Working copies - configure release process
Working copies of assets provide an easy way for users to manage and update content that has already been released. As administrator, you provide configurations for creating and releasing working copies according to asset type and MIME type. You also define release scheduling.
Purpose
Create multiple configurations for working copies based on asset type and MIME type.
Retain features and relations specific to an asset type or MIME type.
Context
The workflow is carried out in censhare Web and in the censhare Client.
Release scheduling is enabled in the censhare Admin-Client.
The workflow involves creating XSL transformations.
This feature is available since 2017.3. In 2017.3 it worked out-of-the-box. In 2018.3, asset-type specific configurations were added.
Prerequisites
You should be familiar with XSLT and censhare extensions for XSLT.
Introduction
Users can create working copies from any asset to update released content. Asset types often affected by updates are media assets such as images, articles, audio, or video. After editing, users release the working copy. The working copy is merged with the original asset and becomes the new released version. The version number is increased.
A working copy has a parent relation to the original asset. It is a self-contained asset with its own workflow and workflow state.
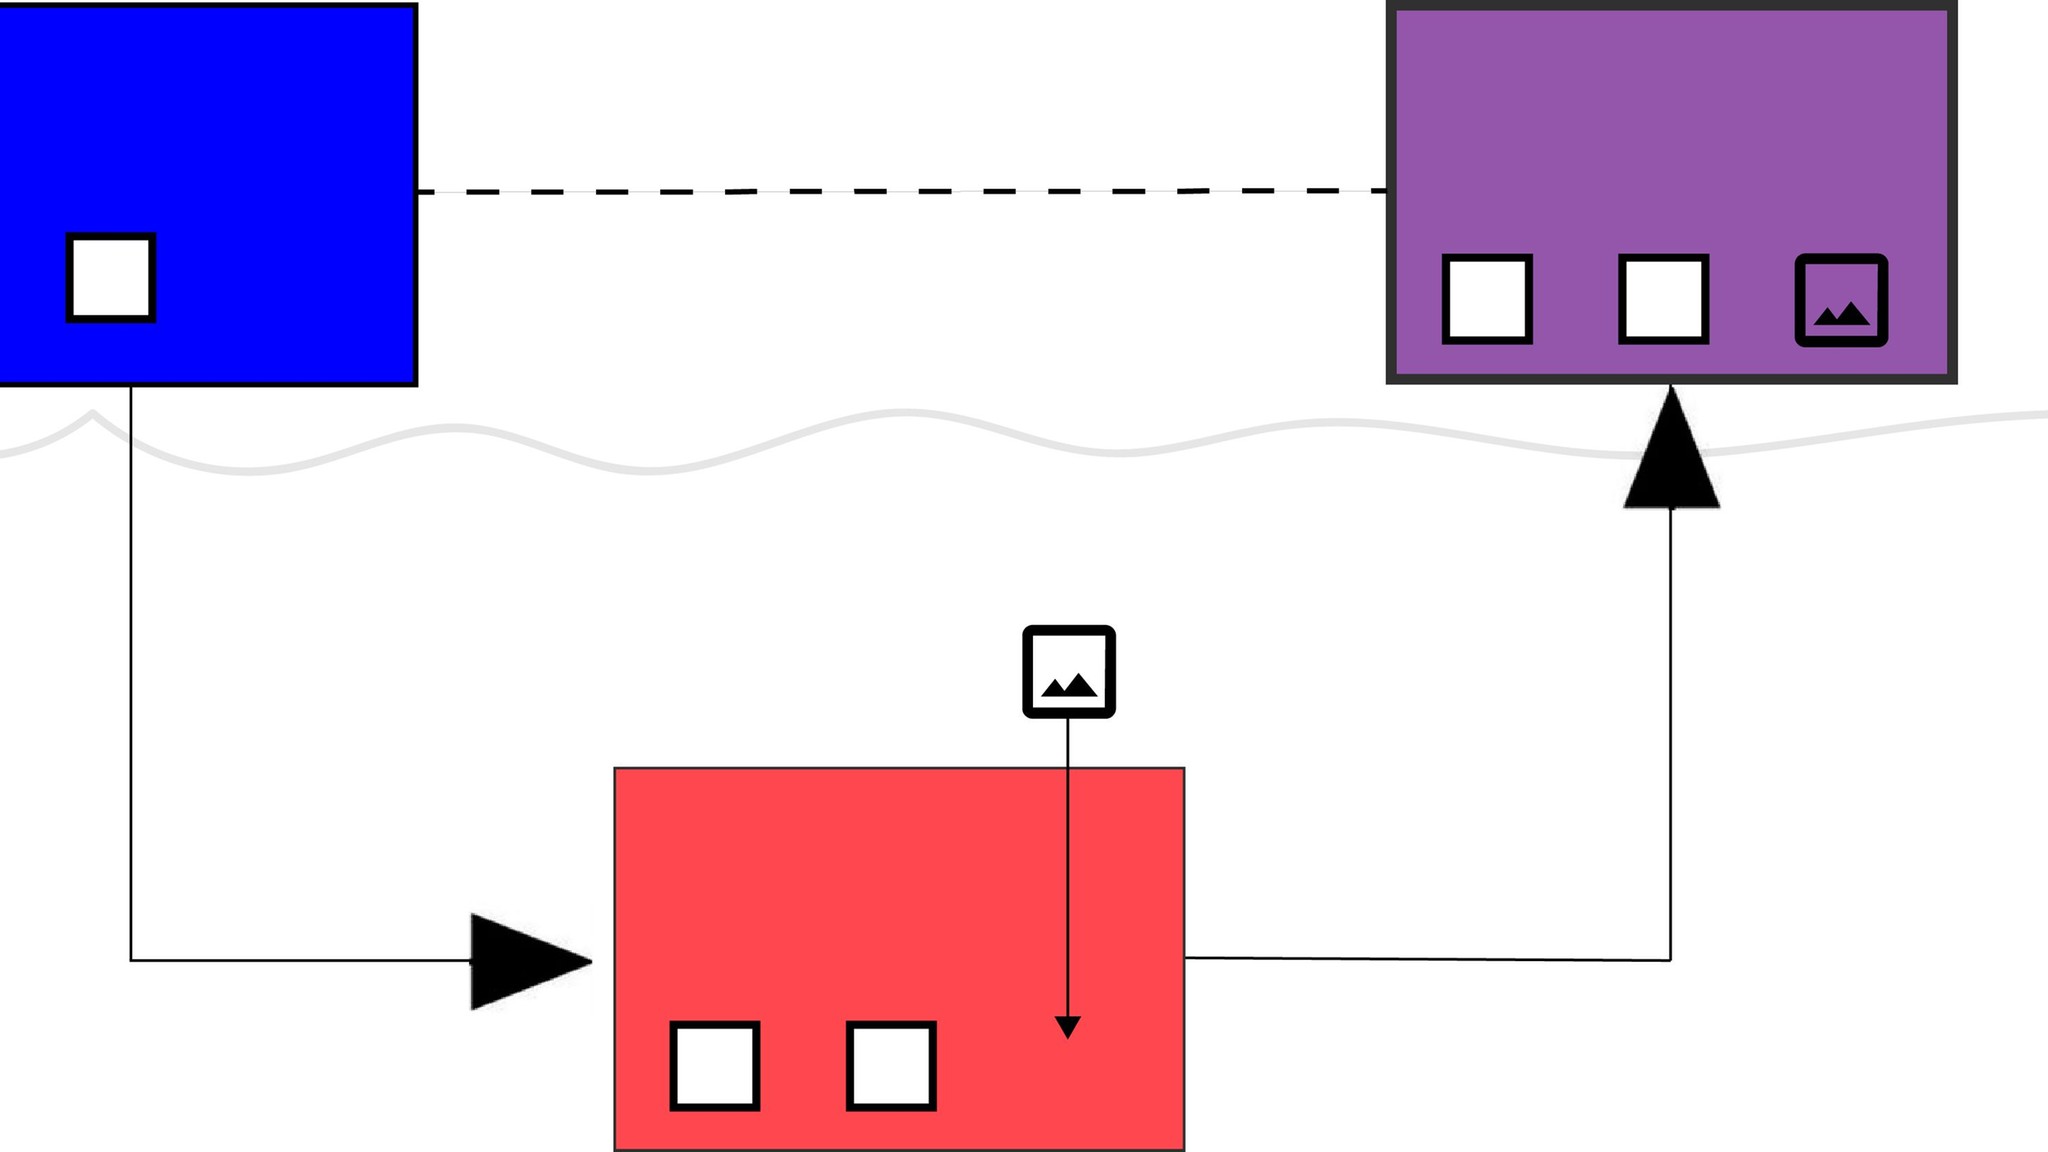 Release process: Published parent asset (blue) and working copy with updated content (red) are merged to a new version of the published asset (purple).
Asset type-specific configurations
You can create configuration assets that are specific to an asset type and MIME types. You can almost freely define which features and relations should be copied to a working copy and which should be overwritten in the original asset for release. Usually you will choose features that are specific to an asset type. For example, aspect ratio, dpi value and dimensions of a photo.
When users create a working copy, censhare selects the configuration that matches the asset type and MIME type. If no specific configuration is found, the default configuration is selected. Therefore, always define a configuration that is valid for all types and use cases.
Example
For example, you have created three configurations: one for assets of type picture.*, another for assets of type video.* and a third one without any defined asset type. That is the default configuration.
When a user carries out the "Create Working Copy/Release Working Copy" actions on an image asset, the configuration defined for "picture.*" is used.
When a user carries out the "Create Working Copy/Release Working Copy" action on an Audio asset, the default configuration defined is used.
Key steps
As an administrator, these are your tasks:
Create the configuration assets. They handle which features and relations are copied to the working copy and released with the new version of the asset.
Customize the configuration assets according to asset and MIME type and your requirements.
Enable scheduling releases at a future date and time.
Create release process configuration assets
Configuration includes two assets per asset type:
Configuration asset for features and relations that are to be copied to the working copy (resource usage key "censhare:working-copy-create")
Configuration asset for features and relations that are to be overwritten and released in the original asset (resource usage key "censhare:working-copy-release").
Log in to censhare Web.
Search for the pair of default release process configuration assets: "Release process: Create working copy..." and "Release process: Release working copy".
Duplicate these assets: Select one of the assets, and from the Actions menu, select "Duplicate asset". Repeat this for the other asset.
Repeat step 3 for as many asset-type specific configurations that you need. Ensure that you always carry out the action for both the "Copy" as well as the "Release" configuration asset.
You have created several pairs of release process configuration assets.
Configuration with and without XSLT
You can configure the release process in different ways:
Create XSL transformations. Store the XSLT as master file on the configuration assets.
Specify features and relations directly on the widgets of the configuration assets.
Features widget: configure asset features (in censhare Web)
Properties widget: configure asset relations (in censhare Web)
Feature hierarchies: configure child features (in the censhare Client)
When the actions to create or release a working copy is triggered, censhare first uses the XSLT. The XSLT then handles the whole process of creating and releasing the working copy according to the features and properties defined. Only if no XSLT is available, the required information is read directly from the respective widgets.
Configure the release process with XSLT
You can use XSLT to handle the whole process of creating and releasing the working copy according to the features and relations that you define. There is an XSLT for creating the working copy, as well as one for releasing the working copy.
To configure the release process with XSLT:
Create and edit the necessary XSLT according to the sample XSLTs described in Release process - sample XSLT.
In censhare Web, open the respective "Create working copy" asset and select the "Overview" tab. On the "Files" widget, click "Plus" and select the "Create Working Copy" XSLT file that you prepared for that purpose. Save your changes.
Open the respective "Release working copy" asset and select the "Overview" tab. On the "Files" widget, click "Plus" and select the "Create Working Copy" XSLT file that you prepared for that purpose. Save your changes.
Repeat these steps for as many type-specific configurations that you need.
If the action to create or release a working copy is carried out by a user, censhare checks for the matching configuration asset. If any XSLT is found, the XSLT is interpreted. In that case, any feature and relations defined directly on the widgets, are ignored.
Configure features and relations without XSLT
In censhare Web:
Open the respective "Create working copy" asset and select the "Overview" tab.
To add the features to be copied to the working copy:
Select the "Features" widget and click the "Add" icon. In the asset chooser dialog, click the "Existing asset" tab, and select the respective feature assets.The selected features are displayed on the Features widget. Asset type, name and domains are copied by default. Storage items, such as graphic or text files, are also copied by default. The default features are not shown on the widget.
To add the relations to be copied to the working copy:
Select the "Properties" widget and click the "Edit properties" icon. In the "Properties" dialog, click the "Add" button under "Working copy". In each "Relation" field, enter the ID for the asset relation type, for example "user." You can look up the ID in the censhare Admin-Client under "Master Data", in the "Asset relation types" list.The selected relations are displayed on the Properties widget.
Click SAVE& CLOSE to save your changes and check-in the asset.
Open the matching "Release working copy…" asset.
Repeat steps 2+3 to specify the features and relations that should be overwritten in the original asset for release.
The features and relations to be copied and to be overwritten have been set. If applicable, configure any child feature hierarchies next.
Configure child feature hierarchies without XSLT
Your release process configuration might require a hierarchical feature structure, with parent and child features. For instance, you want address data to be copied with "address" as parent feature and several child features such as "city", "street", and "phone number".
There is a special way to retain hierarchies between parent and child features when you do not use XSLT. In this case, you first add the parent feature "address” in the working copy configurations in censhare Web. Then, you add the child features "city", "street" and "phone number" to the parent feature "address" in the censhare Client.
Only in the censhare Client, you can assign child feature to the parent feature in the appropriate hierarchical order.
To add parent-child feature hierarchies to be retained in the working copy and overwritten with release:
In the censhare Client, search for the working copy configuration you need. Select the "Create working copy..." asset.
Right-click it and select "Edit metadata". In the "Edit metadata" dialog, on the Features tab, the previously specified features and relations are displayed with their resource keys. Use these resource keys to identify the features to which you want to assign a child feature.
Below the parent feature, click the "Add" icon and select "Feature" from the drop-down menu. In the field, enter the resource key of the child feature.
You find the resource key in the censhare Admin-Client under "Master Data", in the "Features" list.
If a child feature also has child features assigned, click "Add" below the added child feature. Enter the resource key for the child feature. Repeat these steps for any child feature you need to assign to a parent feature:.
Click SAVE& CLOSE to save your changes and check-in the asset.
Select the matching "Release working copy…" configuration asset.
Repeat steps 2-5 to specify the child features that are to be overwritten in the original asset.
The child features to be copied and released have been set.
Enable release scheduling
censhare allows for scheduling the release of working copies at a specific date and time in the future. You have to enable this setting first. Otherwise, users can only release working copies with immediate effect.
To enable release scheduling:
Log in to the censhare Admin-Client.
Select "Configuration", "Modules", "Working copy".
Double-click "Release working copy".
In the dialog, under "General setup" select the "Server Name" that runs the server action.
Note: The server action must run on one server only! Typically, this is the Master server.
In the dialog, under "General setup", activate "Enabled".
Set the default interval in which censhare is to search for working copy assets that are to be released: Under "Trigger events", "Timer event", click "Add". Enter the desired time in seconds.
For the changes to become active, click the "Update Server Configuration" button at the top of the censhare Admin-Client. Execute "Synchronize remote servers", if needed.
Scheduling the release of approved working copies at a future date and time is enabled. A message overwrite action on "asset <asset information>" is written in the log file when a working copy is released.
Result
You know how to configure the release process for released assets with and without XSLT. You know how to enable scheduling the release process.