
Notification about communication updates
Introduction
For communication related to an asset, you can create messages, tasks, or markers. Others can add communication entries to assets which you have created or edited. There can be many assets at which communication takes place that is related to you. The notification page is the place that collects all communication updates related to these assets. Here you can view and manage all communication messages that you have received.
Every time when there is a new entry, the communication bell notifies you. You must not visit the notification page to if there are new entries. The notification bell has a menu that displays all new notification entries. From there, you can switch to the notification page or check an involved asset directly.
Assets for which you receive an update
You receive an communication update for an asset if one the following roles apply to you:
You are creator of asset XYZ.
You are last modifier of asset XYZ.
Asset XYZ is currently checked out by you.
You have been set as the actual workflow target for asset XYZ.
You have create a message, task, or marker or have replied to a message for asset XYZ.
When a notification is sent
A user creates a new task at the Communication tab of an asset page for asset XYZ .
A user creates a new marker at the Communication tab of an asset page for asset XYZ.
A user creates a message or replies to an existing message at the Communication tab of an asset page for asset XYZ.
Notification bell alerts about updates
A bell at the top bar of censhare Web shows a bubble with the number of new notifications. If there are no updates, No notifications is shown when you hover the bell.
See new notification updates
The Notification menu shows a list of new notifications. Once, message entry has been read or marked as read, the entry is removed from the message menu.
Click the bell to open the notification menu.
Click outside of the notification menu to close manually.
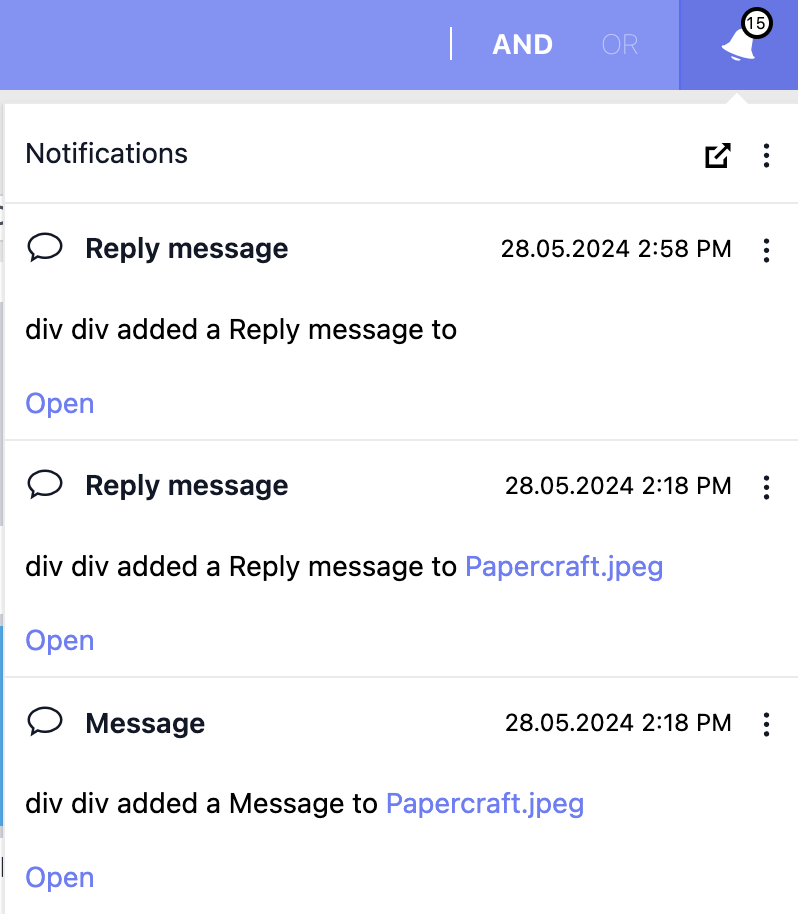
The Notification menu displays for each new notification an entry with a brief summary showing the following information:
notification type: This can be Marker, Task, or Message.
timestamp of the notification message
Short info about the notification: USER added NOTIFICATION to ASSET:
USER is the person of the user who created the notification.
NOTIFICATION is the type of notification.
ASSET is asset name of the context asset to which the notification has been added.
Click ASSET name to open the context asset at the Overview tab.
Click Open to open the context asset at the Communication tab.
Note if the context asset page is already open, it will not switch to another tab of the page.
View all your communication updates
The notification page displays a table with all notifications, read or unread, that you have received. To open the notification page, open the notification menu and click the Open button left to Notification on top of the window.
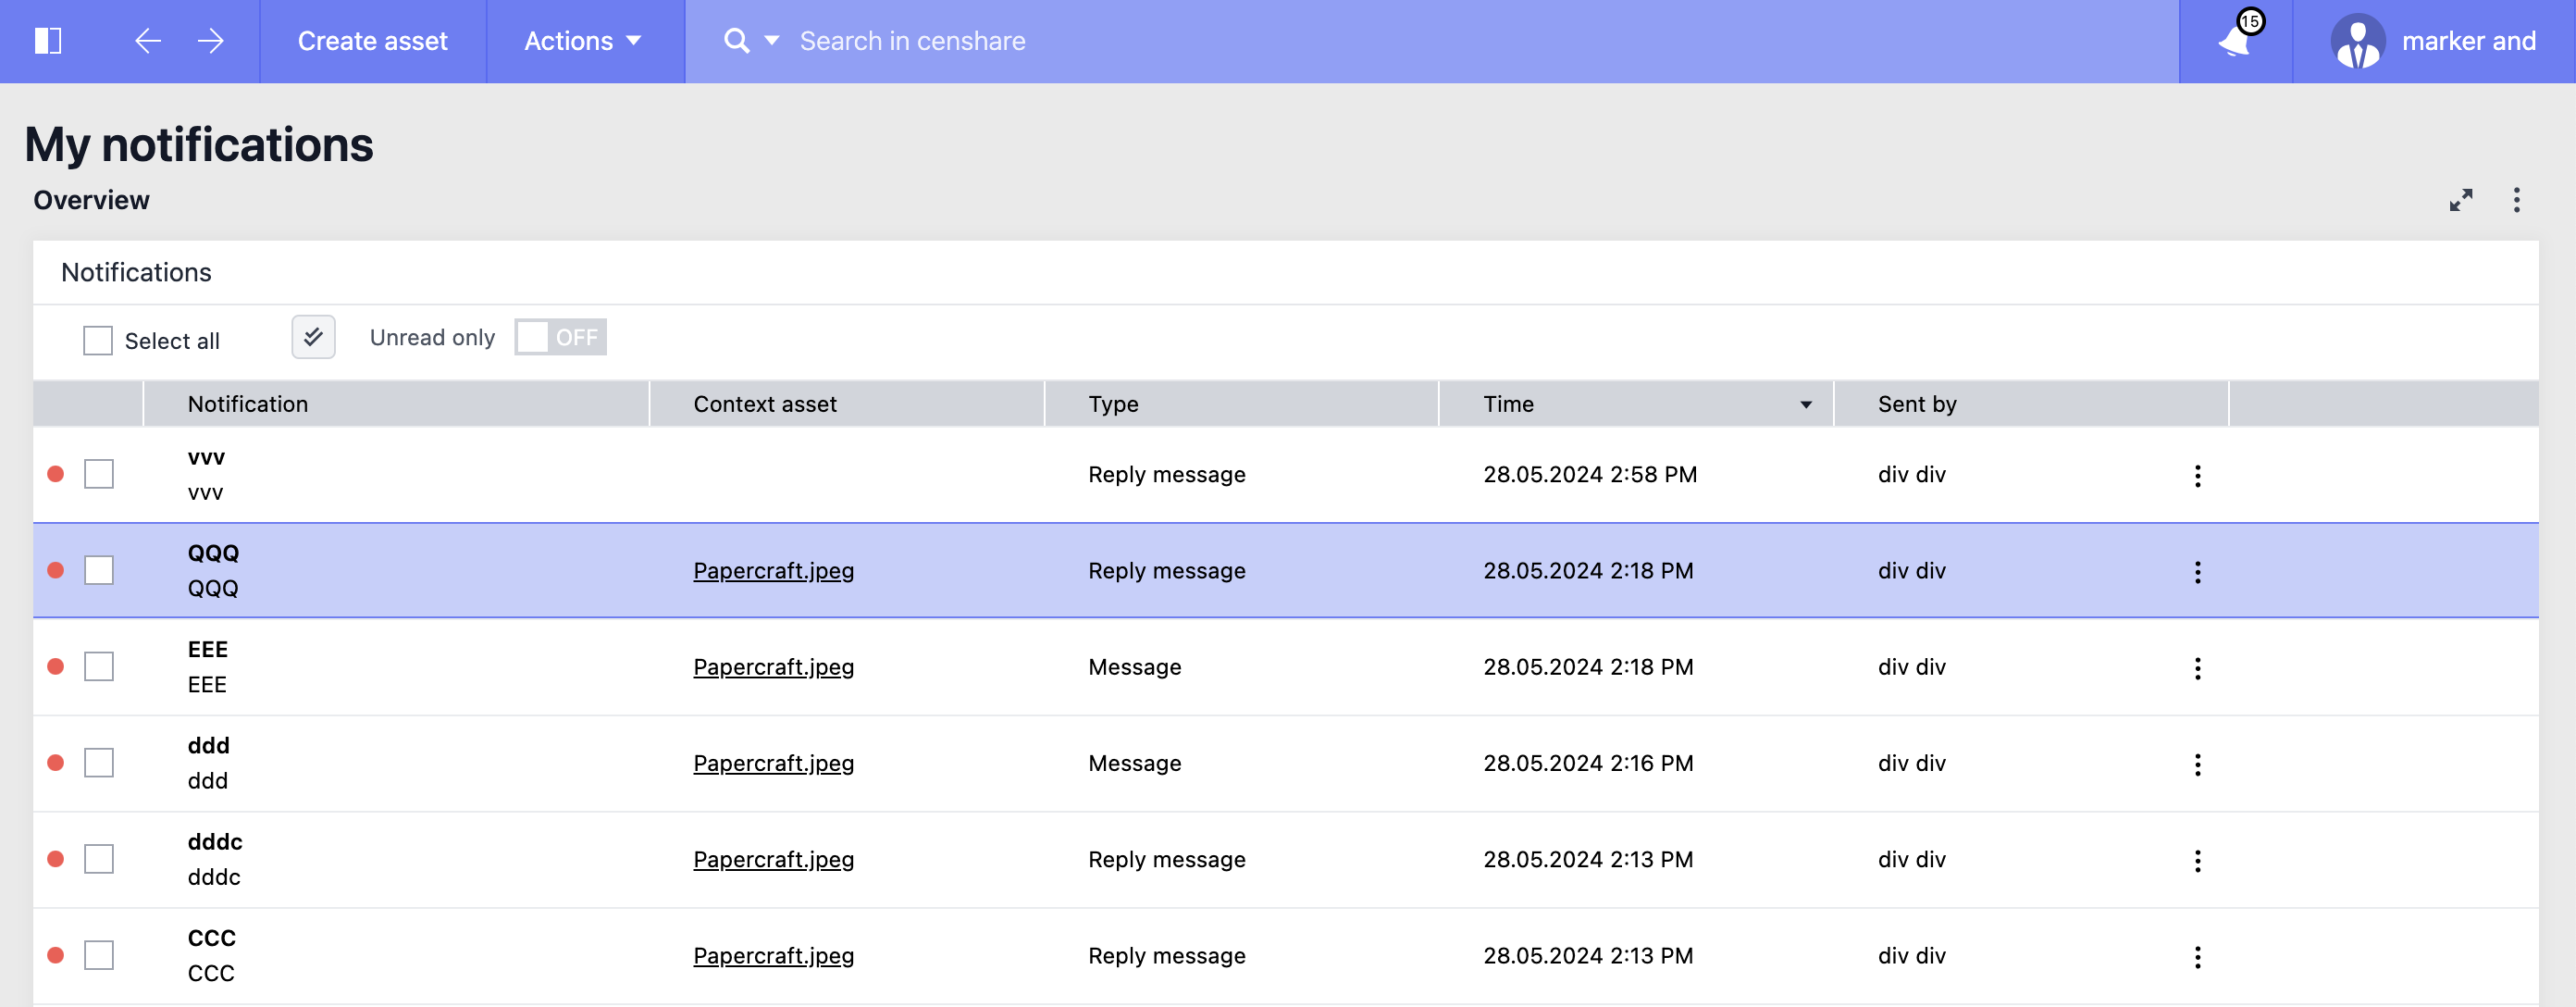
The table shows the following data:
Checkbox to select the notification entry
Notification: subject of the notification and short preview. To see the full text, hover notification cell: A tooltip shows all text.
Context asset: Name of the the asset for which the notification has been created. Click the name to open the related asset. Note that this also marks the notification as read.
Type: The type of the notification. The following types exist:
message
reply message
task
marker
Time: timestamp of the notification
Sent by: The author who has created the communication entry to which the notification refers to
Other actions: Each entry has a menu for further actions.
To only see notification entries that have not been read:
Click Unread only in the toolbar on top of the notification page.
If you receive new notifications while you have opened the Notification page, you must refresh the page to see the updates:
Click Refresh all on the top right of toolbar of the table.
There is no automatic refresh of the Notification page while it is open.
Sort the notification table
For a better orientation, you can sort the entries on the notification page:
Click the header of the column that you want to sort.
You can sort for the following columns:
Context asset
Type
Time
Sent by
Note that you cannot sort for the name of the notification itself.
For entries with the same value, the table uses creation time to also sort these values.
Select notification entries for further actions
Select single notifications:
Click the checkbox at the beginning of a notification entry
If you want to select additional entries, click the respective checkboxes
To select all notification entries, check the Select all box:
Selects all entries when no or only some entries are marked
If all notification entries are already marked, the action deselects the notification entries.
Do the desired action, for eample mark as read or remove from the table.
Mark notification entries as read
Select your desired notification entries.
Click Mark as read
![]() You only see the button if you have marked at least one notification entry.
You only see the button if you have marked at least one notification entry.
Note that you cannot mark a message as unread.
To Mark all as read:
Click Mark all as read
Delete notification entries
Delete a single notification entry:
Click the menu at the end of the desired notification entry: A menu opens.
Click Delete.
Delete several notification entries:
Select your desired notification entries.
Click Delete selected in top toolbar of the table.
Click OK to execute.
Otherwise, Cancel the action.
![]() If you want to remove all entries, click Select all in the top toolbar and then Delete selected.
If you want to remove all entries, click Select all in the top toolbar and then Delete selected.