Use this powerful tool to make communication more precise and substantial. Help your colleagues to understand your requests for change better by setting markers in the visual content. You can mark areas in the preview widget and refer to them in a message or task.
Asset types that support markers
Markers can currently be used on the following asset types:
Only those asset types have the Markers widget and other related UI elements.
Basic features
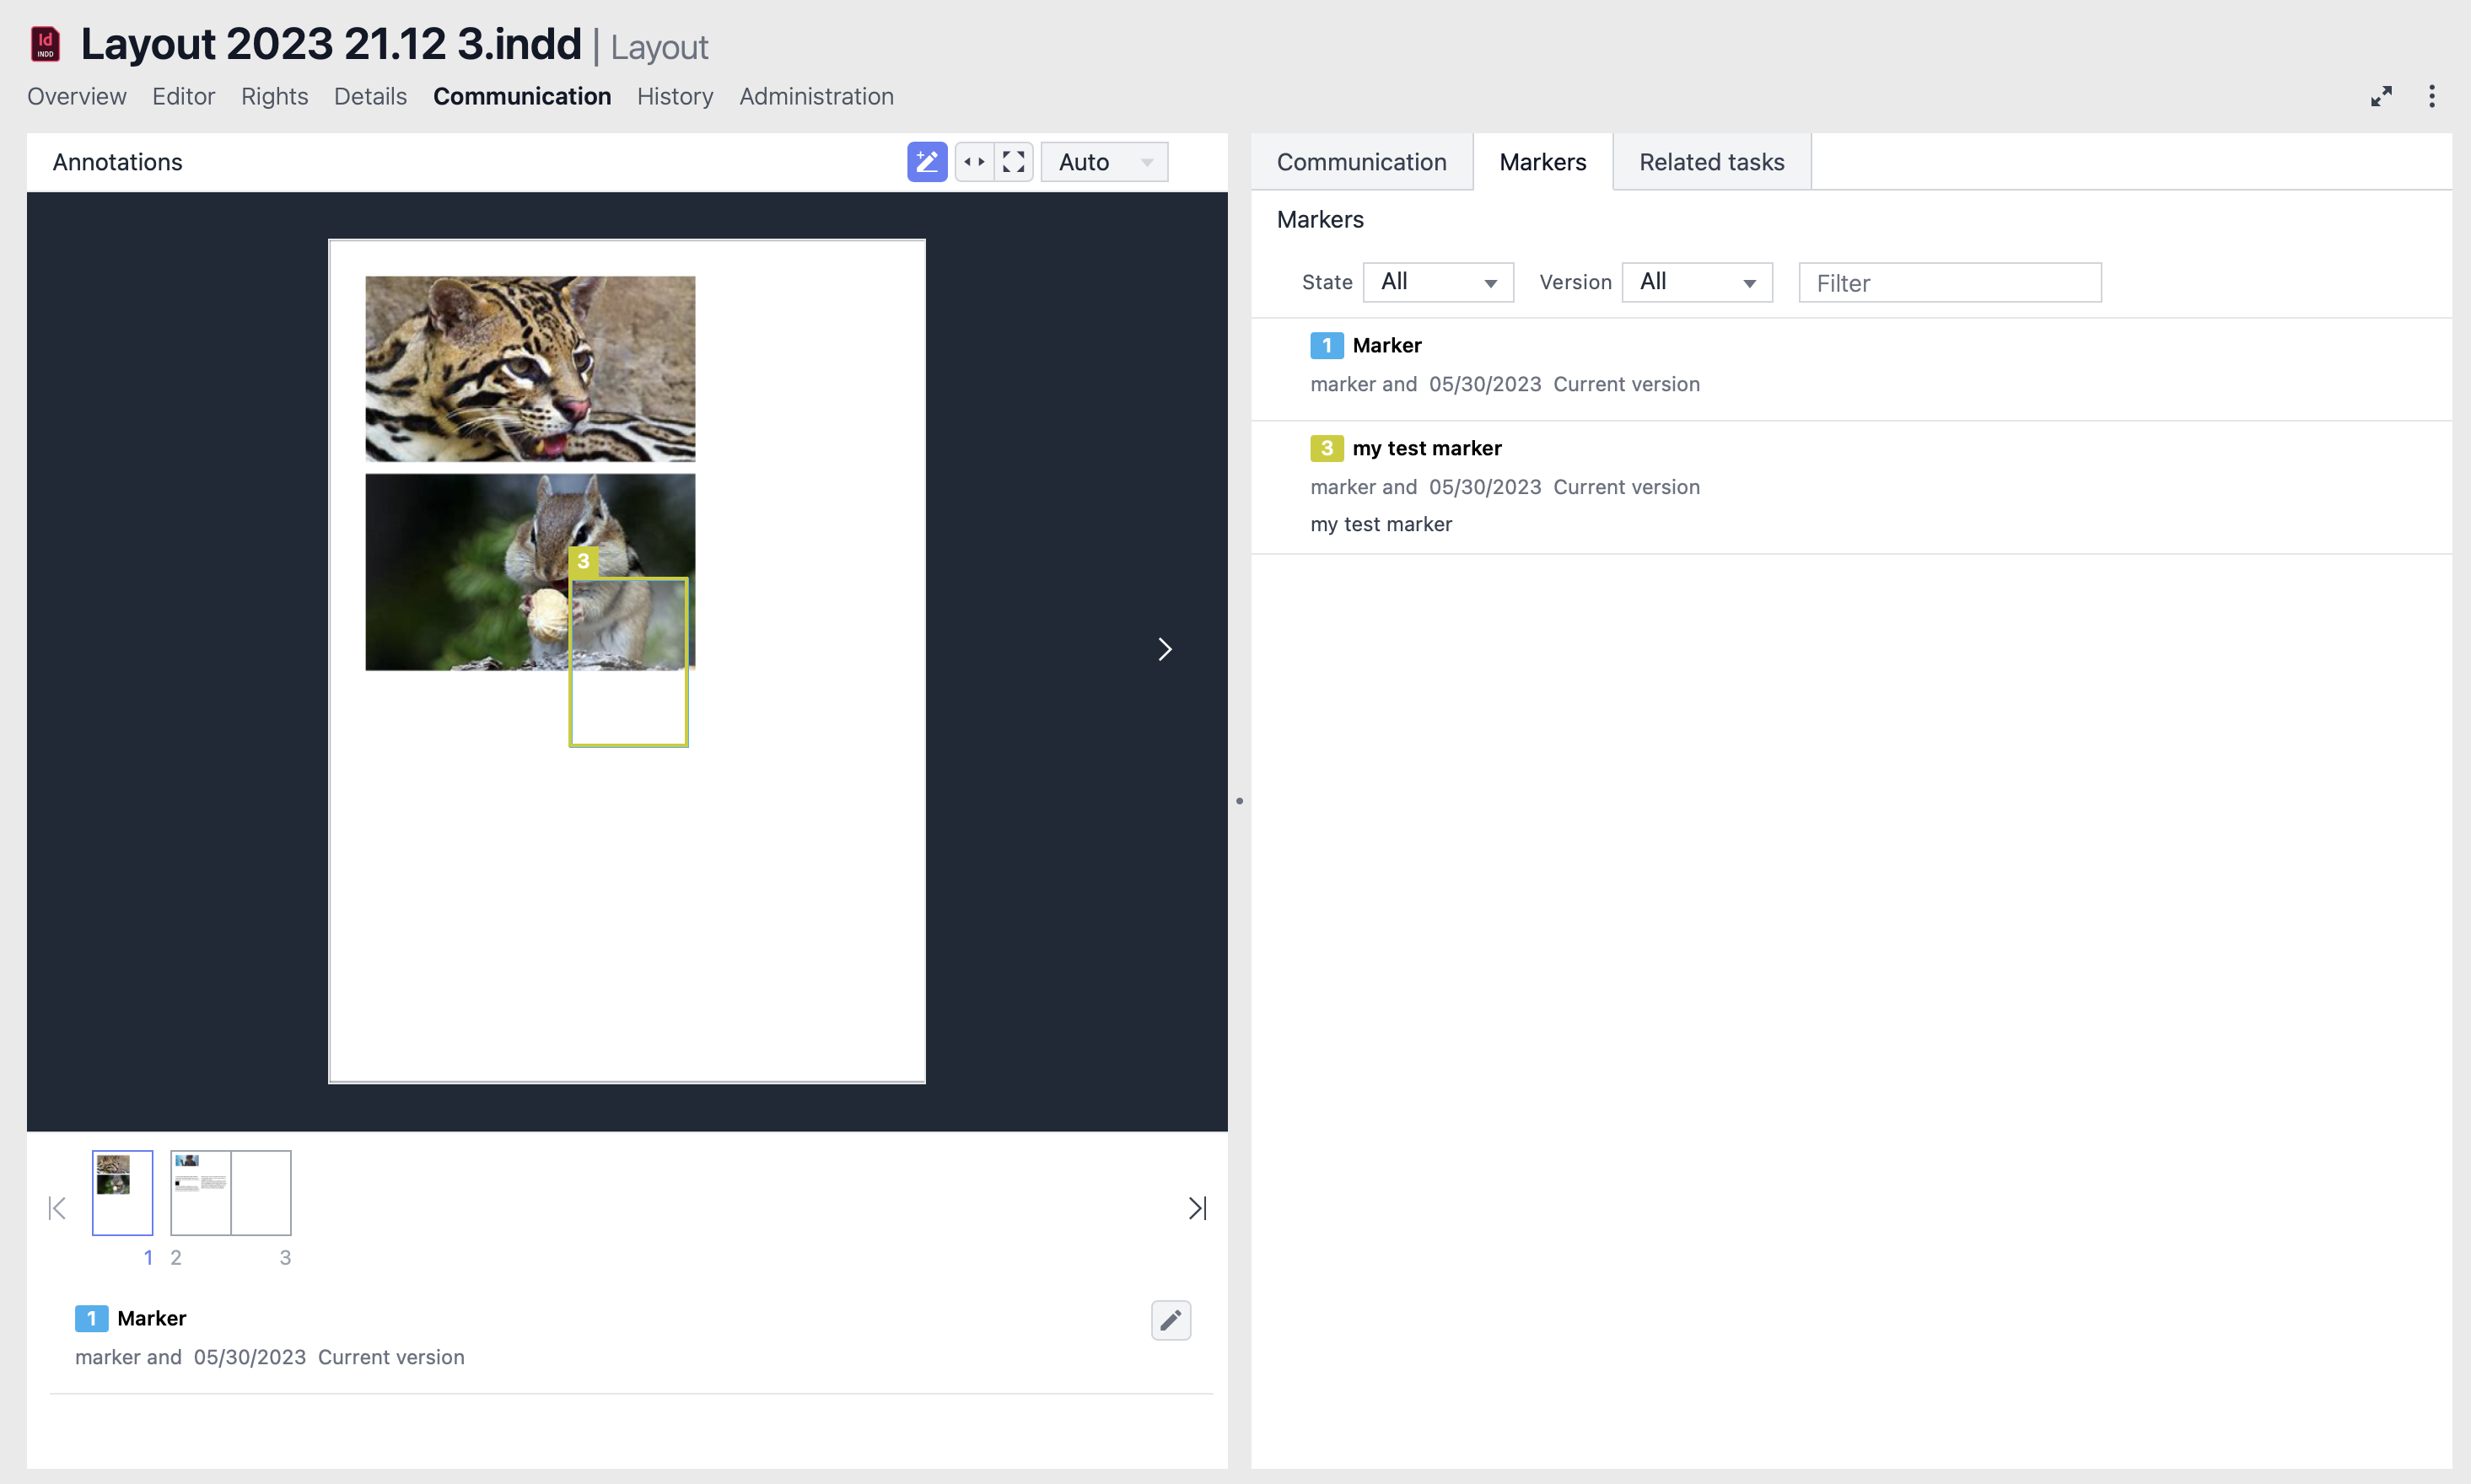
Markers are available in the Communication tab of the asset. They can be accessed in the Markers and Annotations widgets.
Annotations widget in marker editing mode (on the left).
The Markers tab on the right displays all markers for the current version.
Markers from different content versions
Markers set in the current content version are shown with solid lines. Markers set in any past content version are shown with dotted lines.
Displaced markers from the previous content version
Please be aware that the dotted-line markers may be displaced. The reason is that the preview may have changed due to the changes in the content.
For more information on comparing content versions and working with markers in the comparison mode, please read Compare content with markers.
Create markers
To create a marker, you can do one of the following:
In the Annotations widget, click in the top left corner.
In the Markers widget, click +Add marker in the middle.
For images, PDFs, and other static media:
In the preview, click the marker frame. The frame displays with a sequential number to identify the marker.
Drag the frame to the location you wish.
Grab one of the anchors and pull it to adjust the marker size.
For video and audio files:
Move the slider under the preview to select the timeframe.
Alternatively, enter values in the Start and End fields.
In the toolbar below the preview, enter a marker name
Optionally, select a different color from the color palette.
Optionally, add a marker description.
Click Saveto create the marker.
If you changed your mind and do not want to save the marker, simply reset your changes by clicking on .
The new marker displays in the Markers tab on the right and in the Annotations widget.
Configure default marker color
In your user preferences, under General → Markers, you can define how you want the colors of your markers to be set as well as your personal default color. The options are:
use another color for every new marker
use the same color (can be selected) for all markers
This will specify in which color a new marker will appear by default.
Edit markers
On the Markers tab in the right widget, hover over a marker to display its actions.
Click on . The marker is displayed and highlighted in the preview, in the Annotations widget.
Perform your changes in the Annotations widget.
Click Saveto update the marker.
In the Annotations widget, click on any marker:
Perform your changes and click Saveto update the marker.
Different content versions
It is possible to edit markers from the previous content versions: those with the dotted lines. Editing such a marker will assign this marker to the current content version. Read more in the Compare content with markers tutorial.
Known issue with markers in PDF documents
When a multi-page PDF document with markers is replaced by a version with fewer pages, markers associated with deleted pages remain in the asset but can no longer be edited. Attempting to edit a marker on a deleted page will result in an error message.
Delete markers
The instructions provided below describe how to soft-delete markers. It means that you remove markers from the markers tab and the annotations widget.
However, the marker asset remains in the system and keeps its relation to its parent asset. Only admins can remove markers completely, but this should not be necessary in a usual case.
There are three options for soft-deleting markers:
In the Annotations widget, in the editing mode:
Click on the marker you want to delete.
Under the preview, click the icon next to the marker.
Confirm your action in the popup dialog with OK. The marker will be deleted, and you‘ll exit editing mode.
In the Annotations widget, when creating a marker for the first time, click the icon to exit the editing mode without creating the marker.
In the Markers widget:
Hover over the marker.
Click on the three-dot menu.
Click the icon.
Confirm your action in the popup dialog with OK. The marker is deleted.
Different content versions
In the Markers widget, you can also delete markers from the previous content versions. Markers, created in one content version and deleted in another, will remain visible on the Compare content tab when the respective version is selected.
When you delete a marker in the same content version, in which you created it, they won‘t be shown even on the Compare content tab.
If a message refers to the deleted marker, the text of the marker reference remains in the message.
where end users can find soft-deleted markers
Soft-deleted markers can be found on the History tab of their context asset.
Other actions with markers
In the Markers widget, when you hover over a marker, the following actions become available:
: set a marker to Done; this will be explained in more detail in one of the sections below.
/: hide/unhide markers help to hide a marker from the Annotations widget and then display it again.
: play marker set on video or audio content.
If your marker has a very long description, it also can be shown on hover as part of the tooltip.
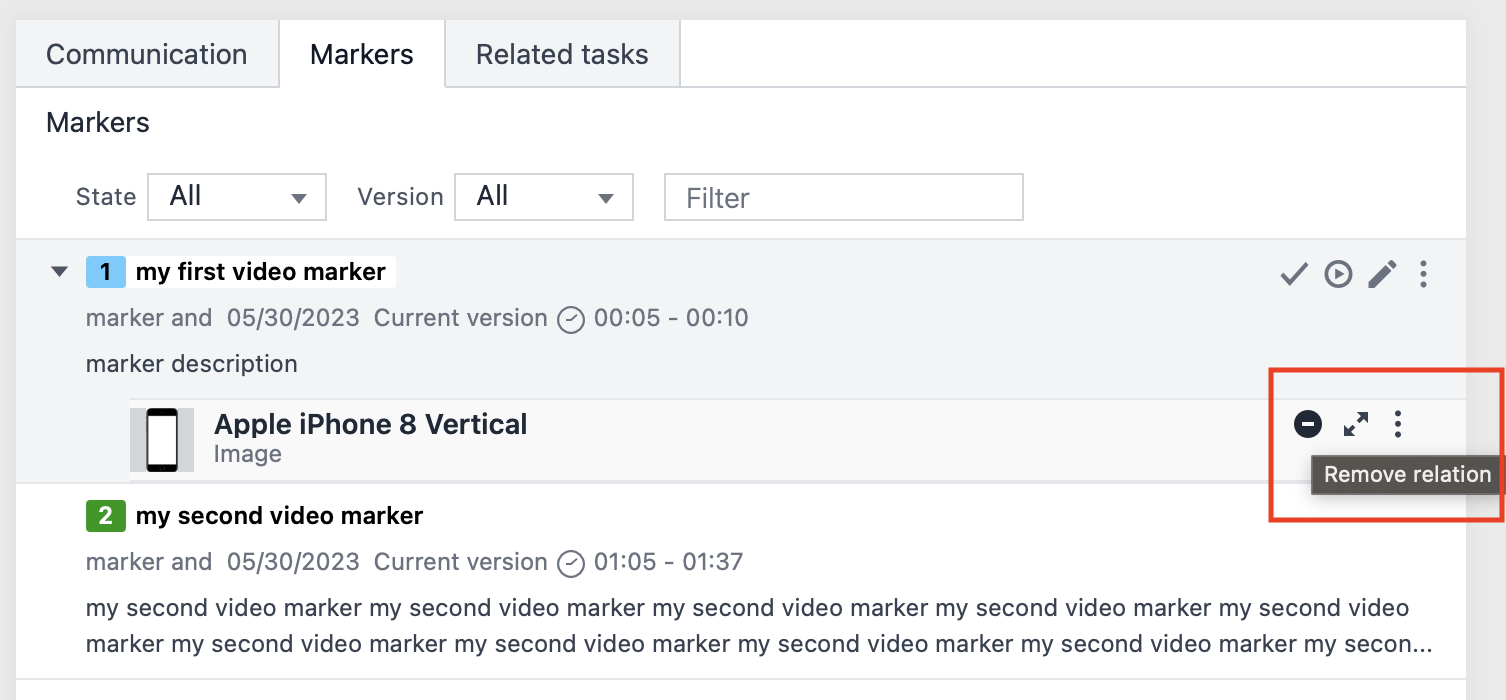
Relate a marker to other assets
Under the three-dot menu, you will also find the Add relation action. Using this, you can create a relation of the Assignment type to any other asset in the system.
The relation can be easily removed from the marker. For this, hover over the related asset to make the action icons appear and click on the icon.
Search for markers
You have two basic options for searching for markers.
While on the asset
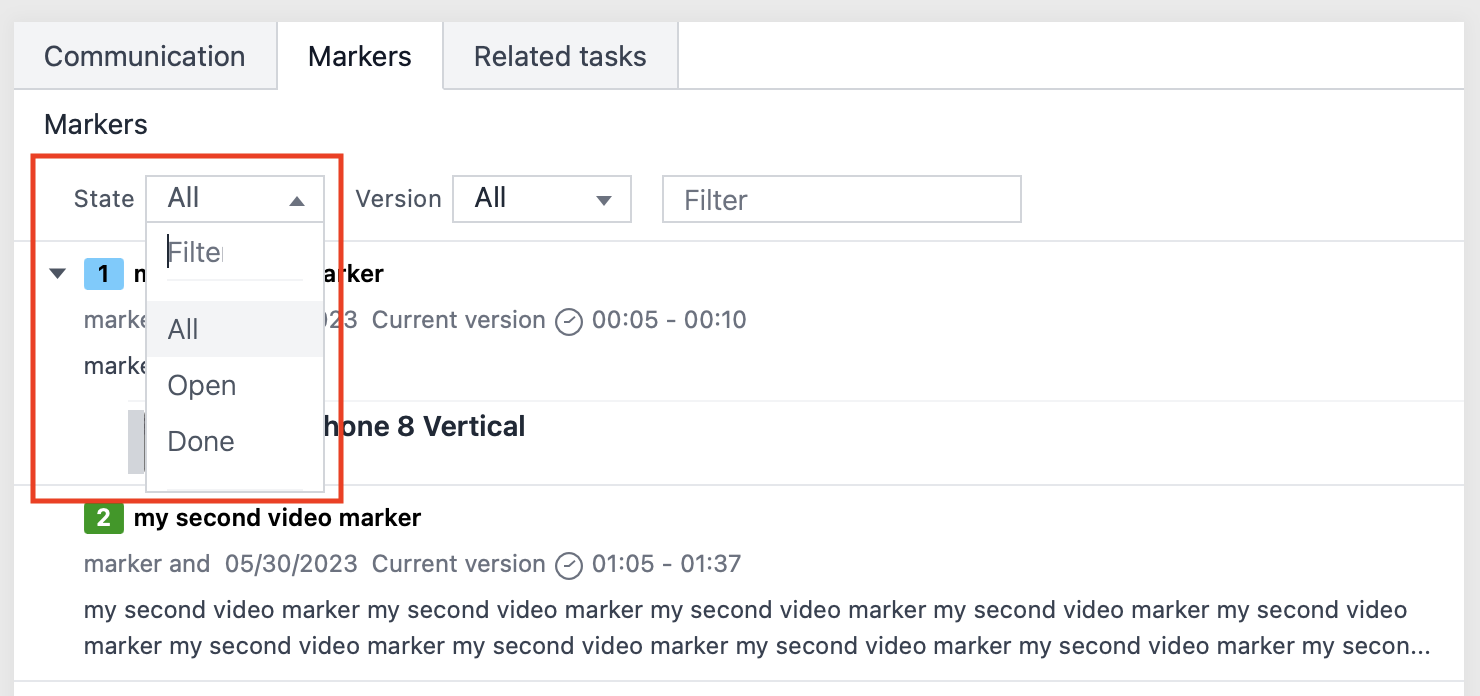
If you want to search for markers on the asset you have currently open, you need to go to the Communication tab, then Markers widget, and use one of the three filters:
The State filter helps to show either opened or completed (set as Done) markers.
The Version filter helps to show only markers from a certain content version. See Compare content with markers for more information.
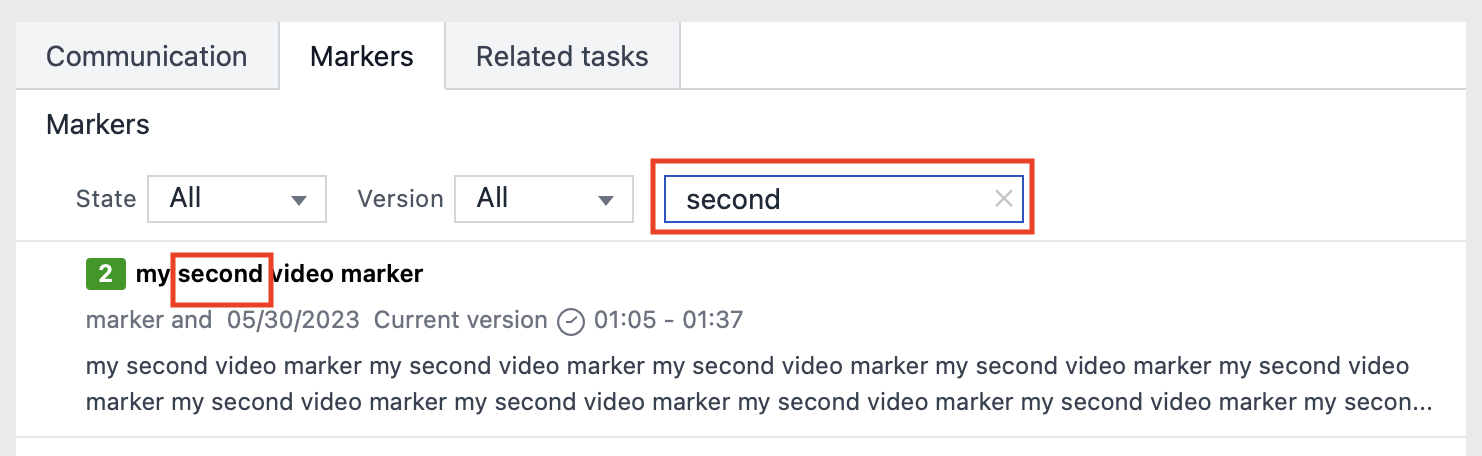
In the free text filter, you can search for any metadata shown on a marker, including its name, description, and user.
From anywhere in the system
As censhare saves every entry as an asset, you can search for markers just like searching for any other asset. In censhare Web, enter the "Marker" asset type as the search criteria in the quick search to list all markers. Narrow down your search using either Detailed search or Advanced search.
Add markers to messages or tasks
Open the Communication tab.
Go to the Communication widget on the right.
You cannot add markers if you create tasks from the Related tasks widget.
Select if you want to create a new message or task.
Start typing your message.
If markers are available, the Add marker icon – – is displayed below the message text.
Click on it. You‘ll see a list with the markers on the current asset.
Markers set on the current content version appear in the list with a solid rectangle.
Click on the desired entry. A link to the marker with its color and number will be added at the cursor location.
Post your message or task.
Change marker state
Markers can have two states: Open and Done. Done means that the request for change or other issue has been addressed and solved.
Done markers vs Done tasks
Markers and tasks that are related – e.g., a marker added to a task – do not influence the state of each other. If a marker is set to Done, the task that mentions it is not set to Done automatically and vice versa.
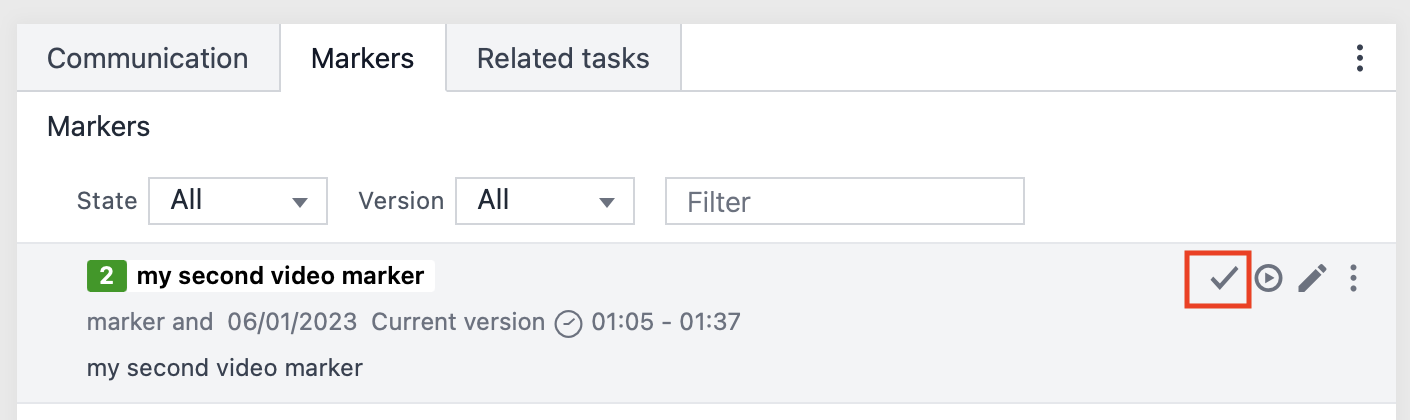
Markers can be set to Done on the Markers widget. Hover over a marker and click on the tick mark.
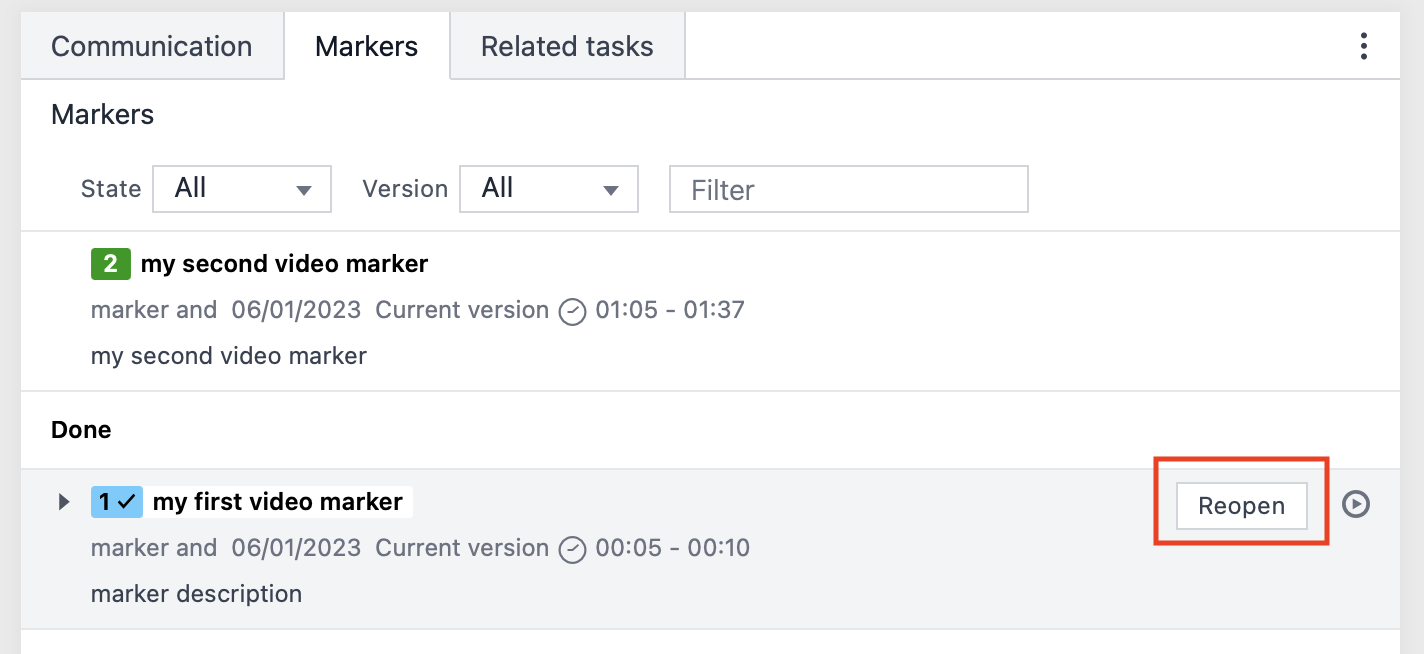
After that, the marker will reappear in the list of done markers. From here, you can reopen it. Hover over it again and click on Reopen. That will move the marker back to the list of open markers.
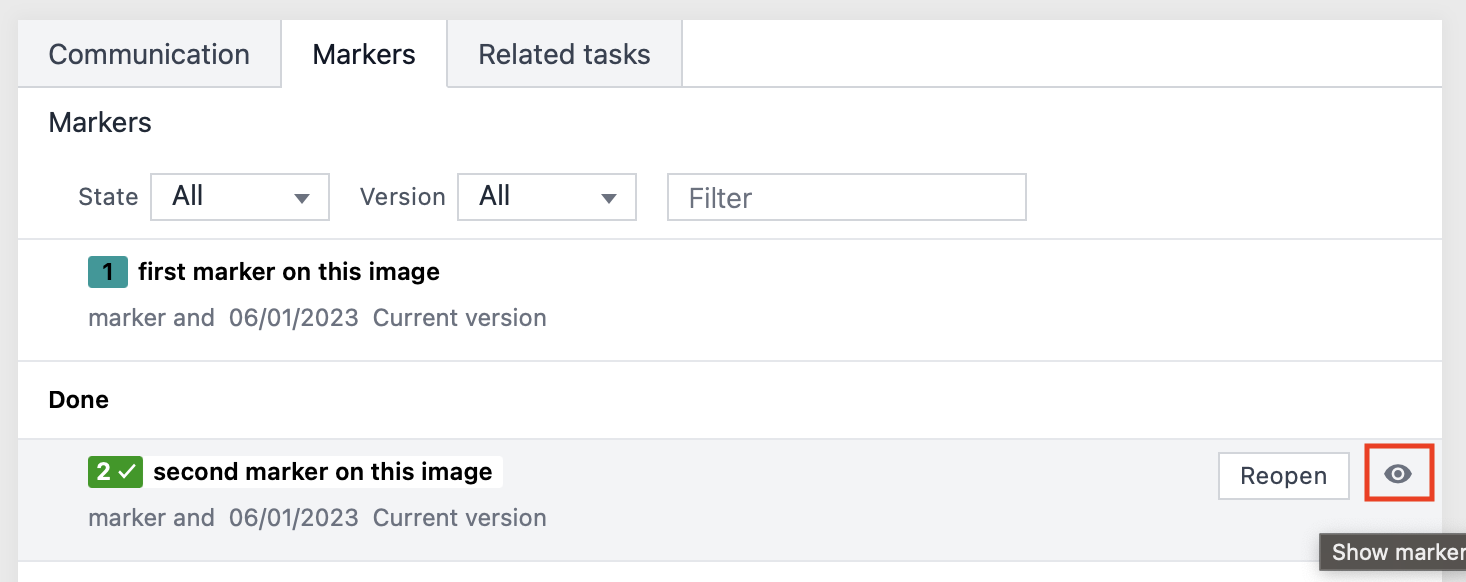
Markers that were set to Done also disappear from the Annotations widget and are not shown on the preview anymore. This is because they are get hidden. You can unhide completed markers by clicking on the eye icon – – on the marker. You need to hover over the marker to make this button appear.
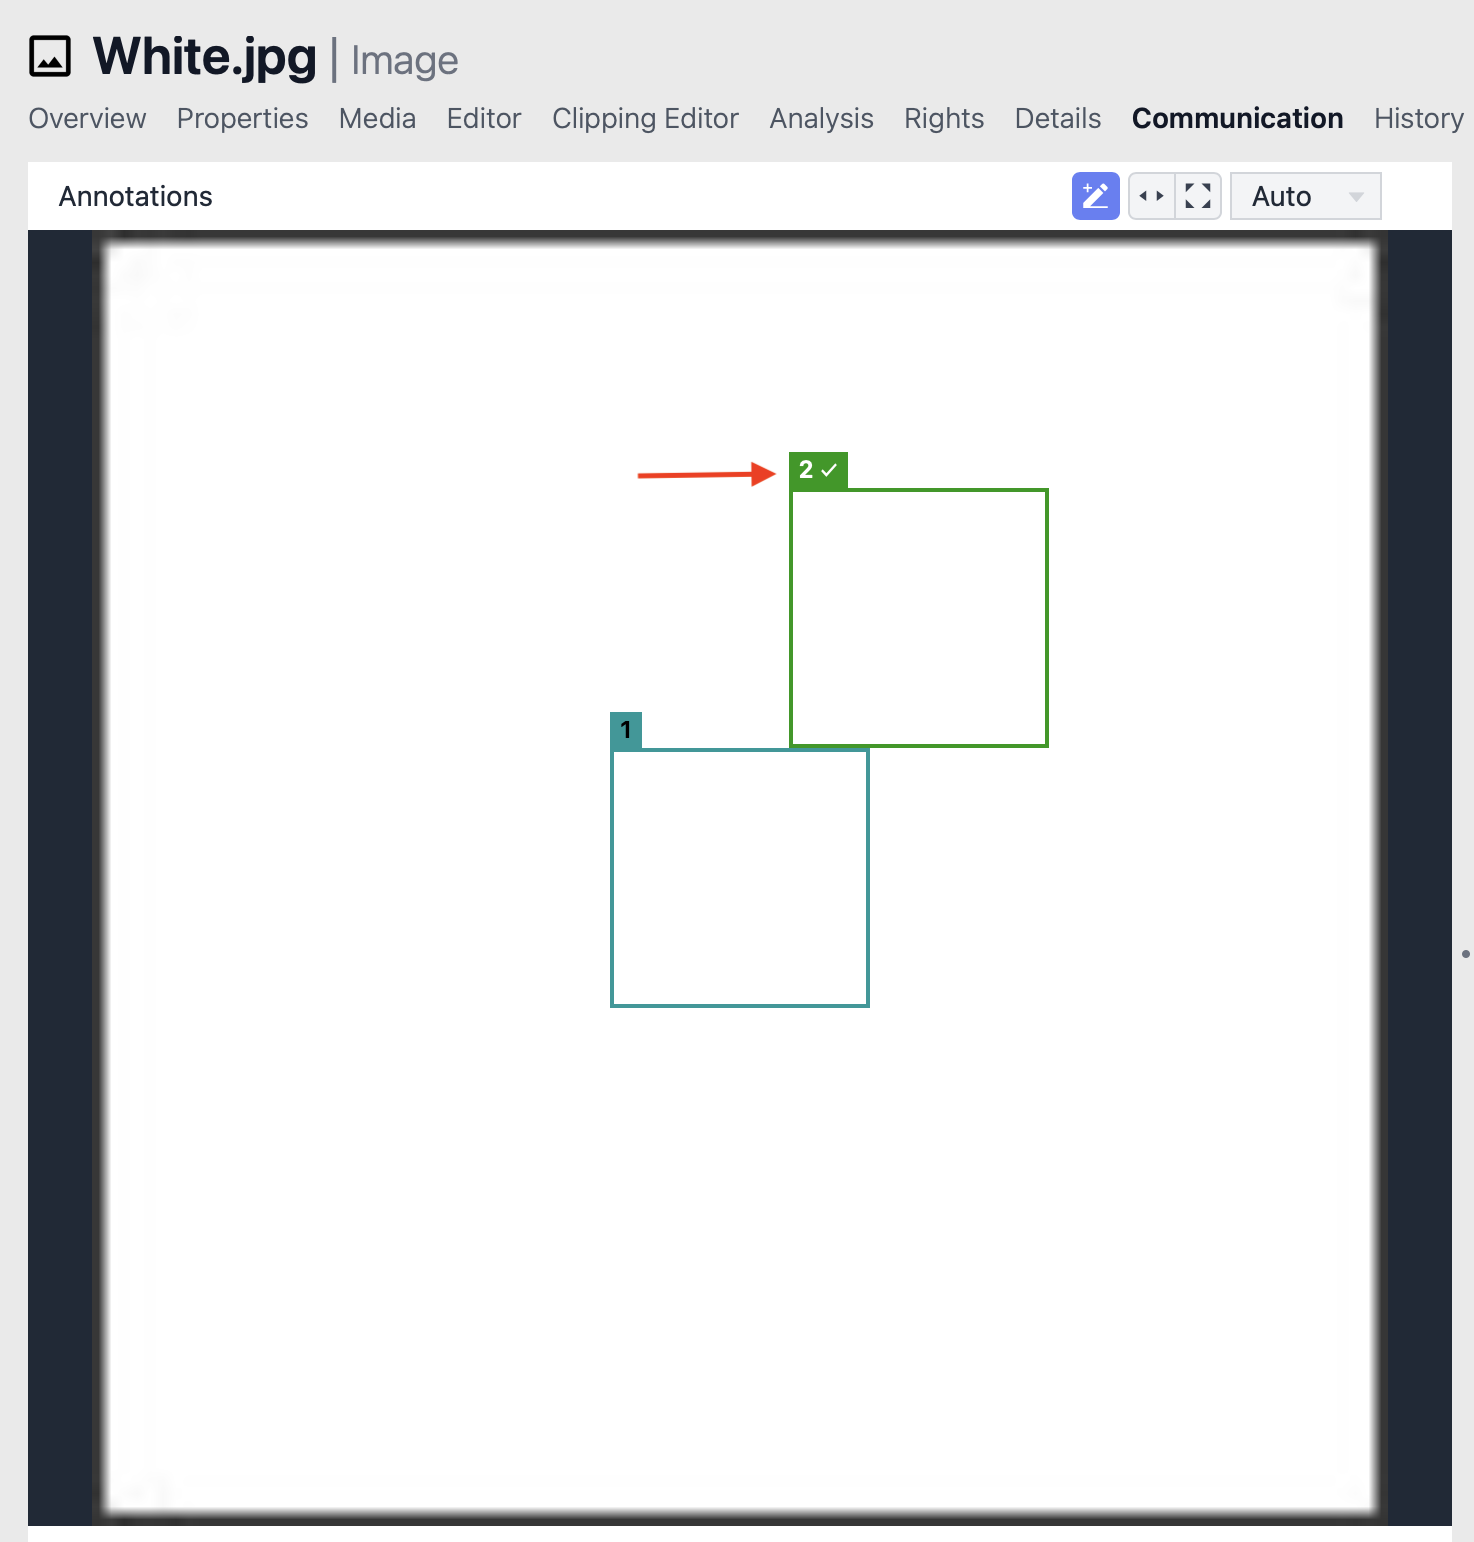
A completed marker will then appear on the preview with a tick mark next to its number.
JavaScript errors detected
Please note, these errors can depend on your browser setup.
If this problem persists, please contact our support.