Asset Query window (censhare Client)
The Asset Query window is the most essential and important element of the censhare Client. Its main purpose is to find and browse assets from the database, get as much information as possible about assets and allow to edit asset files.
Introduction
An Asset Query window is divided into different areas, called Components. Components are divided into Docks. Docks appear as tab panels, a component can hold multiple docks. Docks provide additional information about the assets listed in the Asset Query component.
The following components are available:
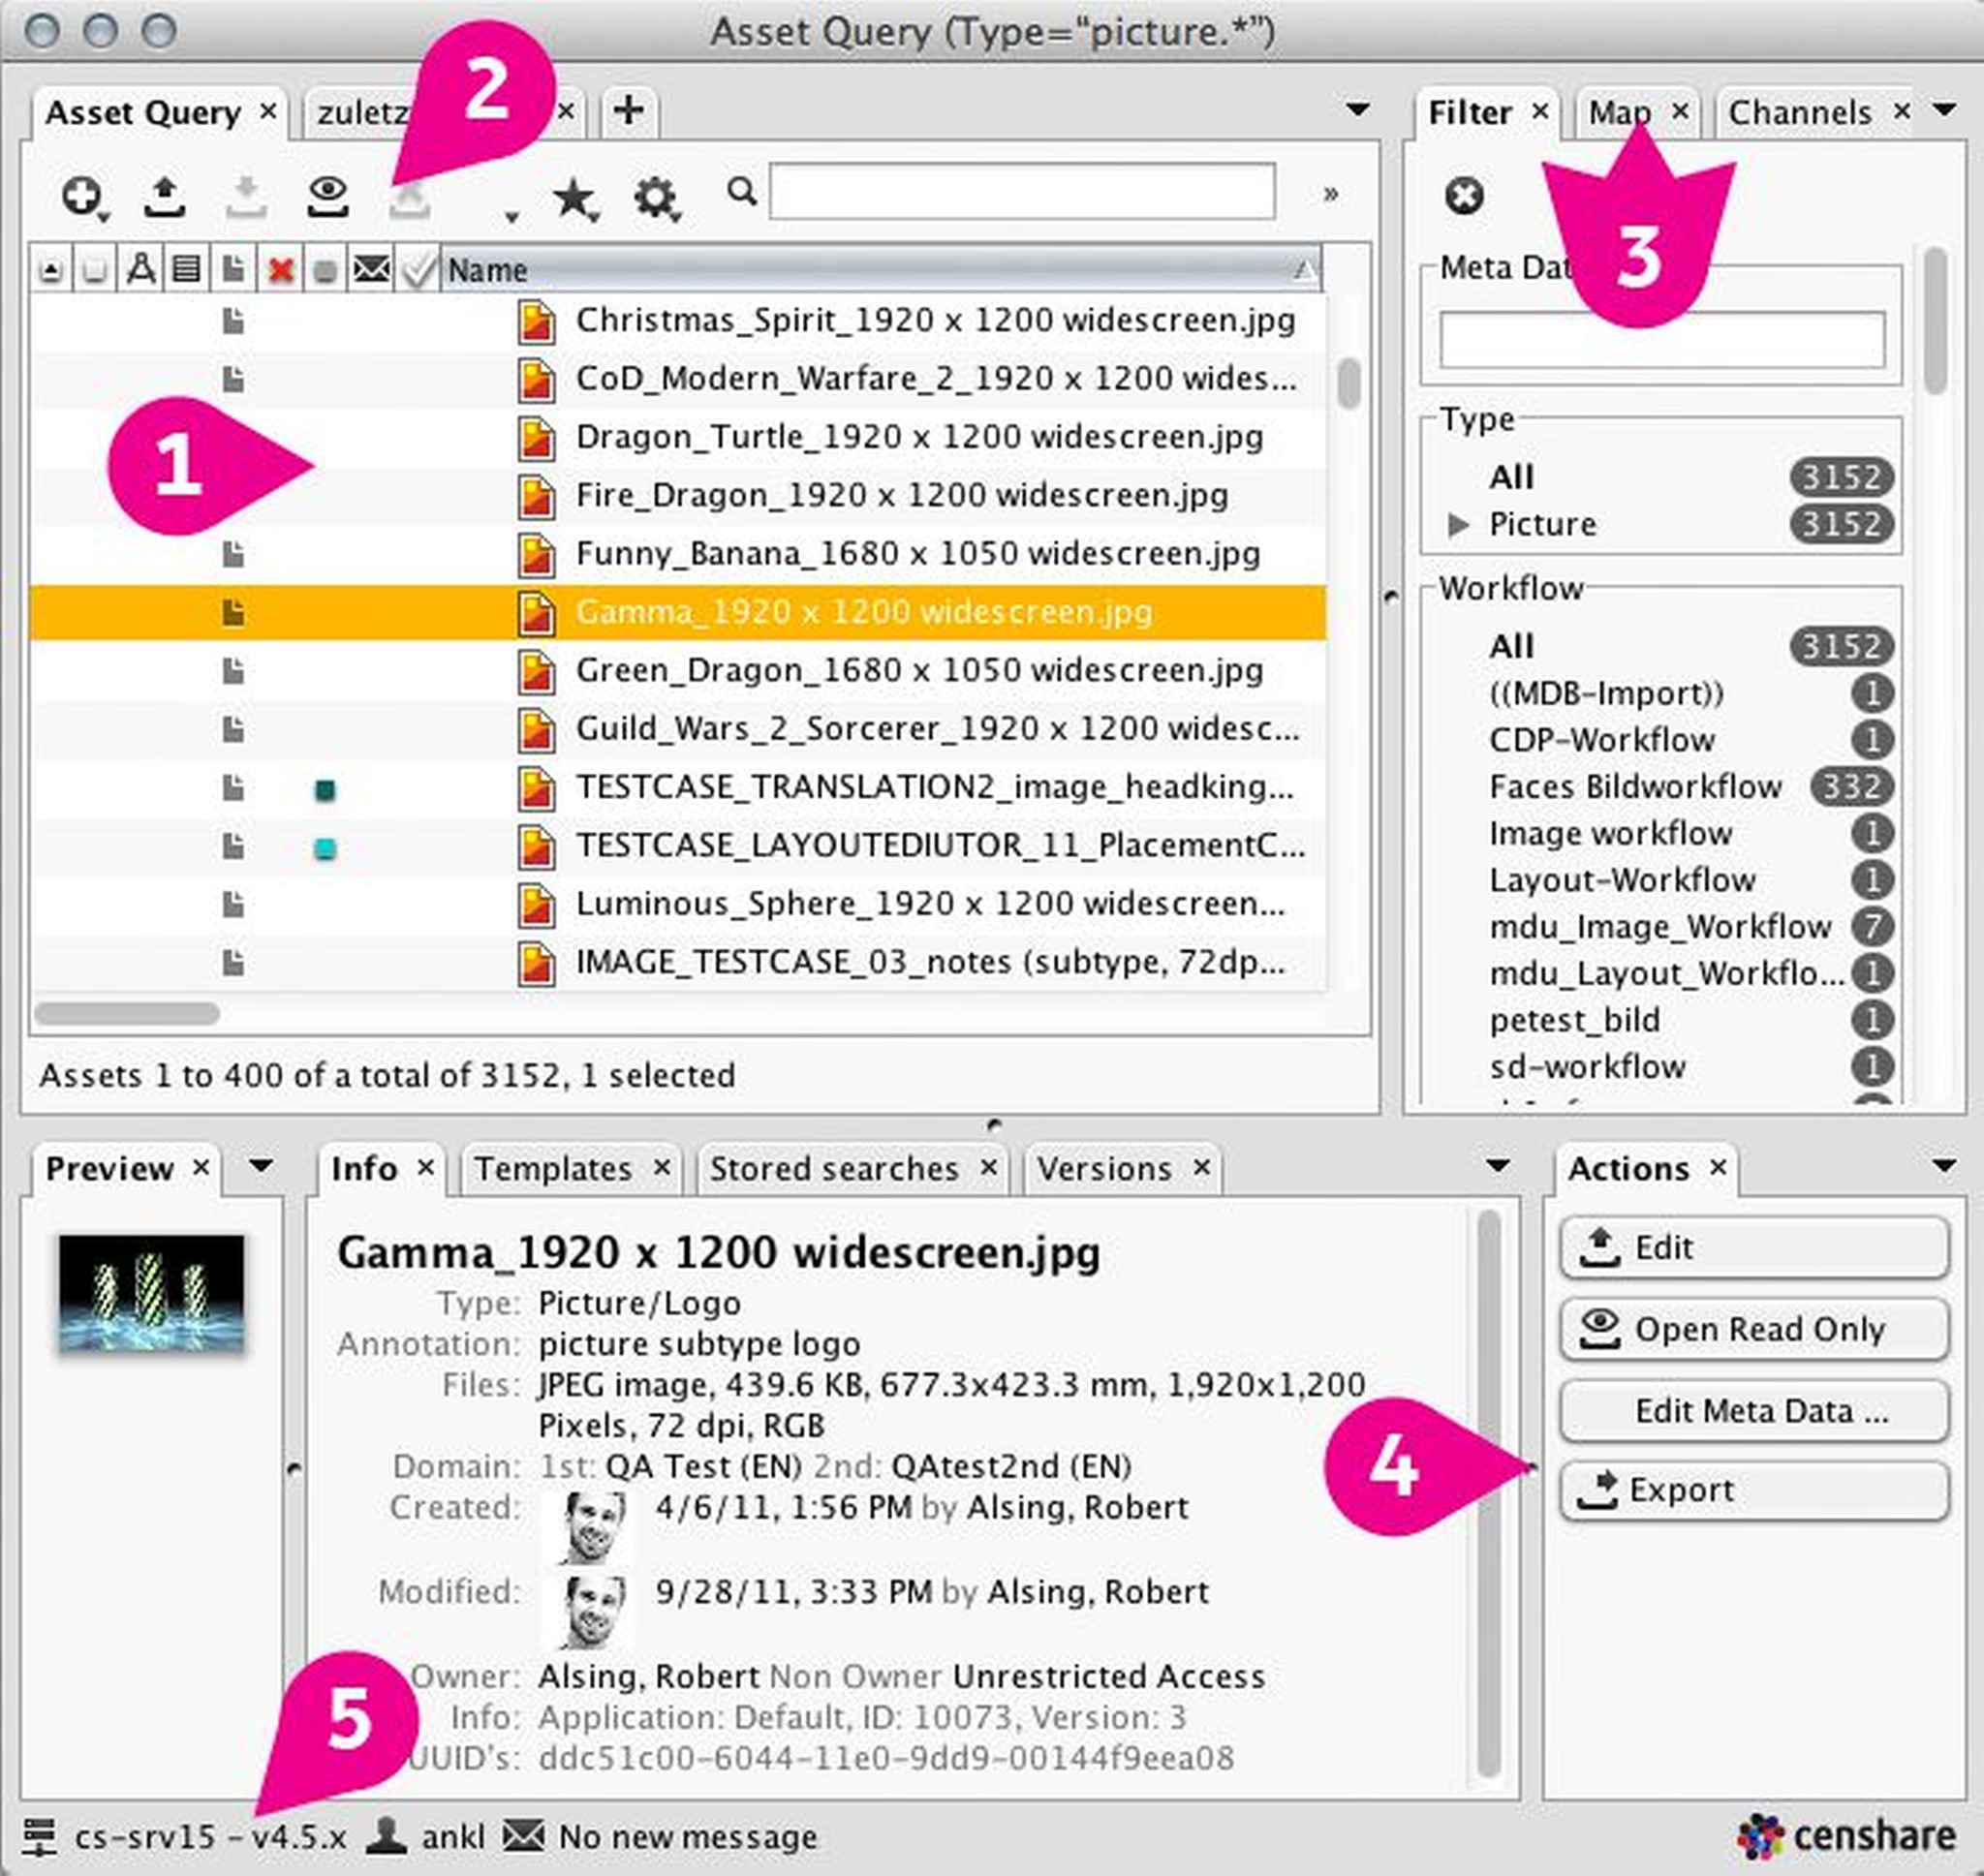
- Asset Query component (1) - lists the results of a search query in one of multiple ways (views).
- Toolbar (2) - access asset actions
- Additional components (3) - for example, filters
- Actions component with slider bar (4) - quick access to actions
- Status bar (5) - information about the connected user, the database, messages and more
Actions
 Create new assets
  Open/Edit the selected assets
 Save and close the selected assets
 Open the selected assets in read-only mode
 Close and dismiss (= Abort Edit) the selected assets
 Edit the metadata of the selected assets
  Rate the selected asset(s)
 Execute a Server Action
  Perform a quick search
  Switch the view
  Browse to the previous page of query results
 Browse to the next page of query results
 Perform a standard search
  Re-execute the last query
Work with components
- Open a new Asset Query: Click the button beneath the rightmost tab. You can open as many Asset Query components as you like.
- Move assets to different query windows to create a relation: Drag an asset from one Asset Query component to another across tabs and drop it at the desired location. Uncollapsed folders collapse when you hover over them with the mouse and you can place the asset at the desired location. You are prompted to select the approrpiate relation type.
- Resize component: Drag the slider bar (4) to the desired size.
Work with docks
- Hide dock: Click the closing box next to the Dock’s name in the tab.
- Show dock: From the menu bar, select Show Dock. This displays a hidden dock.
Standard docks
The basket is a user-specific asset list that serves to collect assets during a selection process for further treatment, especially for exporting the asset files or to mail the list to someone else. The Basket Dock allows to access this list and manipulate it in the following ways:
 Remove the currently selected asset(s) from the basket. The asset will not be deleted, but simply removed from the basket!
 Remove the currently selected asset(s) from the basket and push them to the wishlist instead.
 Export the currently selected asset(s) to a local data medium. Exporting does not remove the assets from the basket.
 Send the currently selected asset(s) as attachment of an email. There is a choice, whether to send the email with the censhare system (requires customization of the mail service) or with an external email client.
Channels are the most common way in censhare to automatically push content into different output targets, like print, web, newsletter and the like. Channels have to be defined and customized first by administrators. They consist of a name, optional icon and a ruleset to which sort of content they apply, how to transpose the content, where to put the results and when to come into action. Once a Channel is customized, it can be applied to the metadata of the assets, thus exposing the asset to the Channel rules.
The Channels dock provides a quick overview about assigned channels of the selected asset(s) and allows to manipulate the assignments in the following ways:
Add additional channels to the currently selected asset(s).
Remove the currently selected channel from the asset.
If extensive changes have to be made to the channel assignment, it is recommended to use the Edit Meta data action, as it provides a more comfortable editor for channel assignment.
The Stored filters dock provides quick access to stored filters and allows to maintain them with the following options:
- Create a new filter. The Create filter dialog displays, which is the standard search dialog. The search criteria are then used to filter all child assets underneath the top level of the asset query result. Note, that creating a new filter will not save it automatically! The filter remains active until it is either reset, another filter is created or a Stored filter called.
 Save the parameters of the last executed filter under the name of the last executed Stored filter, thus overwriting it.
 Edit the Stored filter. This opens an editor window, in which the assignments for roles, users, groups and domains of the selected filter can be modified.
 Delete the selected Stored filter.
 Reset any currently applied filter setting.
Any of the stored filters can be executed by simply clicking it in the list.
The Stored searches dock provides quick access to stored searches and allows to maintain them with the following options:
- Add a new query to the list of stored searches. This will prompt for a name of the new query. The search criteria are picked from the last executed search, no matter how complex the search criteria were, including results from cascading searches. Therefore it is essential to first execute the search and refine it, before it is added to the Stored searches.
- Overwrite the last executed Stored search with the criteria of the last executed search.
- Edit the Stored search. This opens an editor window, in which the assignments for roles, users, groups and domains of the selected query can be modified.
- Delete the selected Stored search.
Any of the stored searches can be executed by clicking it in the list.
The Versions dock provides a quick overview of the recent versions of the currently selected asset. It displays the version counter, asset name of each respective version as well as data about the time and origin of each modification. Clicking any line in the Versions dock delivers a preview of that version in the Preview dock.
Use the Show Versions menu item to open a dedicated Versions window with comprehensive information and the possibility to edit and restore old asset versions.
The Wishlist is a user-specific asset list to collect assets during a selection process for further treatment. The Wishlist dock allows to access and edit this list:
- Remove the currently selected asset(s) from the wish list. The asset will not be deleted, but simply removed from the wish list!
 Remove the currently selected asset(s) from the wish list and push them to the basket instead.