Create and open Xeditor texts
To create an Xeditor text asset, always use Create asset from template. There are several configuration steps necessary to make a plain Xeditor text asset working. A template already includes these steps: There can be two different kind of templates:
- Article assets: There is an article asset that has one or more Xeditor text assets as child. One example is an article that has an original text and several translations.
- Xeditor assets: This is only a Xeditor text asset that contains all configuration that allows to edit the text in the Xeditor.
Create an Xeditor text asset
Log in to censhare Web.
In the top navigation, click Create asset > Asset from template.
- In the left navigation filter, select Standard and then Content.
Filter results to Xeditor.
Select a respective template that you need.
Rename the new asset.
- Select the content language and any other metadata to your needs.
Click OK.
The Article asset is created and opens in an asset page.
For more information, how to create an asset from a template, see:
Open Xeditor text asset
The Text / Xeditor text asset type is associated with the Xeditor.
If you open an Xeditor text asset, the Editor tab provides a Xeditor preview and editor widget. This widget allows you to open your text either in the widget itself for inline editing or in a separate Browser tab. Which option is chosen, depends on the configuration of your widget.
The Editor tab:
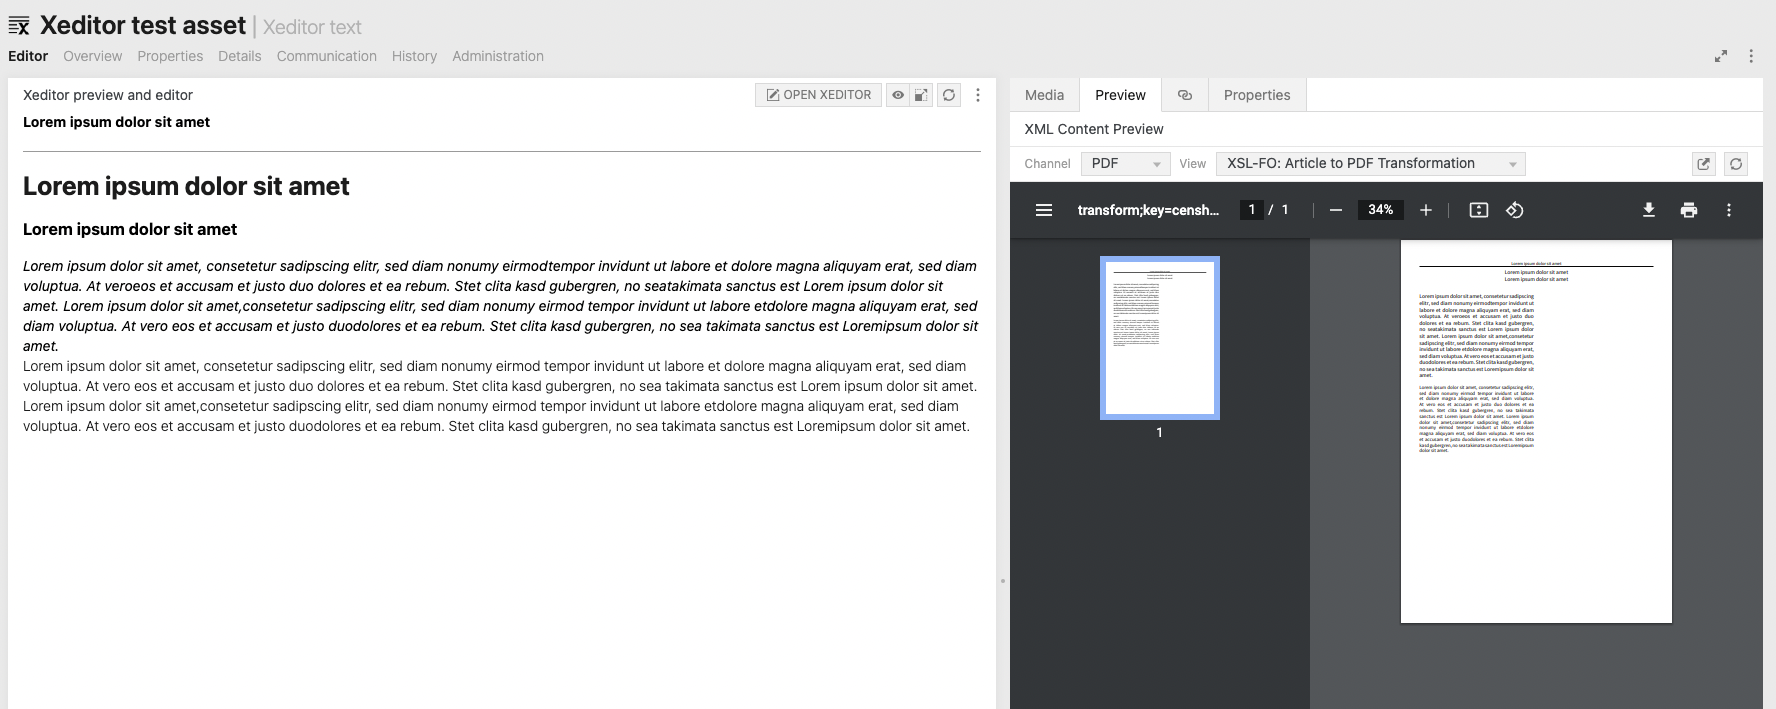
- The Xeditor preview and editor widget shows a preview of the XML content.
- The Preview widget on the right side shows a preview of your text. The preview can either be a HTML or a PDF preview. When you edit the text, the preview is automatically updated.
- The Properties widget on the right side shows the general properties of the Xeditor text asset. You can also edit them.
- The Media widget on the right side shows all assets that have a media relation with the parent article asset. If there are no relations or no article asset, the list is empty.
- The Assignment widget on the right side shows all assets that have a user relation with the opened Xeditor text asset.
Preview your XML text
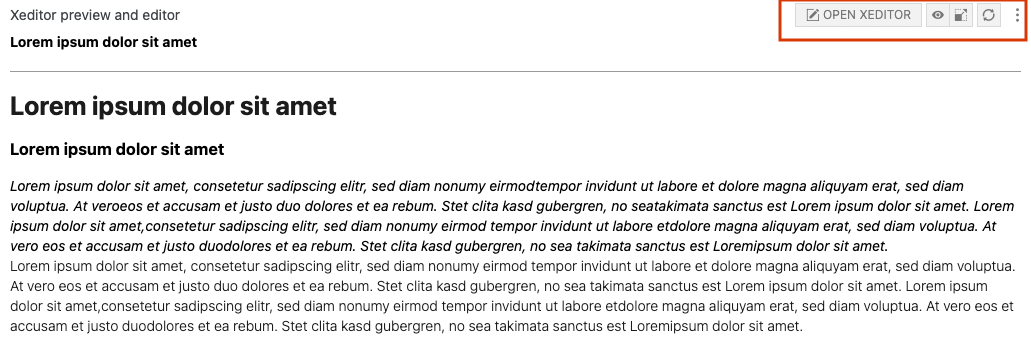
The top buttons of the Xeditor preview and editor widget allow you:
- Start editing: OPEN XEDITOR.
- See a Preview: This opens an overlay window with the preview of your text.
- See a Fullscreen preview: This opens the preview in the fullscreen mode.
- Refresh the Xeditor view.
- See the content language that is defined for Xeditor text asset. This is only shown if you are in the edit mode.
The panes of the Xeditor
- Start editing: Click OPEN XEDITOR
- The edit mode opens and shows the Xeditor. Depending on your widget configuration, the Xeditor opens inline in the widget or in another browser tab:
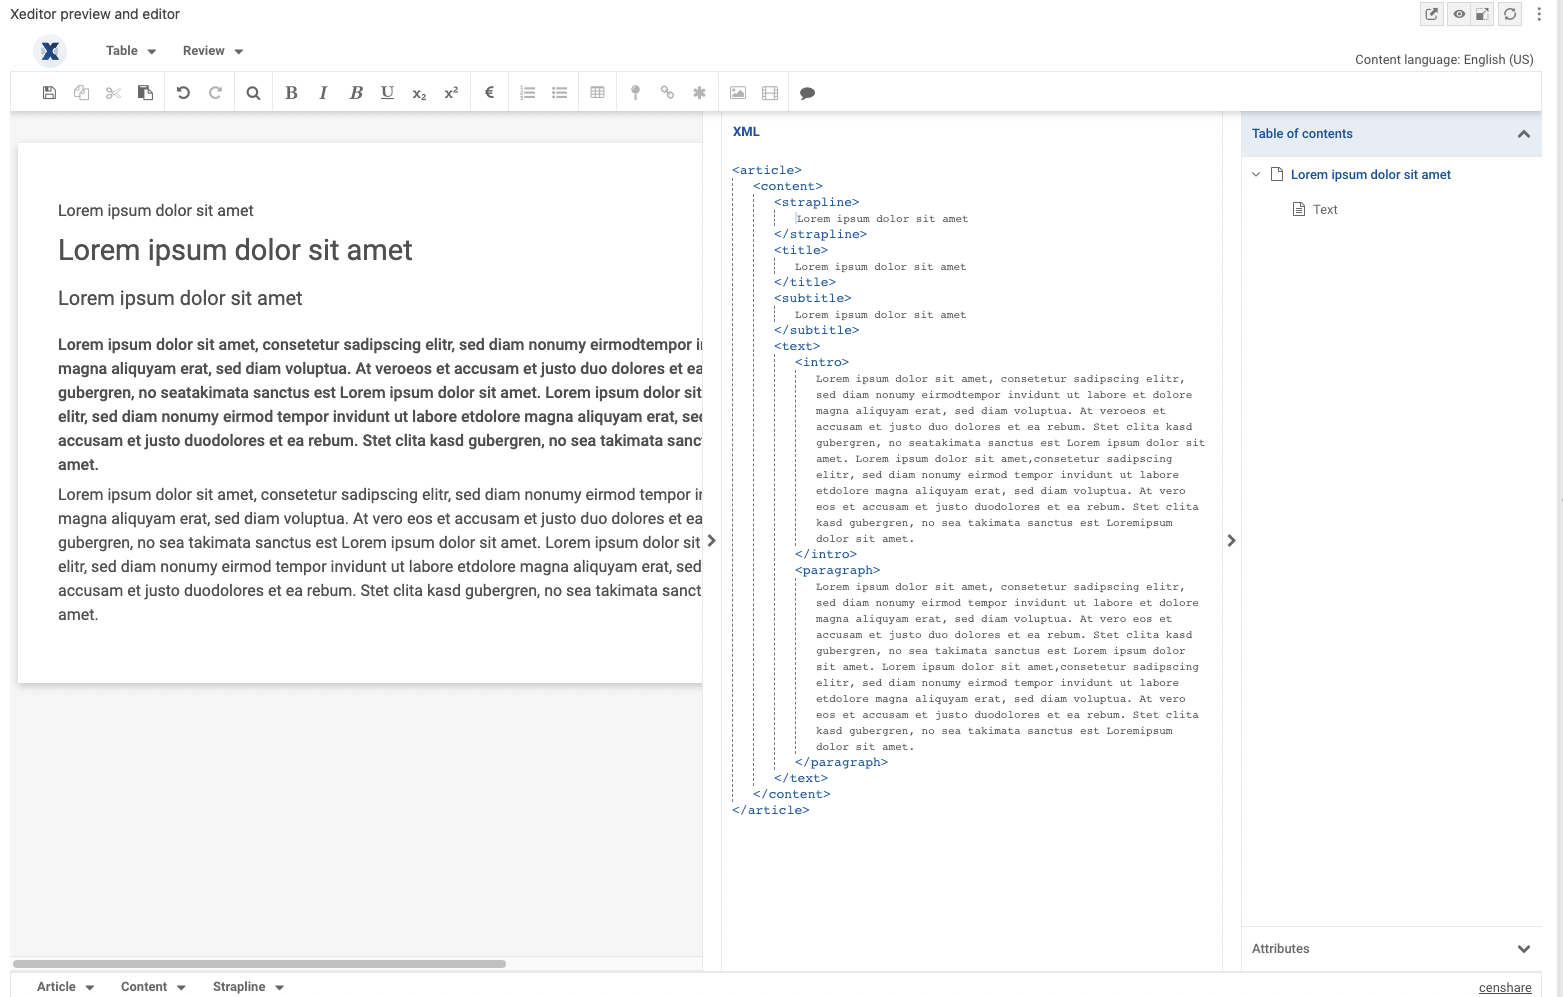
- On the right of the text editor pane, you see the XML content of your text. Use the < button to unfold the XML pane. Use the > button to hide the pane again if you require more space for editing.
- On the right of the XML pane, the Table of contents pane shows the headlines of your text. Use the < button to unfold the Table of contents. Use the > button to hide the pane again if you require more space for editing.
- Once you type, the XML and the Table of contents panes are updated immediately.
- Note that you can edit your text only in the text editor pane itself.
The Xeditor does not open for editing if you just are just editing attributes of the text asset, for example the name of the asset. But, once the asset is checked out and you reload the asset page in the web browser, the Xeditor also opens in the edit mode.
If you are working inline, you can always open the Xeditor in another browser tab:
- Click Open in a new window on the top right of the preview and editor widget. The Xeditor is then opened in the widget and in the browser tab.
- If you edit the text in one of Xeditor windows and switch to the other Xeditor window, you get the notification: "Content has changed on the server, you need to reload the editor."
- Click reload to update the window and continue.
- Note that you can also copy the URL of your Xeditor window tab and open it in another web browser after authentication. If another user tries to use the link, he receives a warning because the XML text asset is already opened (checked-out) by you.
The following instructions are based on the censhare Standard Content Structure schema. Depending of the customization of your schema, the XML structure might change. As of that, also the shown XML structural elements in the Xeditor UI might change.
Showing XML tags
XML tags in your text define to which XML element of the XML structure a part of your text belongs to. The XML structure (schema) defines which elements are allowed at which places. As of that, depending on the position of your cursor, it changes which XML elements you can insert. For this reason, showing XML tags, eases the navigation in your text. It also helps to select the right XML element if you want to insert a certain another XML element. For example, you have some paragraphs within a teaser box and some outside of the box. You want to add another paragraph within the teaser box at the beginning of it. Seeing the XML tags, helps you to find the right place to place the cursor to insert the XML element.
To see XML tags in your XML editor window:
- Click the Review menu on top of the Xeditor window.
- In the menu list, click Show tags.
- The tags are shown in the edit pane. By default, the Xeditor only shows text tags:
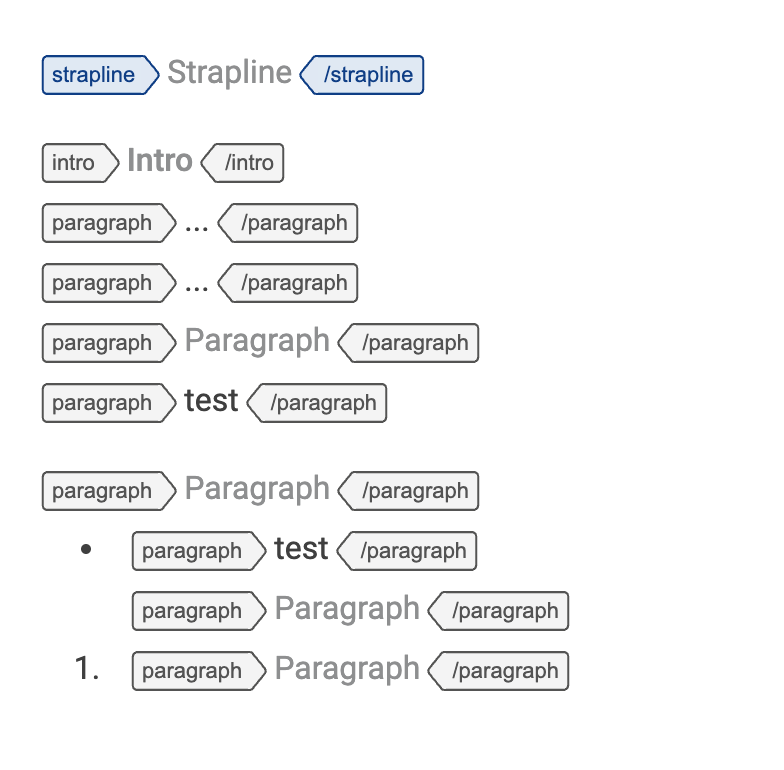
- To hide the XML tags, click Show tags again.
If you want to see all XML tags for a better navigation:
- Click the Review menu on top of the Xeditor window.
- In the menu list, click Tags options.
- A sub menu opens: Click Show all tags.
- If you want to see an XML element in its structure highlighted, click it: It also highlights the element in the XML pane:
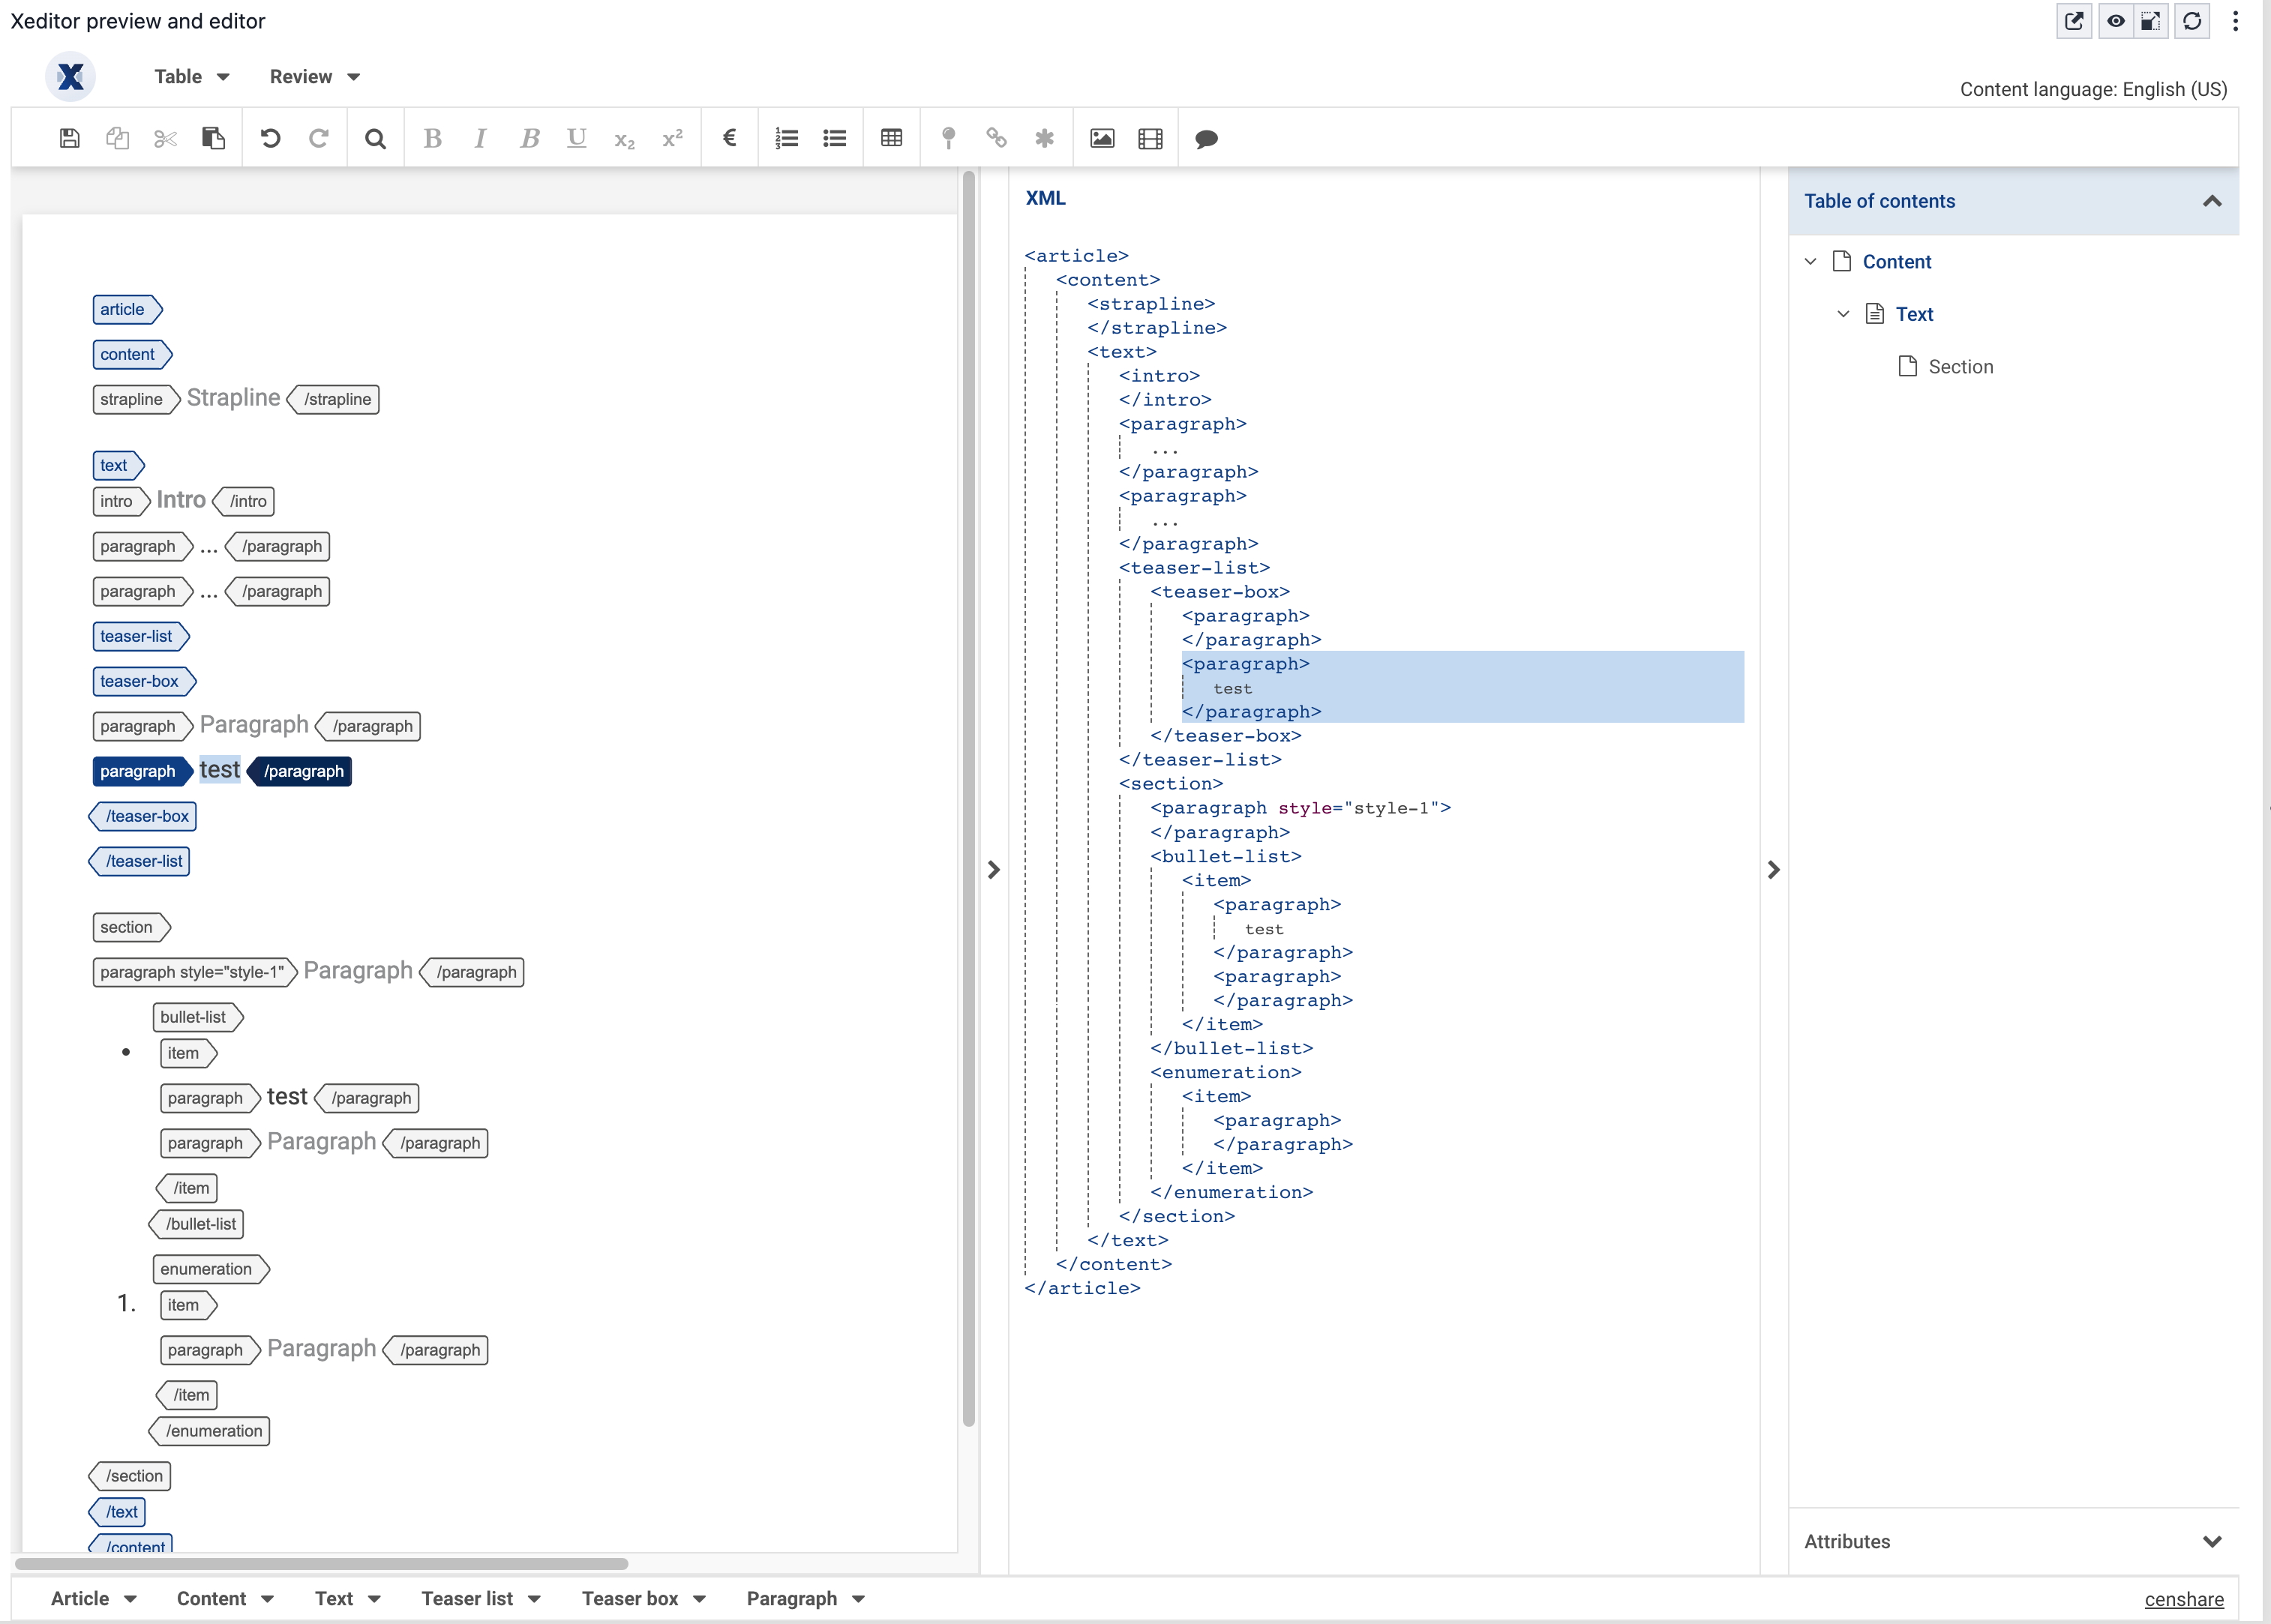
- If you want to only see text tags again: click Show text tags in the Tags options sub-menu.
Some XML elements can also have attributes, for example the style of a paragraph. These attributes can also be shown in the XML tags:
- Click the Review menu on top of the Xeditor window.
- In the menu list, click Tags options.
- A sub menu opens: Click Show attributes. For example:
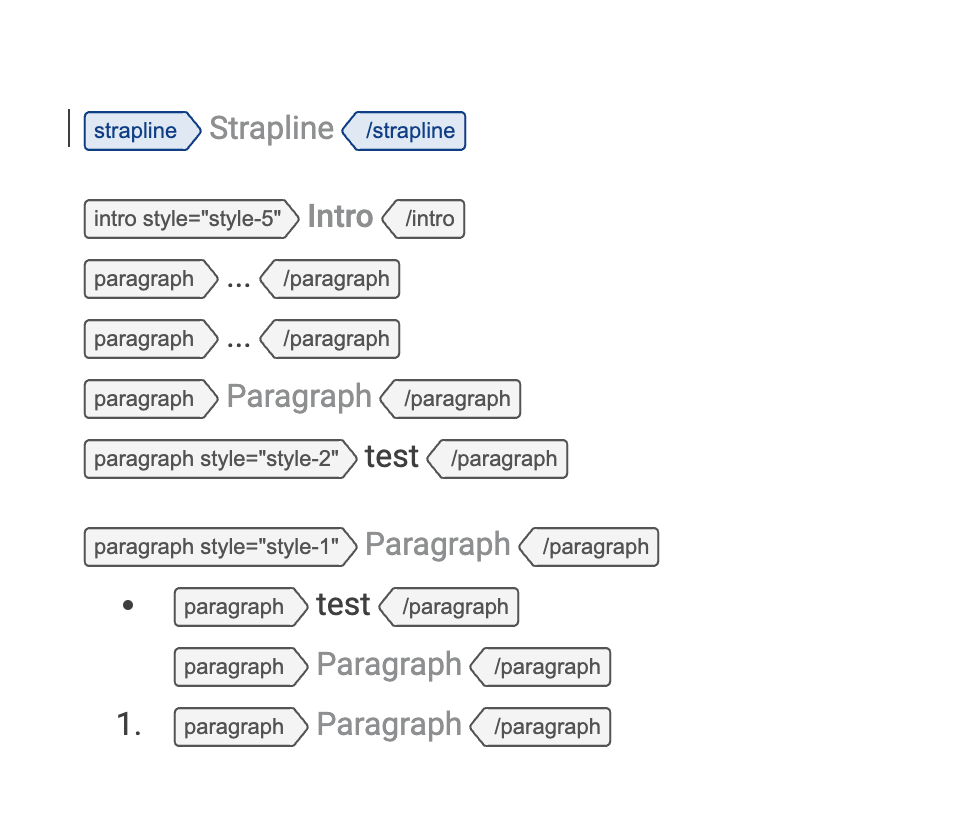
- If you want to hide the attributes again: click again Show attributes in the Tags options sub-menu.
