Configure spellcheck and add custom languages
Learn how to add custom languages to be used for spellchecking in the Content Editor.
Default spellchecking
Content Editor comes with an integrated spellchecker, a freeware called Hunspell. Hunspell uses dictionaries that are provided for free by OpenOffice and LibreOffice. For the most popular languages, such as English, French, etc., we provide dictionaries as part of the server installation. They can be found in the css/install/assets/optional/dictionaries directory. For English and German, the spellchecker is already configured and can be used directly. The other dictionaries from this directory need to be added manually. In addition to that, you can get dictionaries for any other language and add it too. See the instructions below.
Steps for adding new languages
Download dictionaries
The important thing is that you need two files for every language:
- one file with the
.affextension - one file with .
dicextensions
You have two options from where to download the dictionaries. The exact URLs for both providers may change, so it always helps just to search in Google for either "openoffice dictionaries" or "libreoffice dictionaries".
- https://github.com/LibreOffice/dictionaries : You may need to click through the subrepos, but there are
.affand.dicfiles for each language. - https://extensions.openoffice.org : Download the
.oxtfile for the respective dictionary.
Prepare .zip archives
You need a .zip archive with .aff and .dic files inside it. The name of the archive should consist of the language ID you are to create later and the _hunspell part, for example:
de_CH_hunspell.zip
The ID part – de_CH in our example – usually contains the ISO language acronyms, one for the language itself and an optional one for the language dialect, such as CH (Swiss) in our example.
You should create a folder with that name without the .zip extension and then convert it into the archive.
Two peculiarities here:
- OpenOffice does not offer
.affand.dicfiles. Some transformation is necessary. - On macOS, you should not use the right-click and
Compresscommand. The reason that the system will put into such an archive invisible elements that will prevent the censhare system from recognising this archive as a spelling dictionary. You need to create a.ziparchive from the Terminal using the following commands:
cd <<folder with .aff and .dic files>>
zip de_CH_hunspell *
OpenOffice archive transformation
- Download the
.oxtfile. - Change extension to
.zipwithout any additional action yet. - Unpack the archive.
- Handpick only
.affand.dicfiles. - Create a folder and name it <<ID_hunspell>>.
- Zip it.
Add a new language in the master data
Before you can add a dictionary, you need to create a new language in the master data. The reason is that you will need to assign this language to the dictionary later.
- Open your Admin Client
- Expand
Master data - Double click on
Languages - Click on the plus button in the top left corner
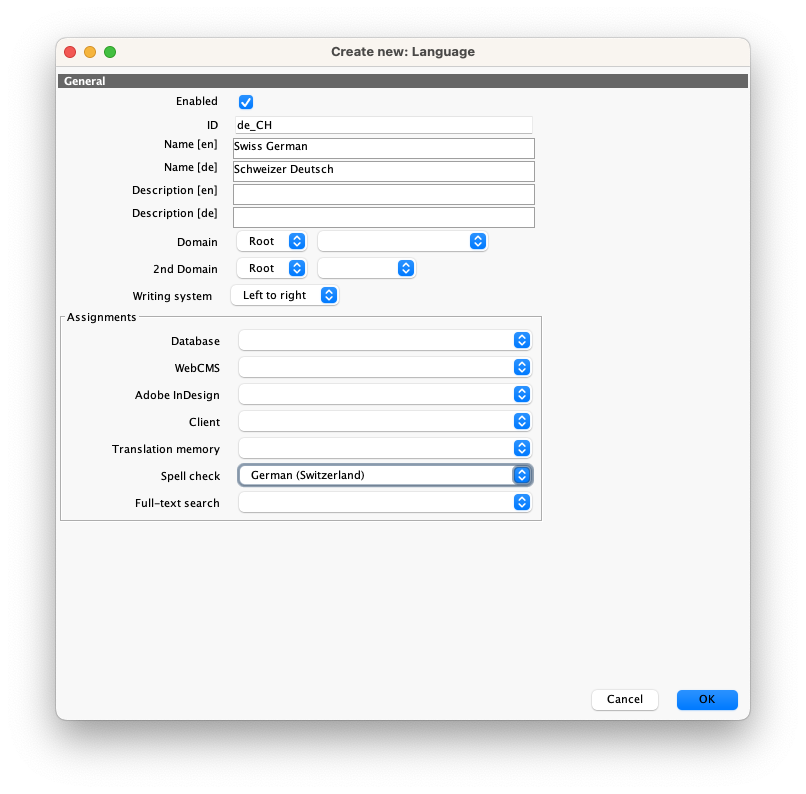
- Fill in the fields like on the screenshot below

The ID must coincide with the first part of the name of your archive.
You do not have to fill out all Assignments. For the purpose of spellchecking, you only need to select a language from the Spell check dropdown. Those are existing ISO languages.
Add the dictionary as an asset
You need to upload the archive as a censhare asset. We strongly recommend doing it in the Java Client.
- Drag-and-drop into the Client.
- The metadata dialogue will appear.
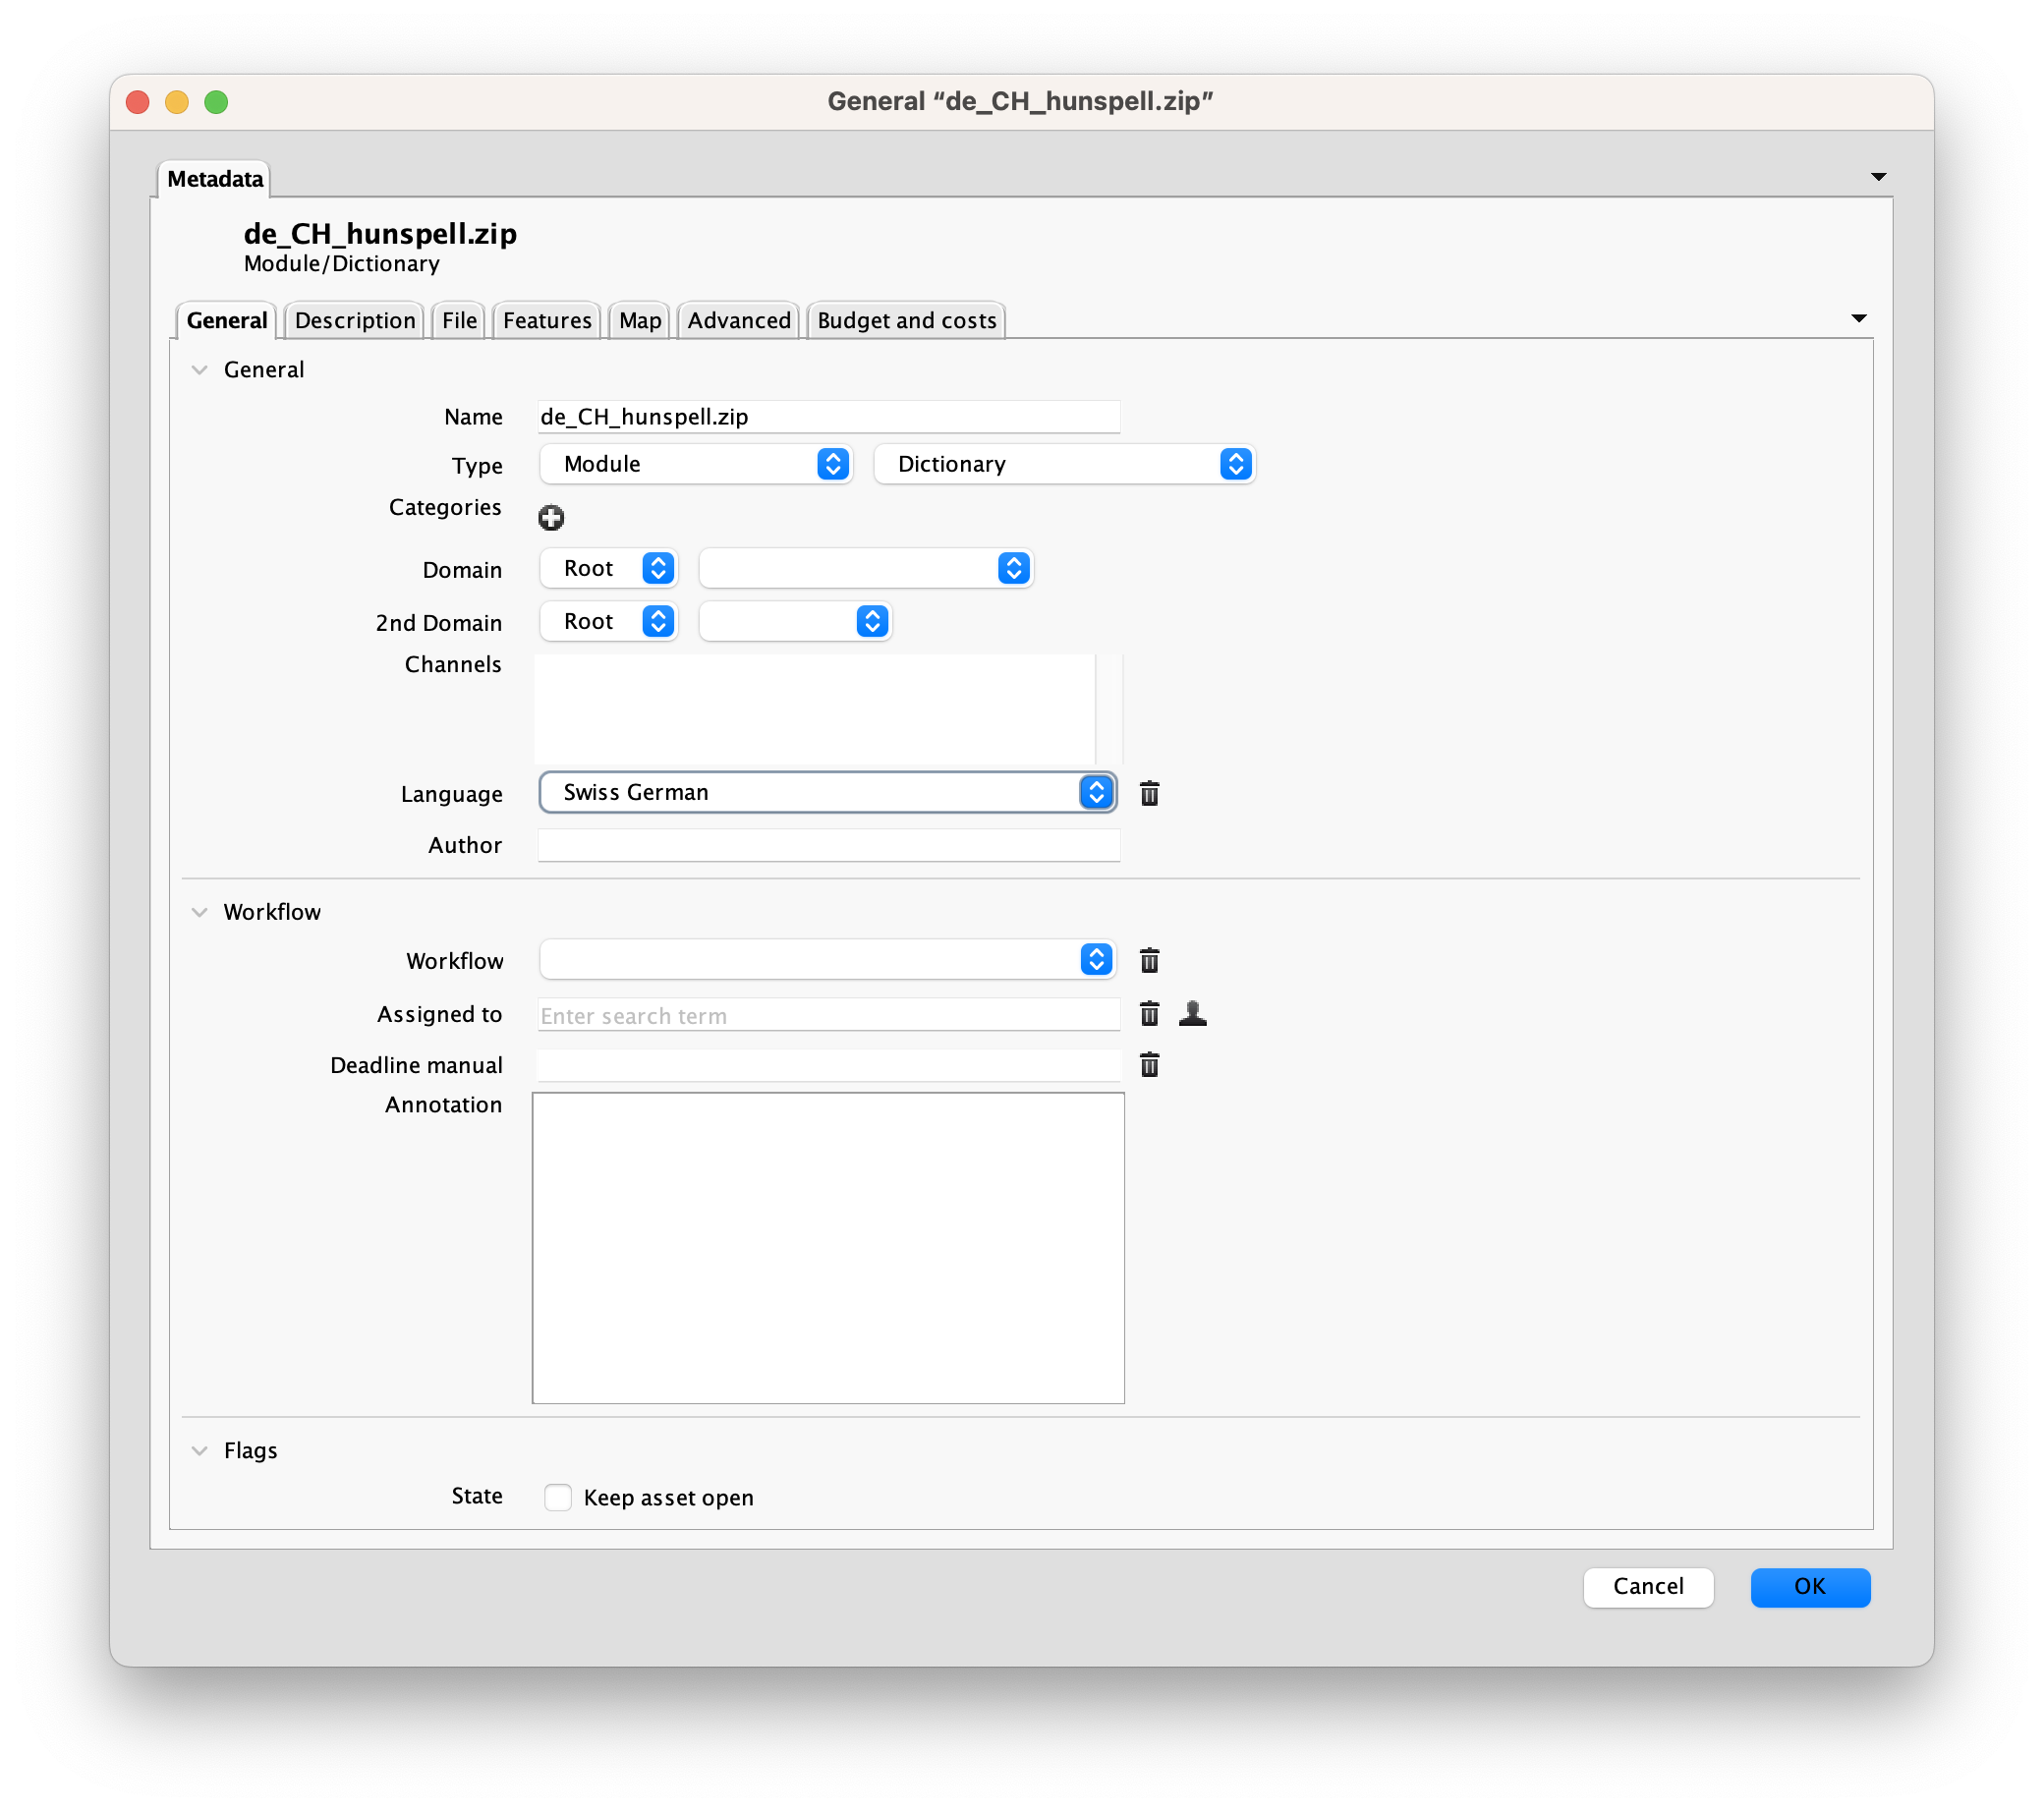
- On the General tab, fill out the following files:
- Type must be
Module/Dictionary. - Language is the one you created on the previous step.
- Type must be

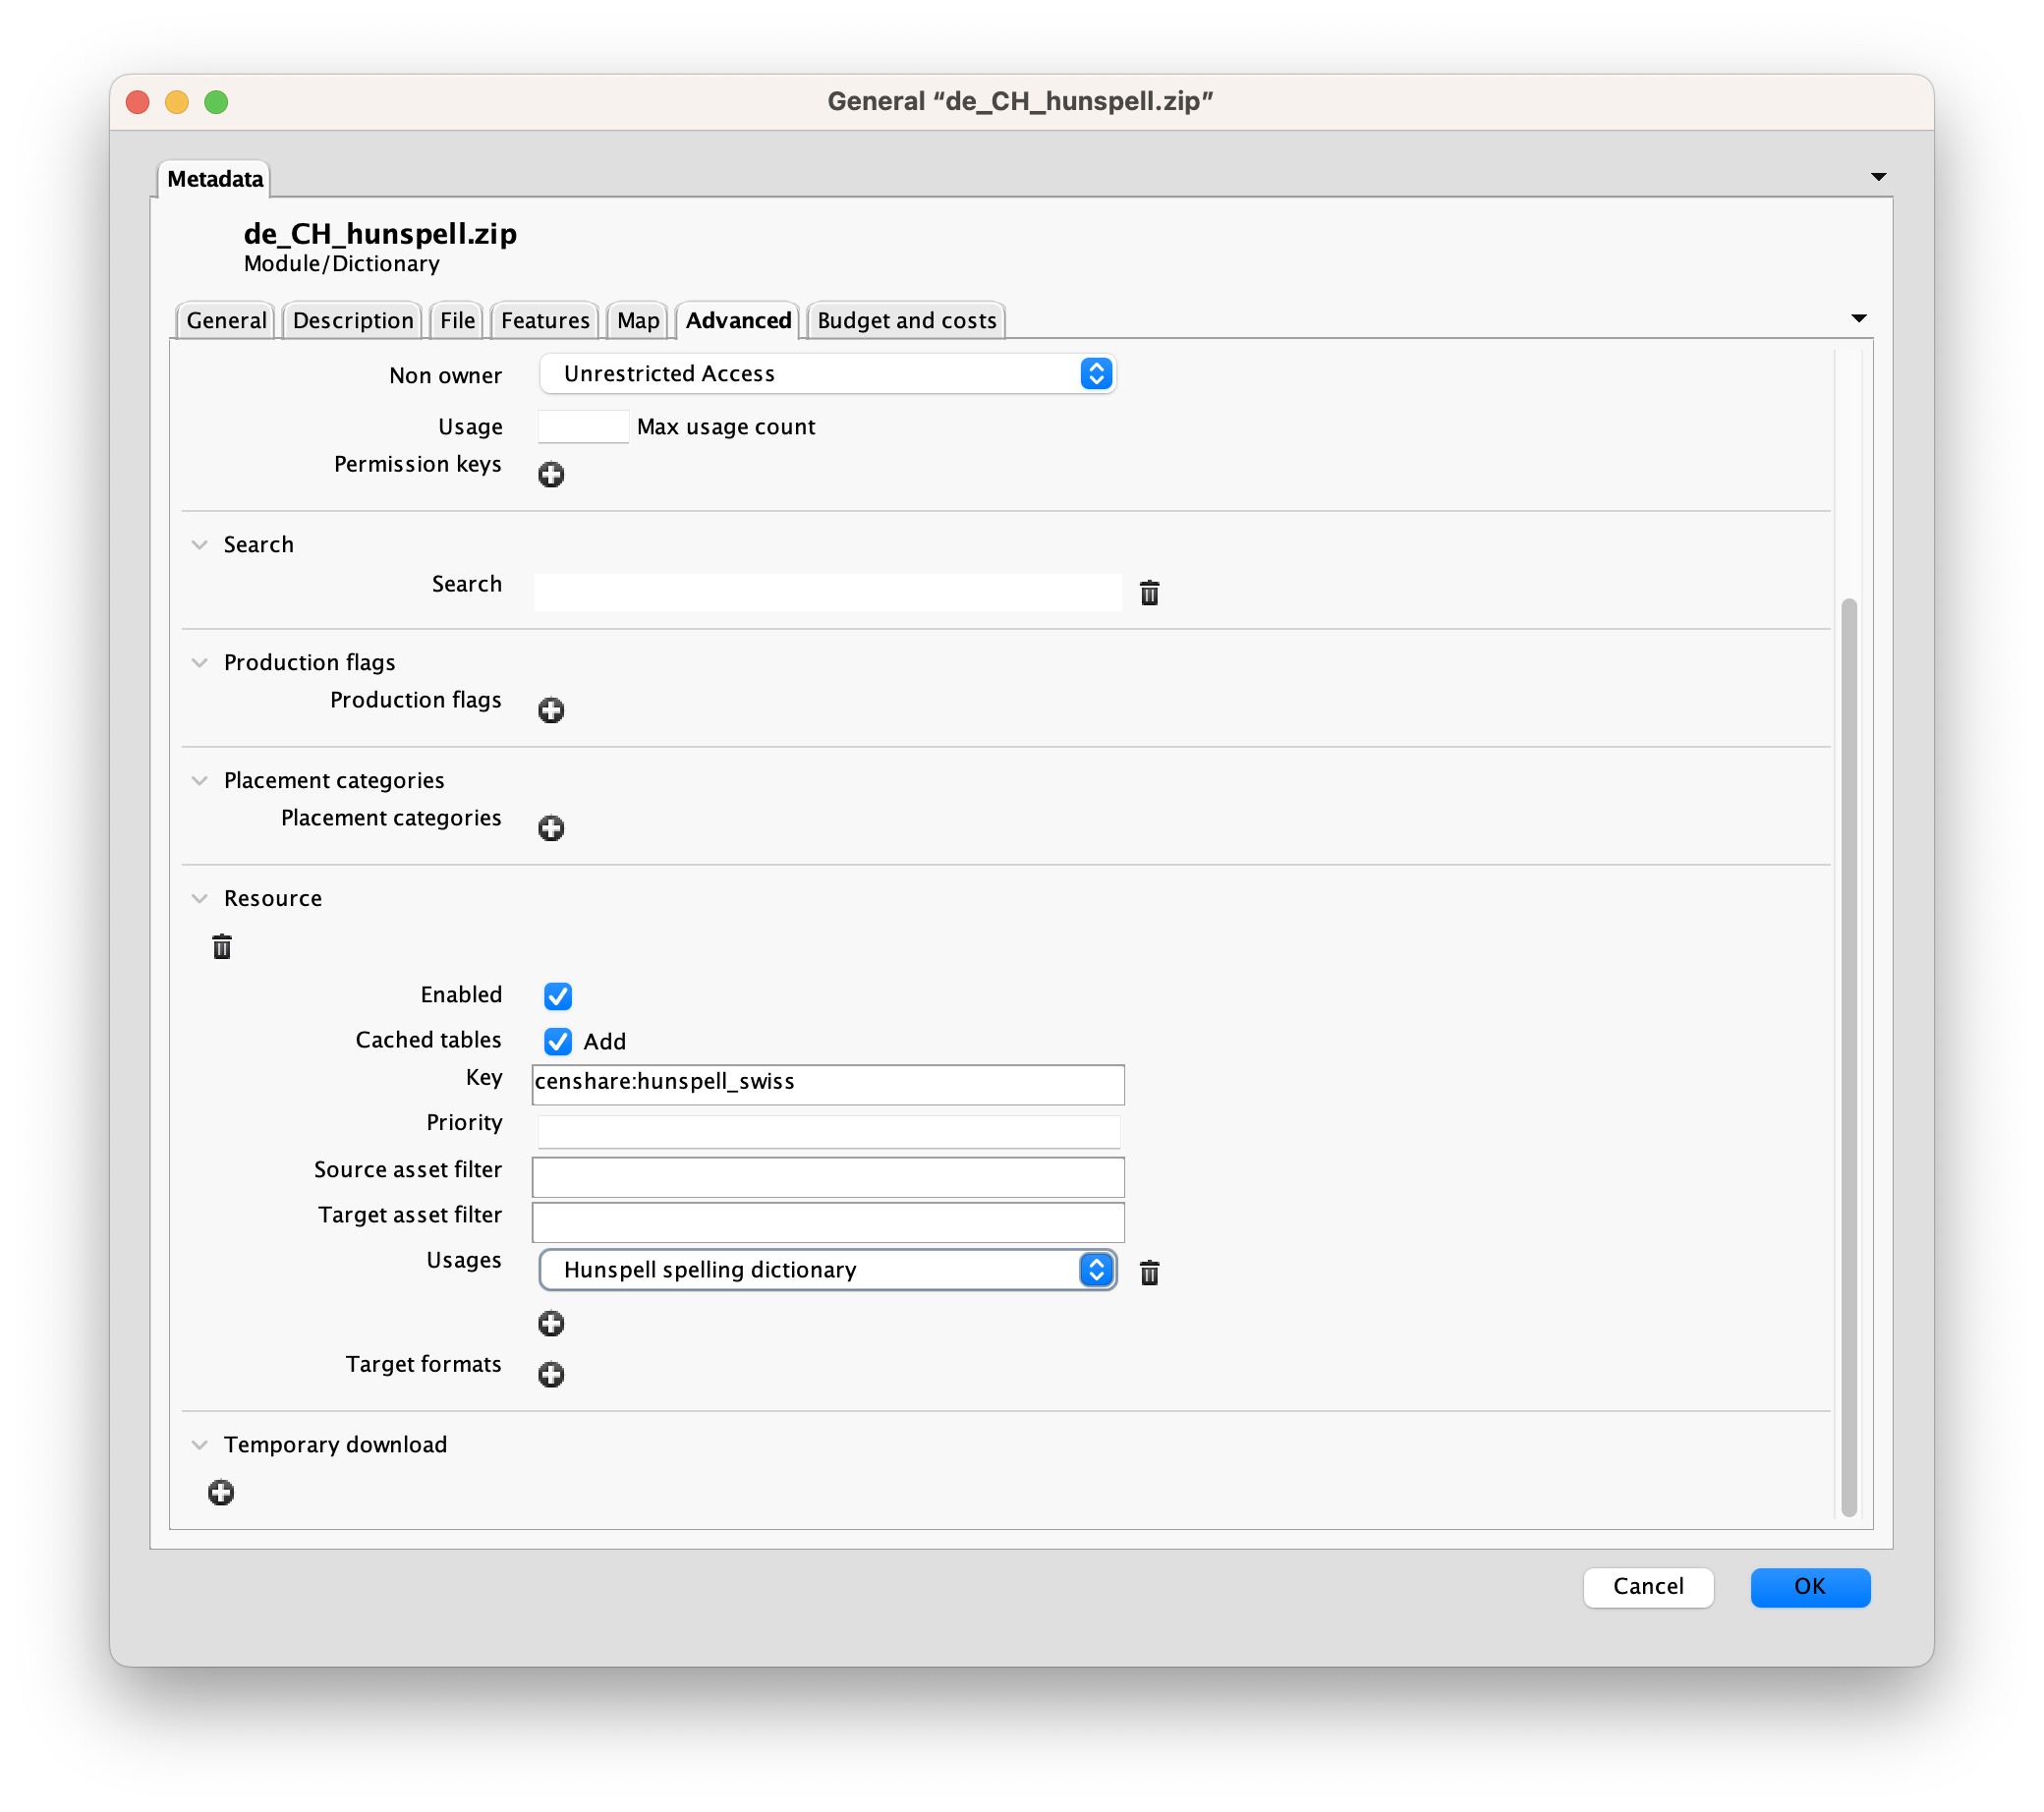
- On the Advanced tab, enter the following:
- Under the Resource - Key, enter
censhare:hunspell_<<language>>- How you write the language, is not critical, but it should provide a good hint.
- Under Usage, select
Hunspell spelling dictionary
- Under the Resource - Key, enter

Now you are set for using this for spellcheck.
Which language is applied during spellcheck is defined by the language set as content language in the properties of your text asset. However, you can add multiple languages using the Additional languages property. If the language you need is missing in that list, you can add this manually to the spellchecker.
