Introduction
Bundle files provide an easy way to combine many files into one and transfer them easily, for example ZIP files. Besides that, there are applications that use bundle files to combine the various parts for an application object into one, for example 3D models.
Censhare provides an easy way to view files within a bundle and extract files as desired. You do not have to extract the bundle file, import all files of the bundle and create relations between the asset with the bundle file and all the extracted file assets. You simply select the desired files in the bundle and press the button to extract. Censhare then creates the assets and respective asset structure with the links between the assets.
If the decomposition functionality is available for an asset, the asset pages shows a Decomposition tab. For now, the decomposition functionality supports ZIP files.
The functionality
In detail, the Decomposition tab provides the following functionality:
-
view which files are contained in the bundle
-
view the structure of files in the bundle
-
select files within a bundle file for extraction: single, several, all
-
view which files have already been extracted
-
create assets from selected files in the bundle
-
view created assets in a list or hierarchical structure and open them for editing
Bundle files can contain not only regular files but also:
-
ZIP files
-
Folders that may include files, ZIP files, or other folders.
Supported asset types and bundle files:
-
bundle assets with Other asset type and a ZIP file as master file
-
3D assets with 3D model asset type and a ZIP file as master file
Only then, the Decomposition tab is shown that provides the decomposition functionality.
The extraction
View files in bundle before extraction
-
Open the bundle/3D asset.
-
Go to the Decomposition tab.
-
The Extraction tab shows the Extraction widget on the left with a hierarchical tree view of the bundle content, for example:
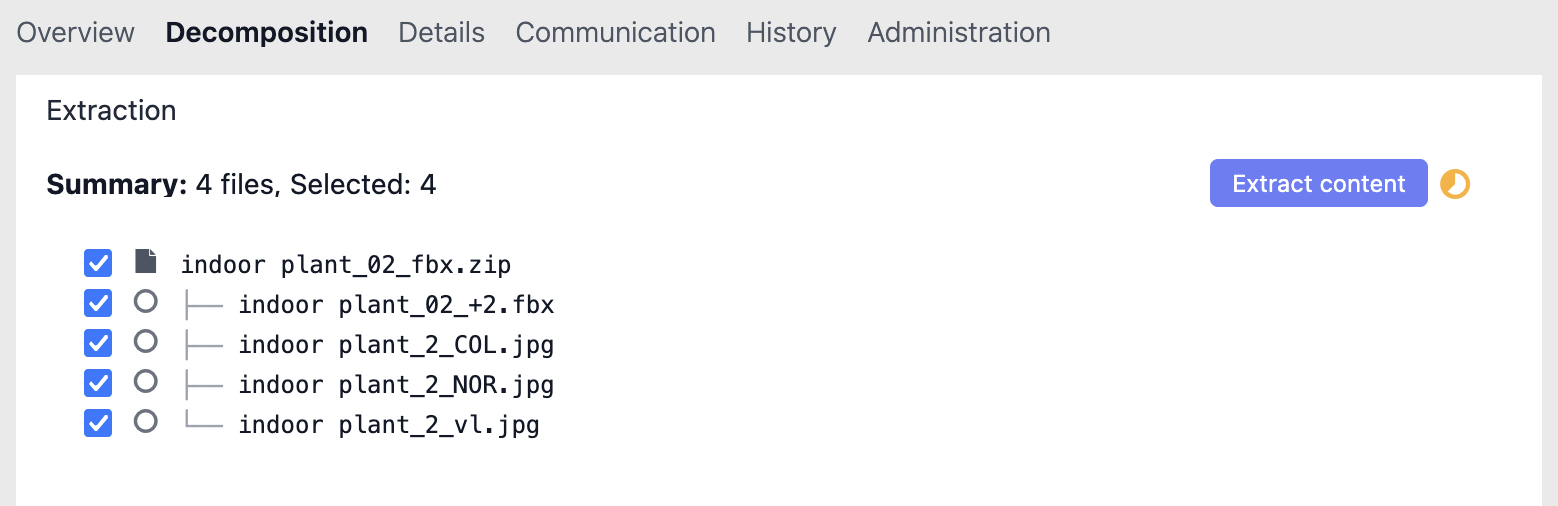
If you open the bundle asset for the first time, all files are marked for extraction.
-
The Extracted files widget on the right is empty because no assets have yet been created from files, for example:

Select files in a bundle asset
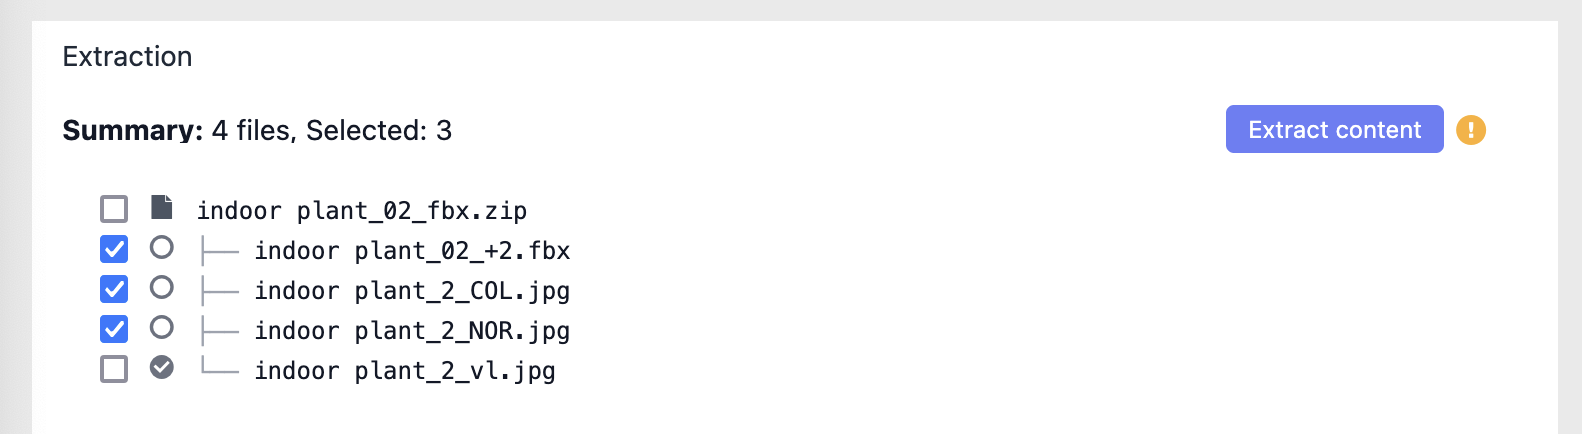
In the Extraction widget, use the checkboxes on the left, to mark the files that you want to extract:
-
Click a checkbox to select or deselect a file for extraction.
-
If you want to extract all files, click the checkbox of the bundle file: all checkboxes are marked. Click again to remove all selections.
If one or more files have already been extracted, the respective files have a checkmark and are not selected for extraction if you open the Decomposition tab again, for example :
If you mark an already extracted file again for extraction and click Extract content:
-
The linked asset that already contains the respective file in the bundle file is updated.
-
The attached master file of the linked asset is overwritten.
If you select a file in the bundle for which an asset already been created, be careful.
Check first if you have edited the master file of that asset after the extraction of that file.
If you extract that file again, these changes of the master file are lost because the master file is overwritten!
Start extraction process
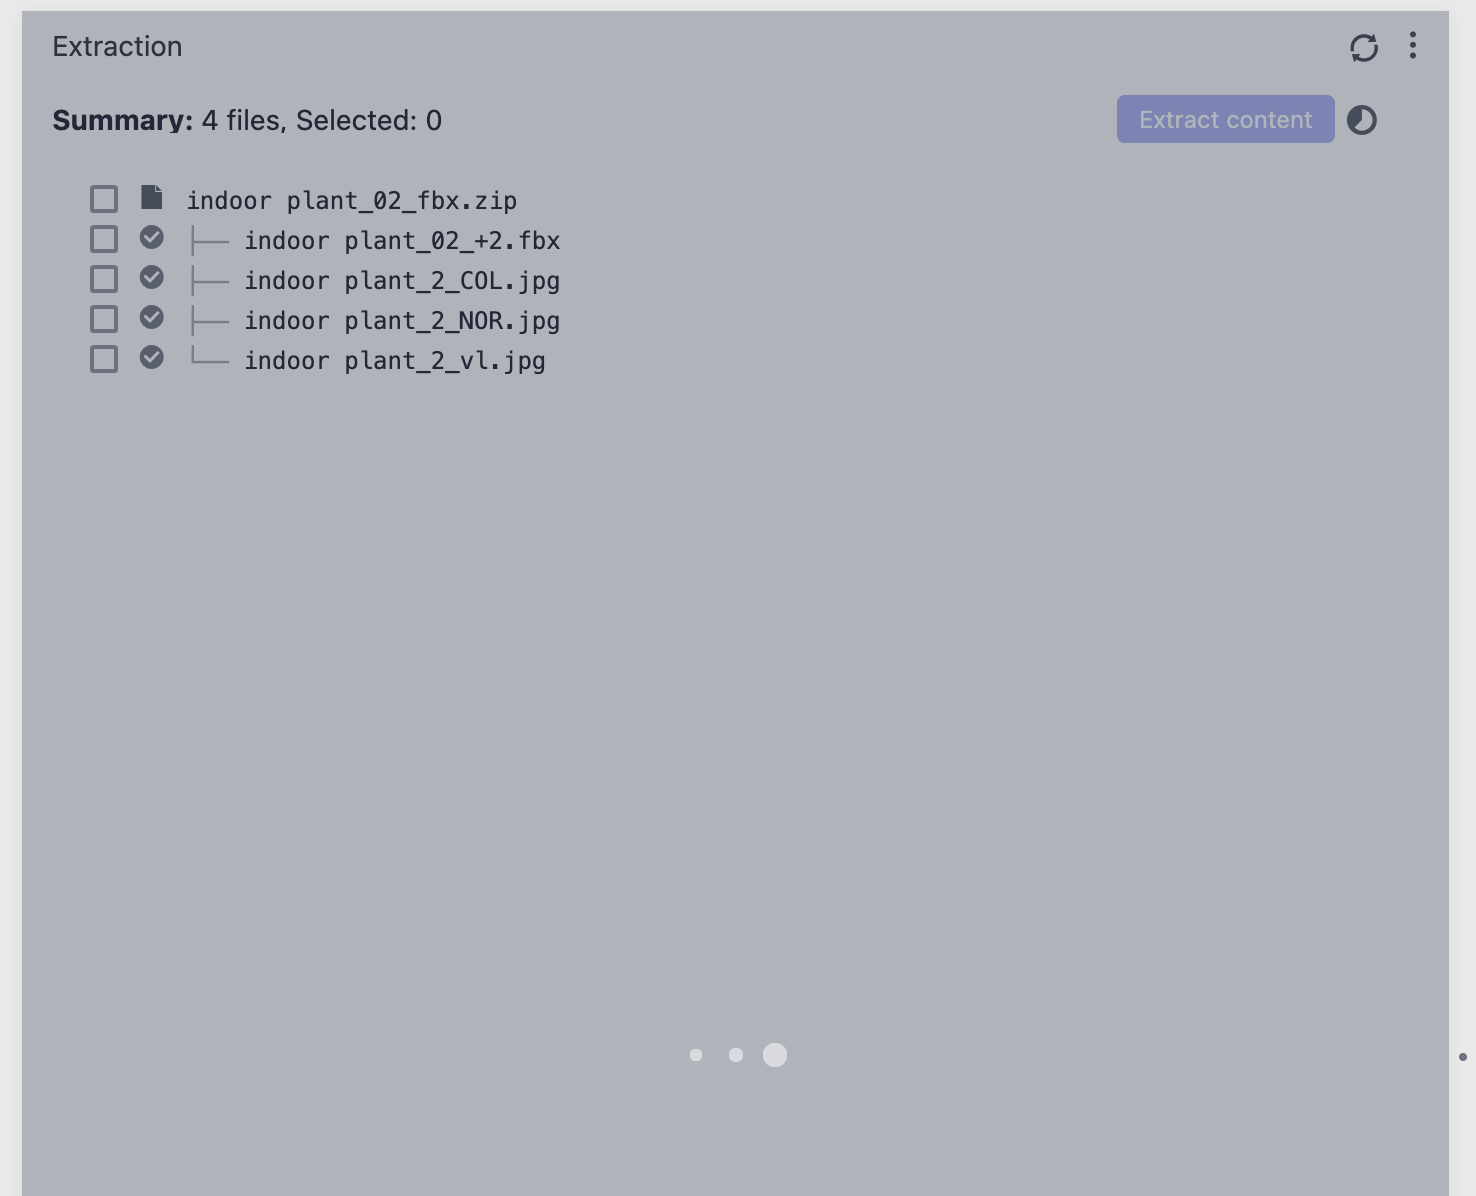
If you have marked one or more files for extraction, the Extract content button is activated:

Click it to start the process.
If no files are selected, the button is deactivated.
While extraction is in progress, the Extraction widget is highlighted with grey color and an activity indicator is shown, for example:
The extraction: one asset for one file
For each selected file in the bundle, an own asset is created. Every new asset is linked with a Content relation with the bundle file asset.
Check the result
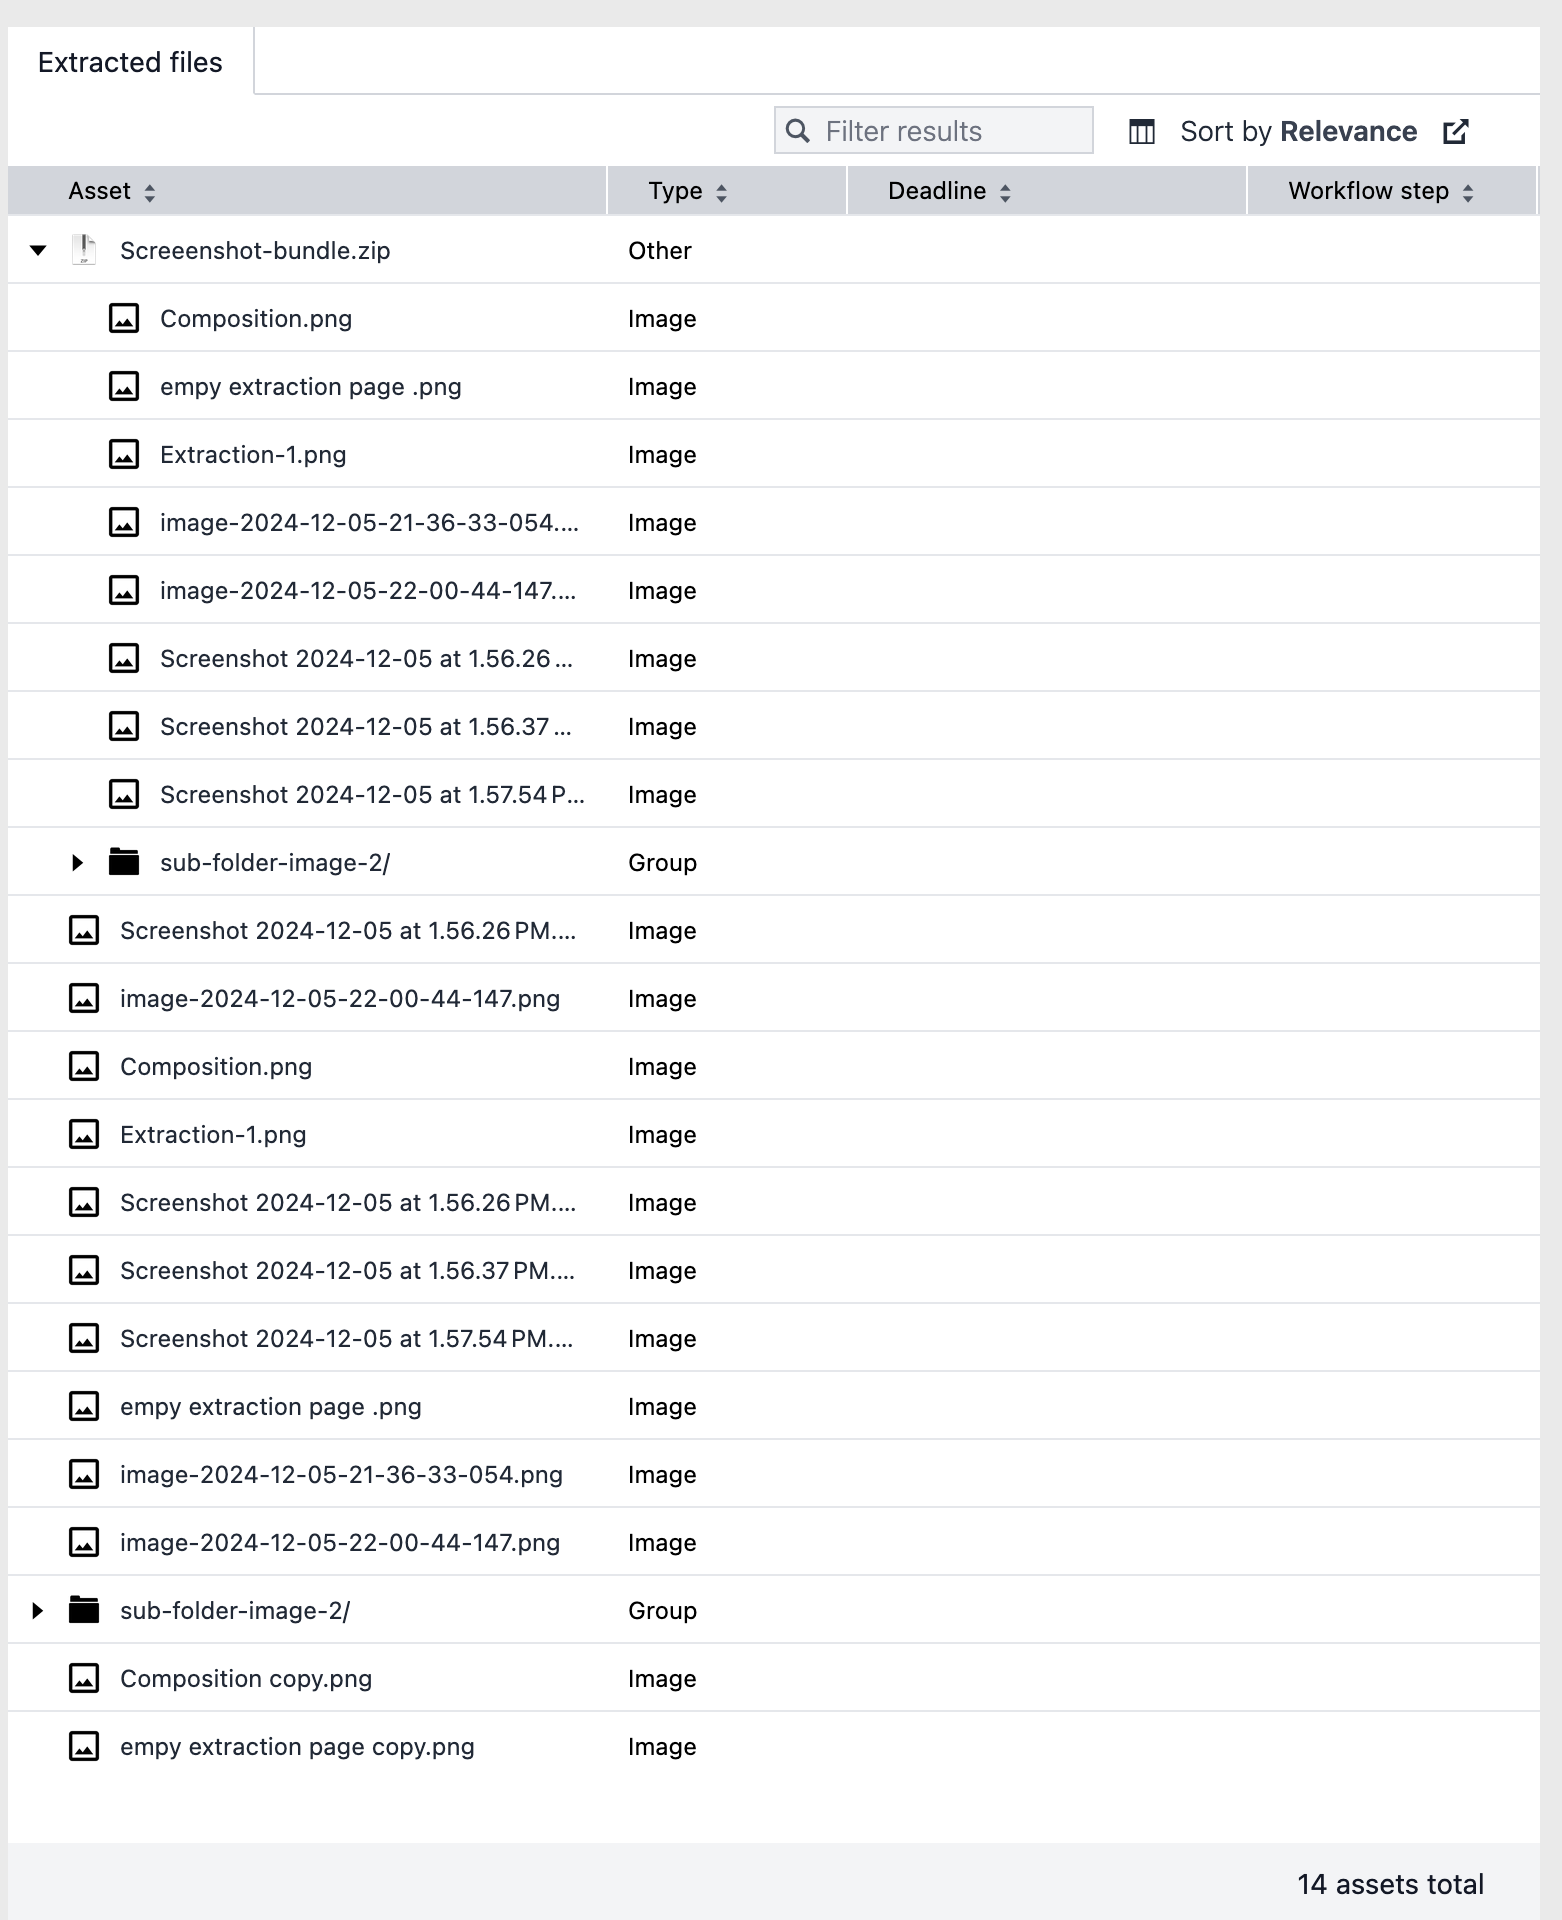
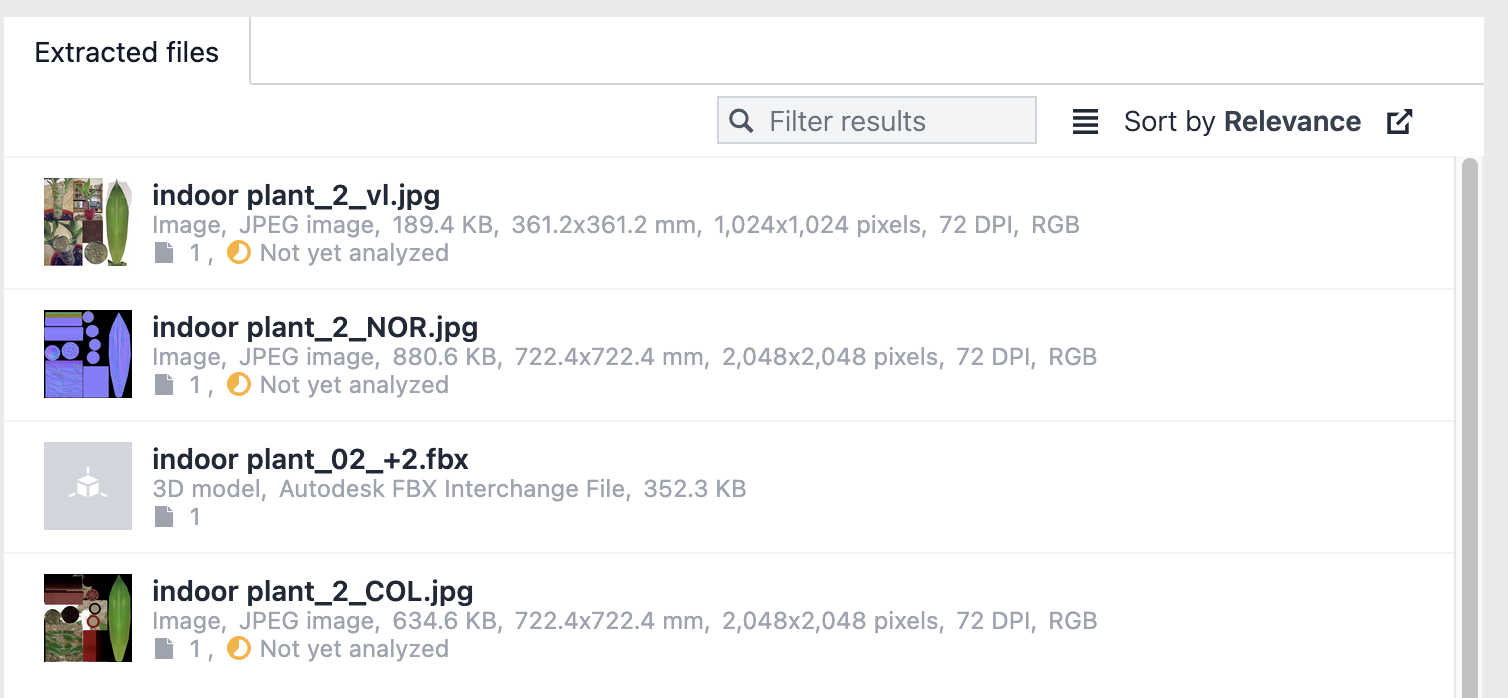
The results of the extraction are shown in the Extracted files widget on the right side.
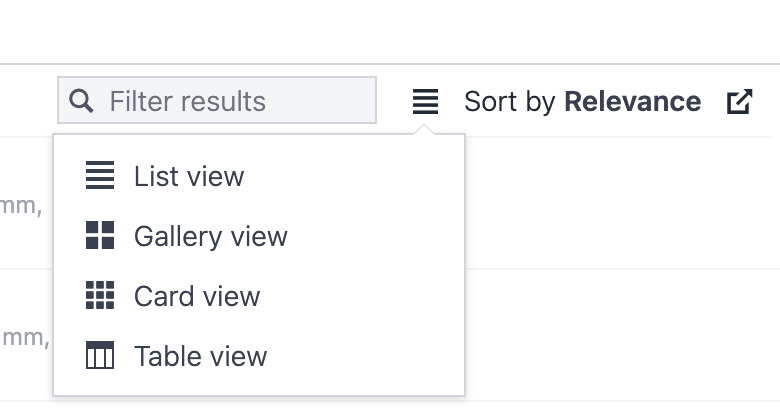
By default, the assets are shown in the List view which is a plain list, for example:
Note that a folder structure in your bundle file is not shown in the List view, for example:
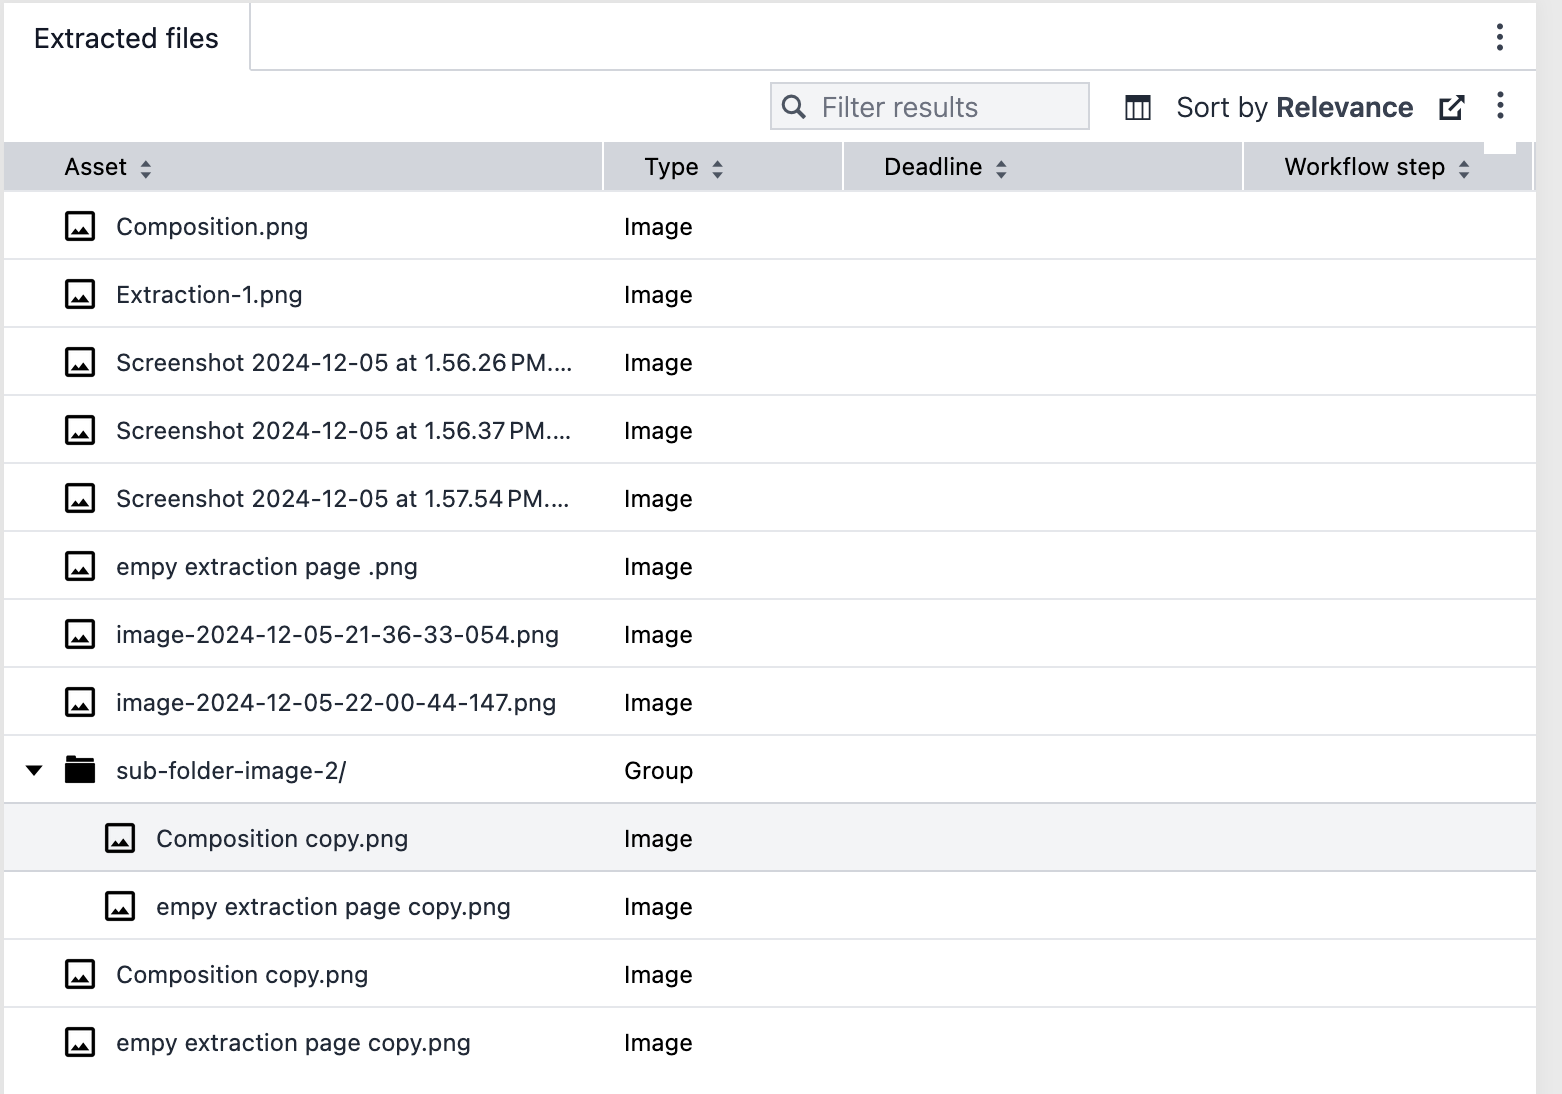
To see a structured list of your assets, you must switch to the Table view in the toolbar of the widget:
For example:

Extraction of folders in a bundle
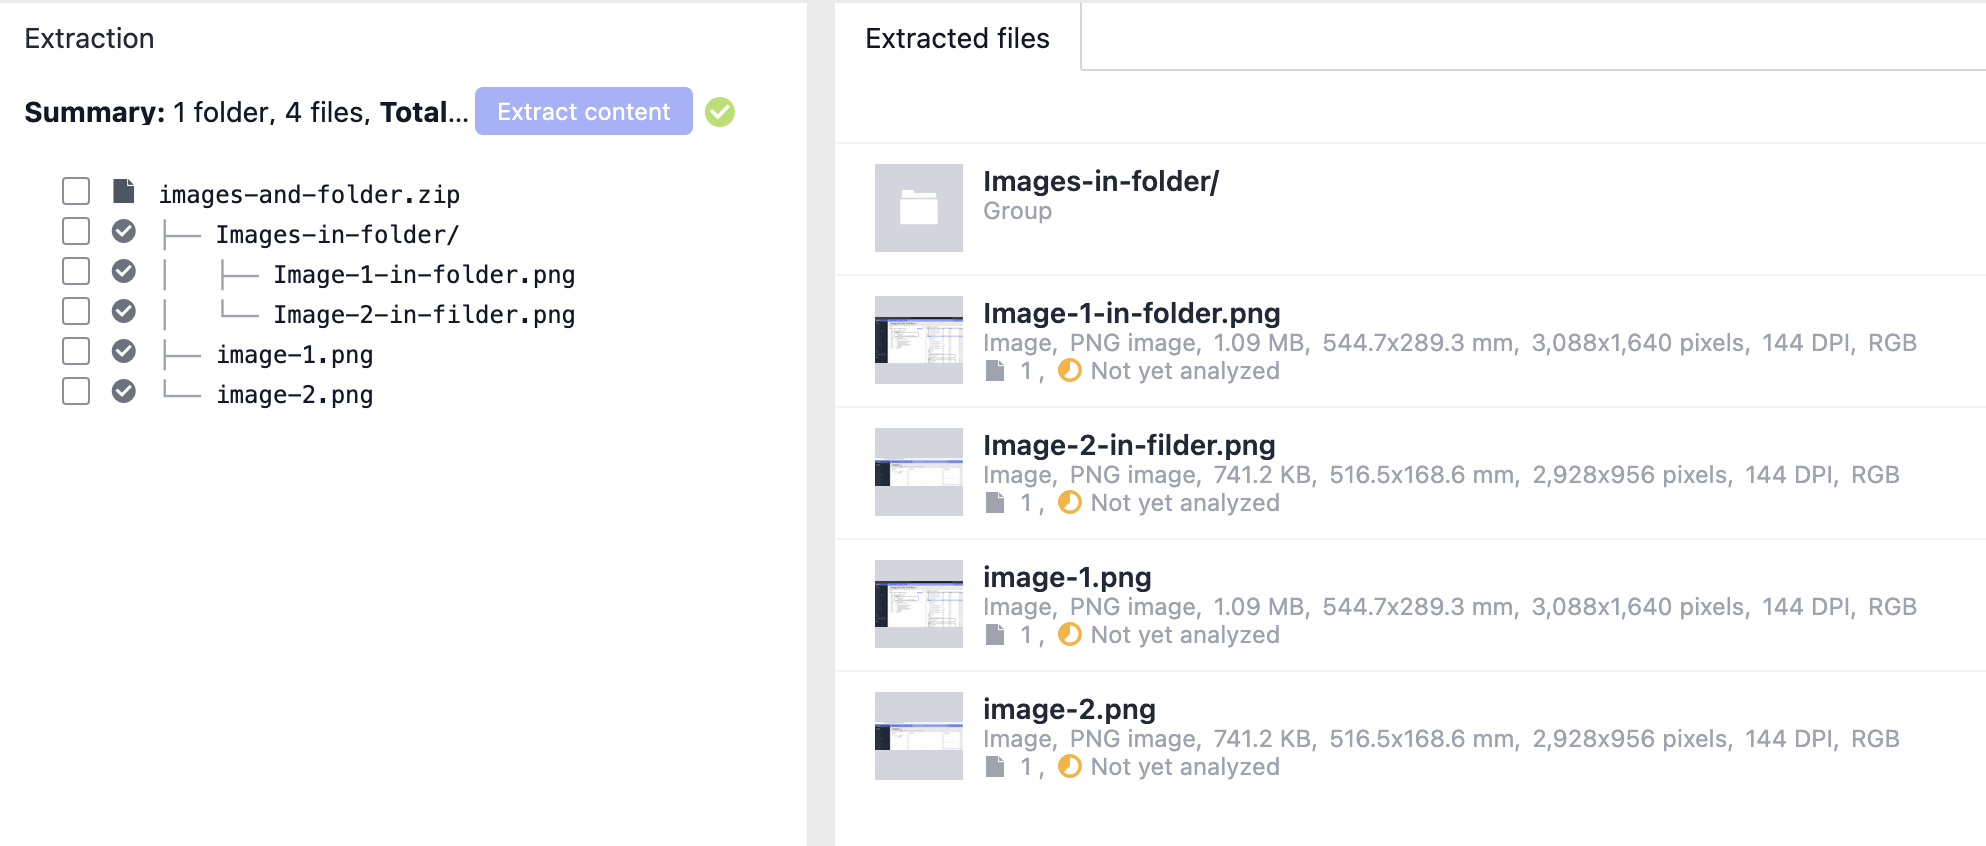
If the bundle file contains folders and files within these folders, it creates for each folder an own asset with the Group type. For the files in a folder, it creates own assets and assignes these assets to that group asset.
For example, the following bundle file has several folders with files:
This is the respective asset structure after extraction:

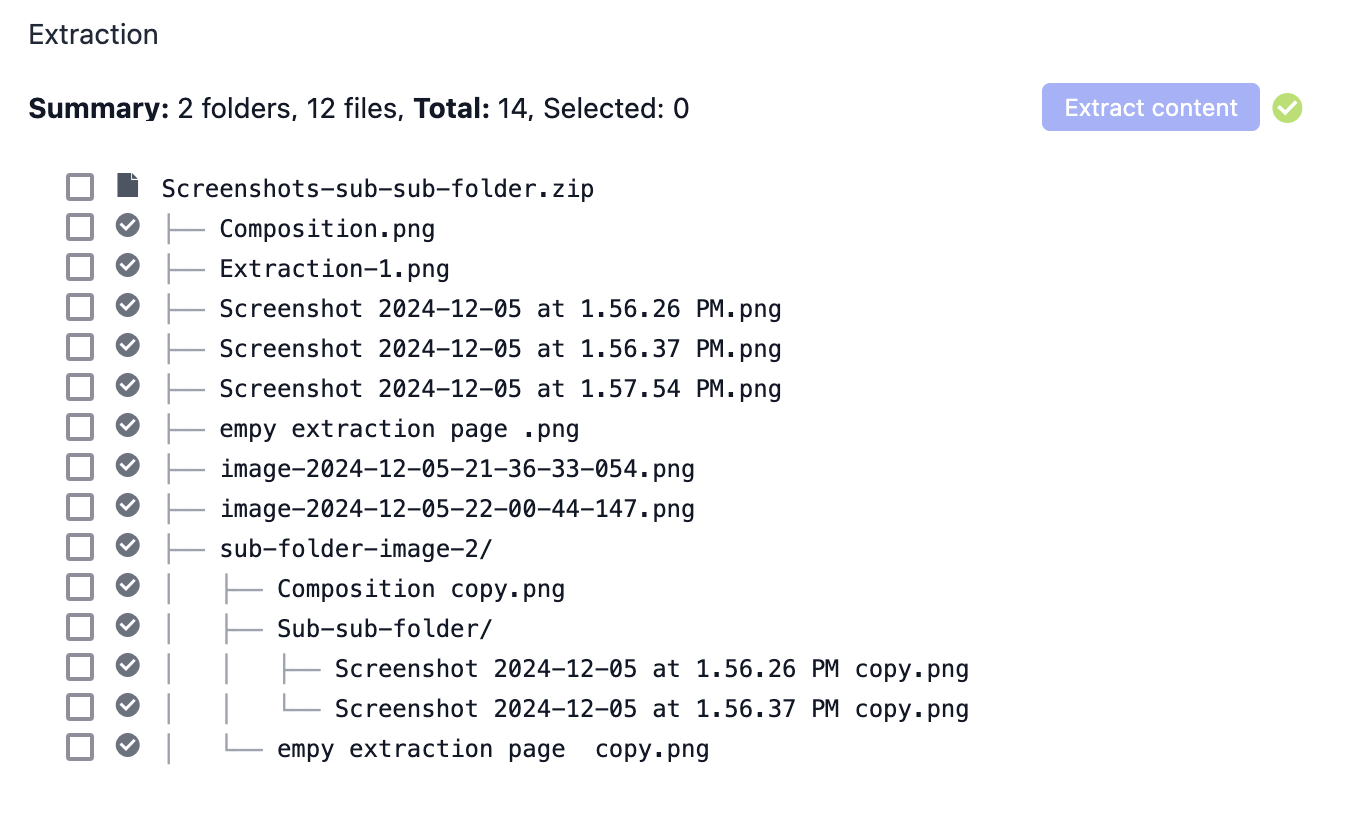
Known bug: If the bundle file contains a sub-folder, assets from files within this sub-folder are not shown in the List view of the Extracted files widget.
Work around: To display the missing assets in List view, switch to another tab of the asset page and then back to the Extracted files widget. The List view is updated.
No duplicate check
-
There is no duplicate check if the selected file already exists as an asset in the system. The system always creates a new asset and attaches the selected file.
-
The system also creates a new asset if the bundle file contains the same file in a different folder.
For example: The bundle file collection.zip contains a plant.jpg file in the base layer. The same file is also stored in a sub-folder of the bundle:Collections.zip | -- plant.jpg ... | -- sub-folder-moor/ | |-- plant.jpgThe system does not check if both plant.jpg files are duplicates, neither by name nor by hash code. It just creates two different assets and adds the respective file.
This way, you always know where to find the assets with the extracted files.
Extraction of ZIP files in a bundle
If the bundle file contains a ZIP file, you cannot directly extract the files within the ZIP file. Instead, you can do it in two steps.
1. Extract the main bundle file
In the first step, you extract the files in the bundle file as usual.
For example, you have the following bundle file:
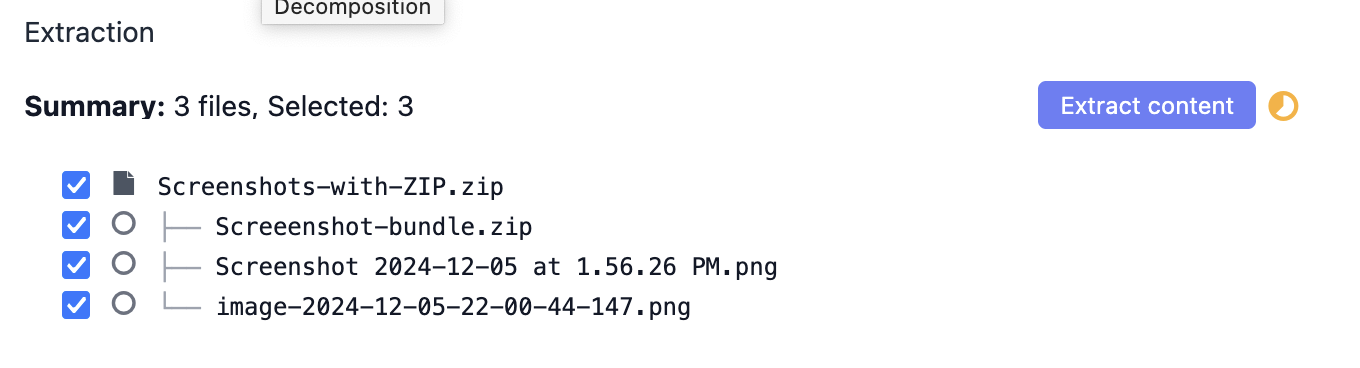
The asset structure then looks like this:
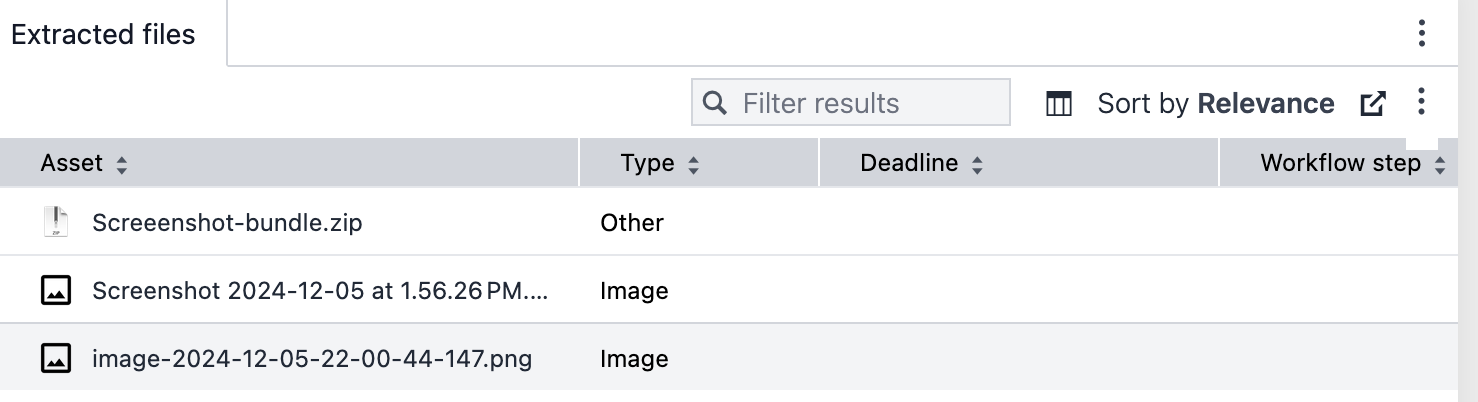
2. Extract the contained ZIP file
In the second step, you open asset that contains the ZIP file.
For example:
The asset structure then looks like this:
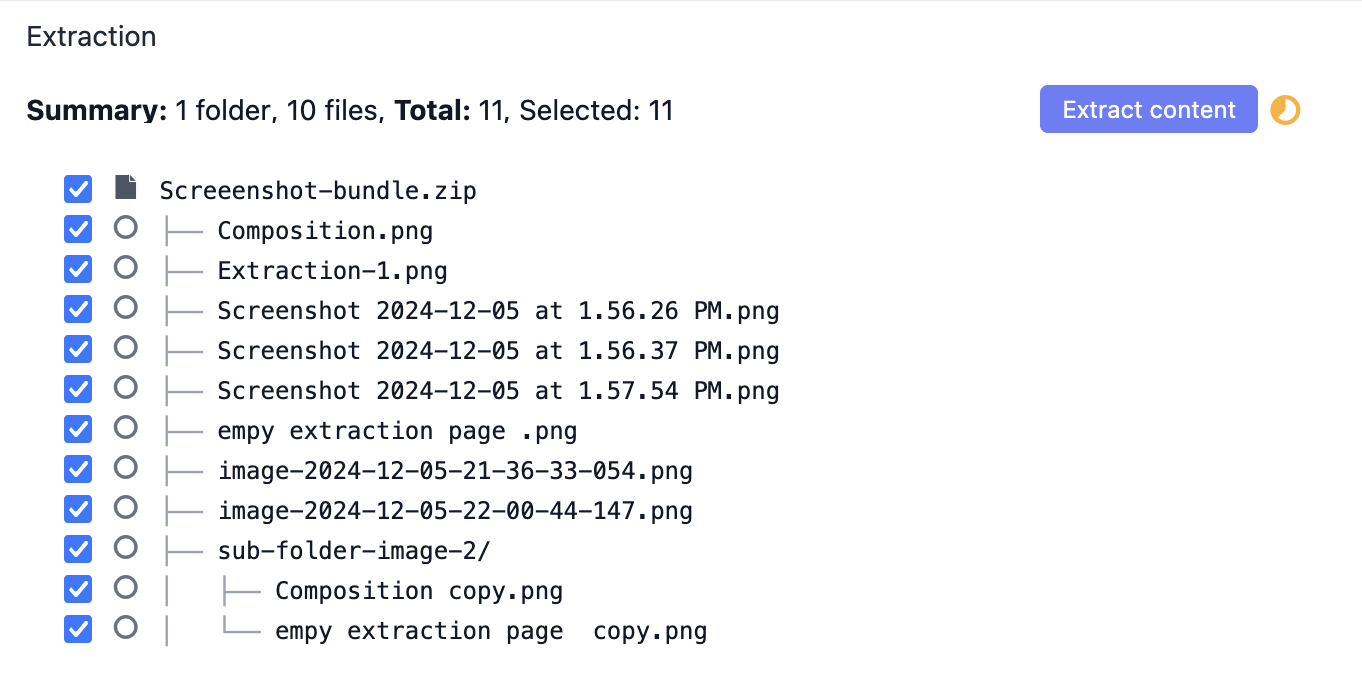
3. View all extracted file asset at the main bundle asset
Now, open the main bundle file asset again. The asset structure of the contained ZIP file is now also shown here.
Now, the full asset structure looks like this: