VFS Configuration
The Virtual File System configuration.
Where to find the VFS configuration
- You can find or add any VFS-related configuration in the
hosts.xmlfile, most of them in the node<censhare-vfs/>. Example:
<host name="hostname" authentication-method="" compressionlevel="0" url="//some/where/corpus.RMIServer">
	<censhare-vfs use="1" />
</host>- Some parameters are also available in the censhare Client. However, not all parameters in those dialogues are related to VFS.
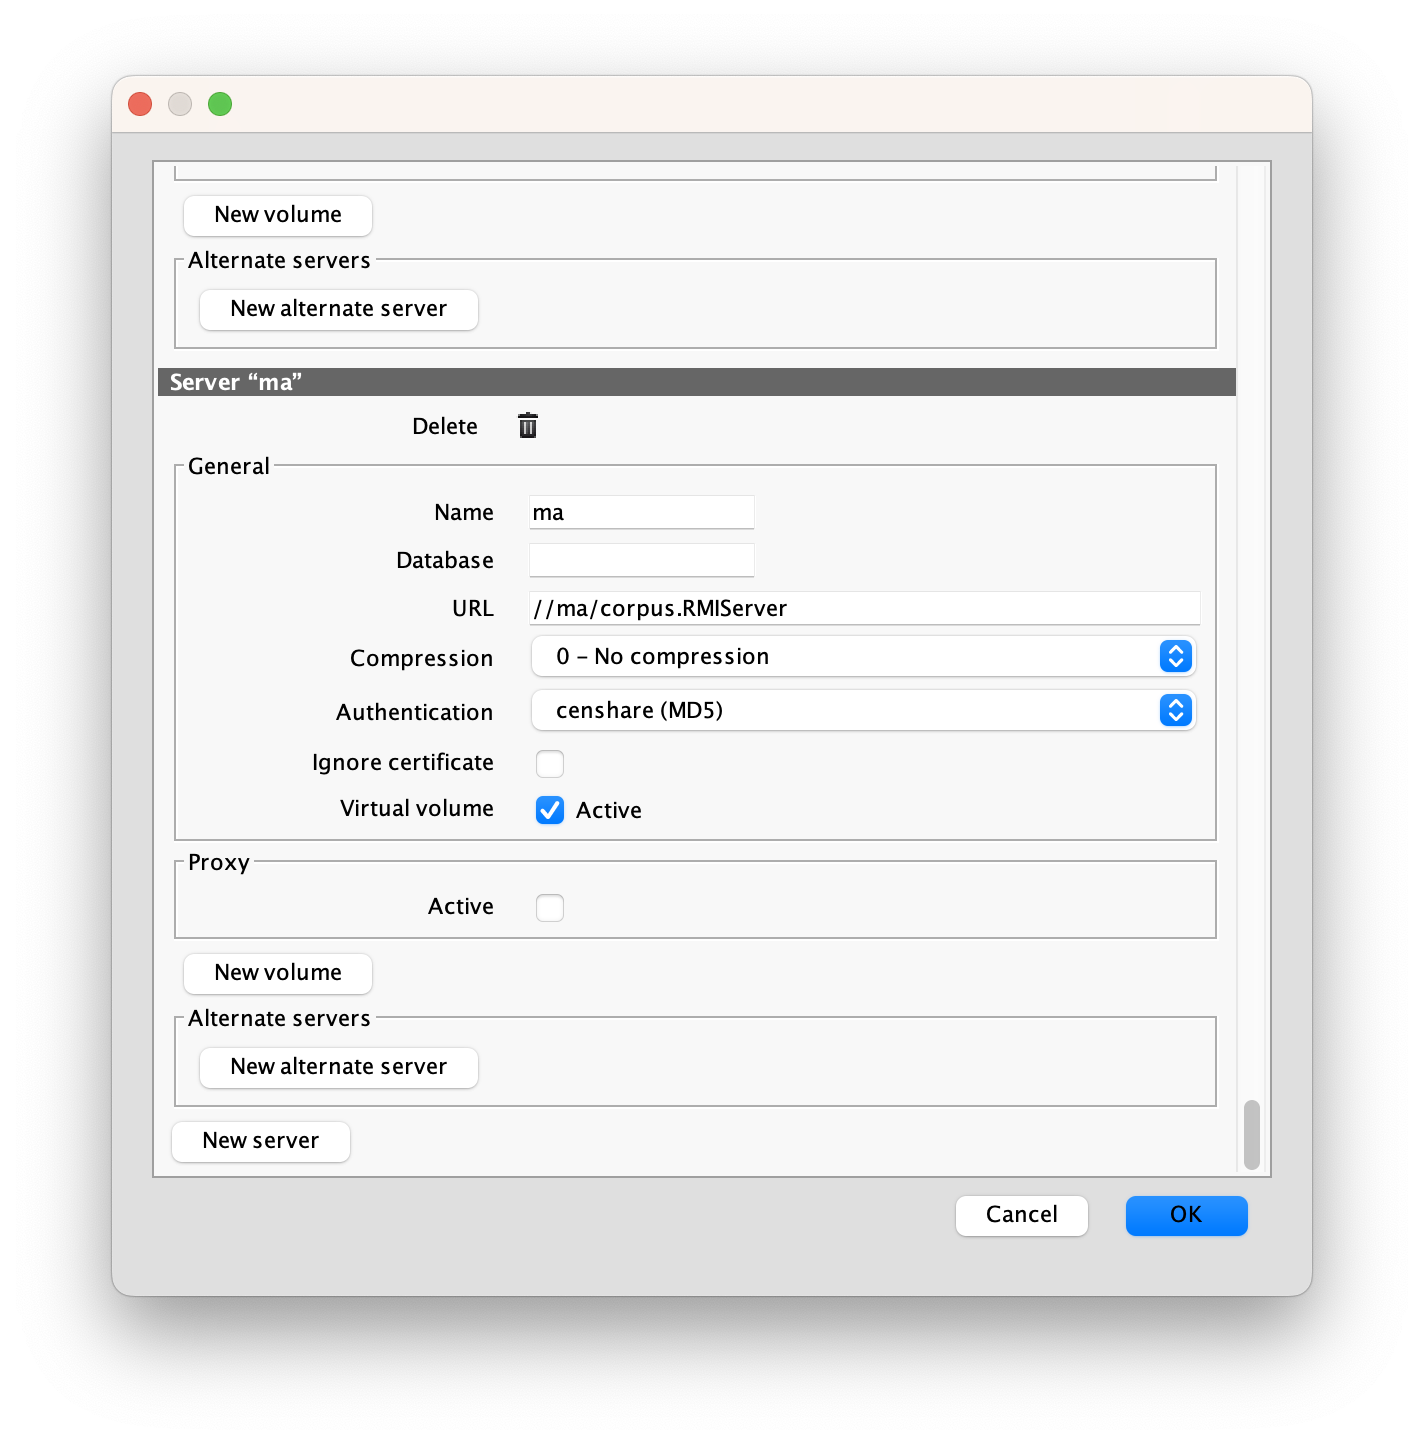
File → Preferences → Servers

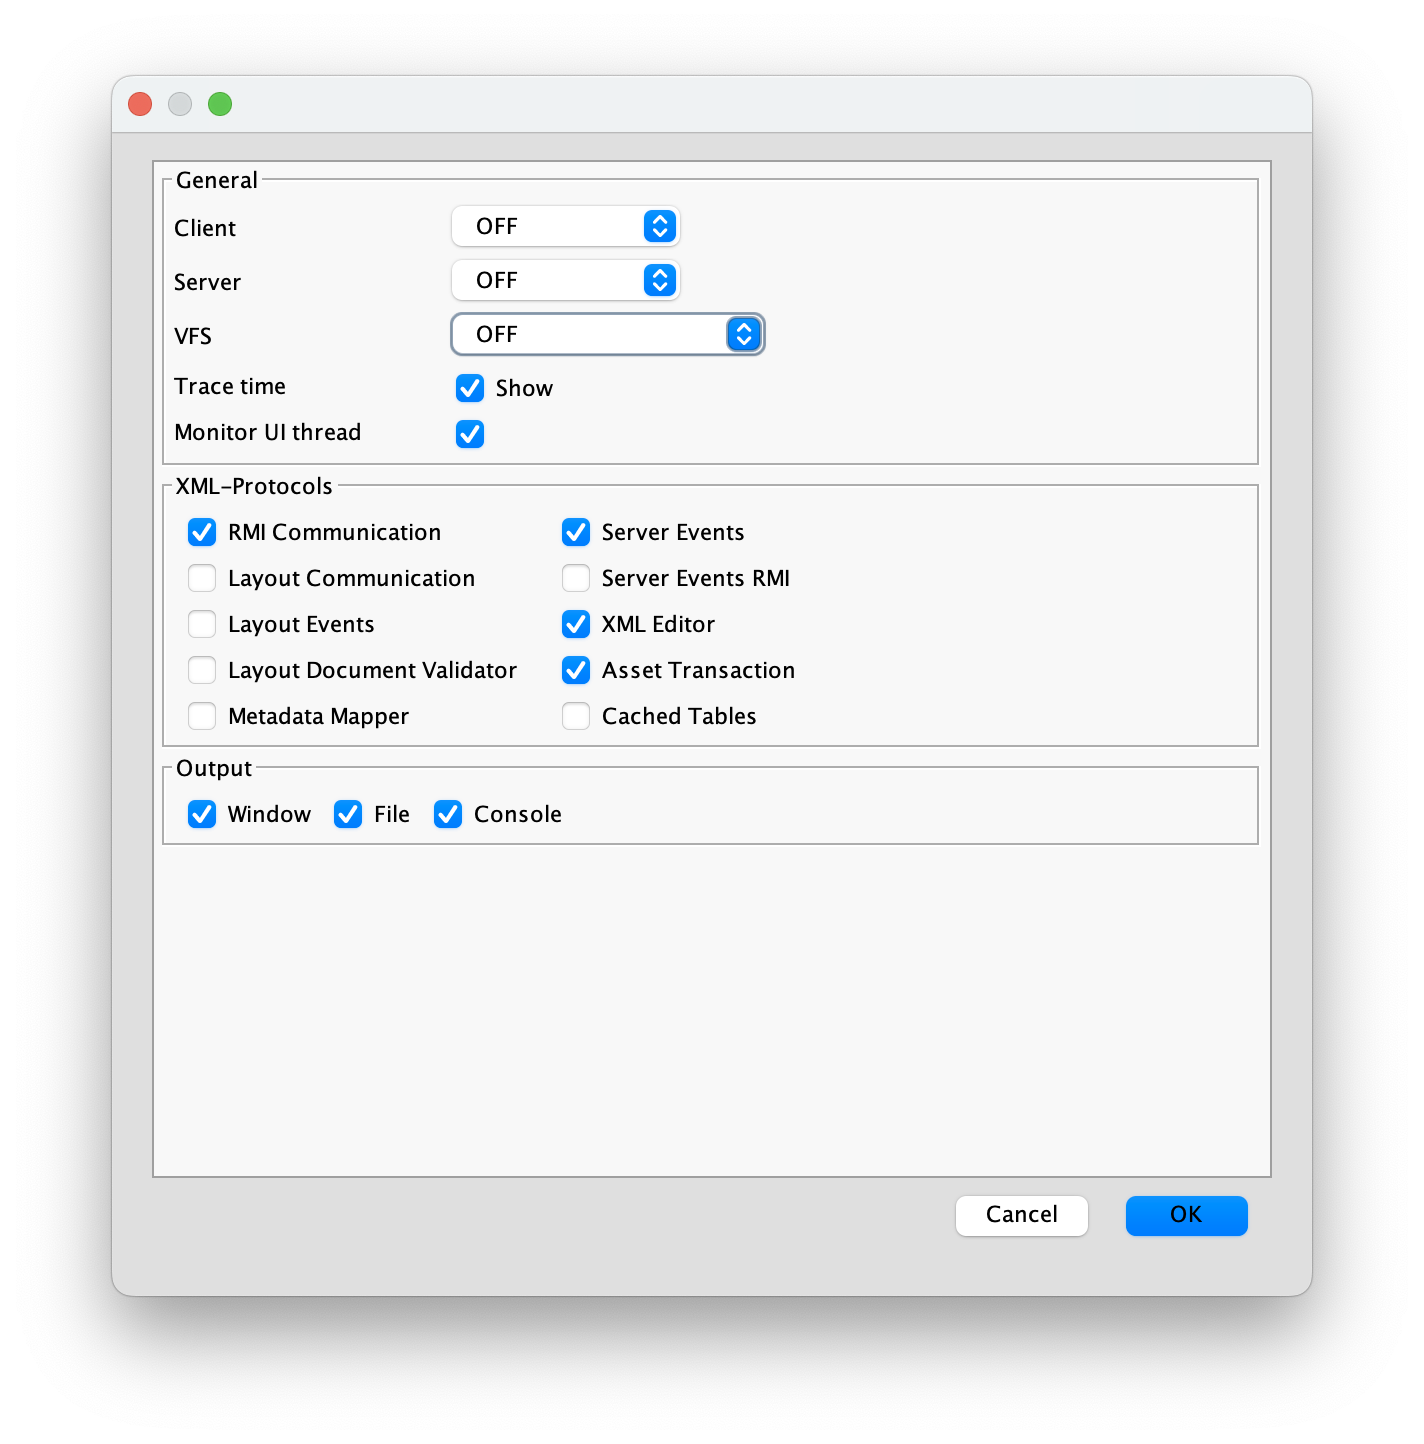
File → Preferences → Logs

The dialogue is only accessible in the admin mode. See Switch to Admin mode - censhare Client for instructions.
hosts.xml and configuration in Client are opened in the same time
When hosts.xml and one of the above dialogues in the Client are opened at the same time, changes made in the Client will override changes made in hosts.xml. Changes made in the hosts.xml file will be lost.
Configuration parameters
use | Enabling and disabling the VFS
The virtual file system is activated by default. You may also disable it:
- by setting the
useparameter to"0"in thehosts.xml - by unchecking the
Activebox in theFile → Preferences → Servers → General → Virtual volume
databasename and name | Default VFS name
Any current censhare JavaClient uses a VFS mount point to access the assets (virtually) directly. The name of that mount point is either taken from the name tag or, if present, from the databasename tag.
databasename is not related to the Censhare Server database.
The server name is the same that is shown in the drop-down list if a user wants to log into a system using the desktop Client. We strongly recommend to use the databasename to ensure that problems with the third-party software do not affect the operation of censhare.
The databasename tag is also used for creating the VFS path to single files. Such paths look like this:
/Volumes/censhare_Tracker/service/assets/asset/id/67485/storage/master/fileThis path accesses the Master File of the asset with the ID 67485, in the database or on the server censhare_Tracker.
Proper naming
The databasename tag should be short and unique and without any special characters or white spaces. The name tag can contain special characters, but the client might automatically change the VFS name into one that is compatible with the disk drive.
How to change
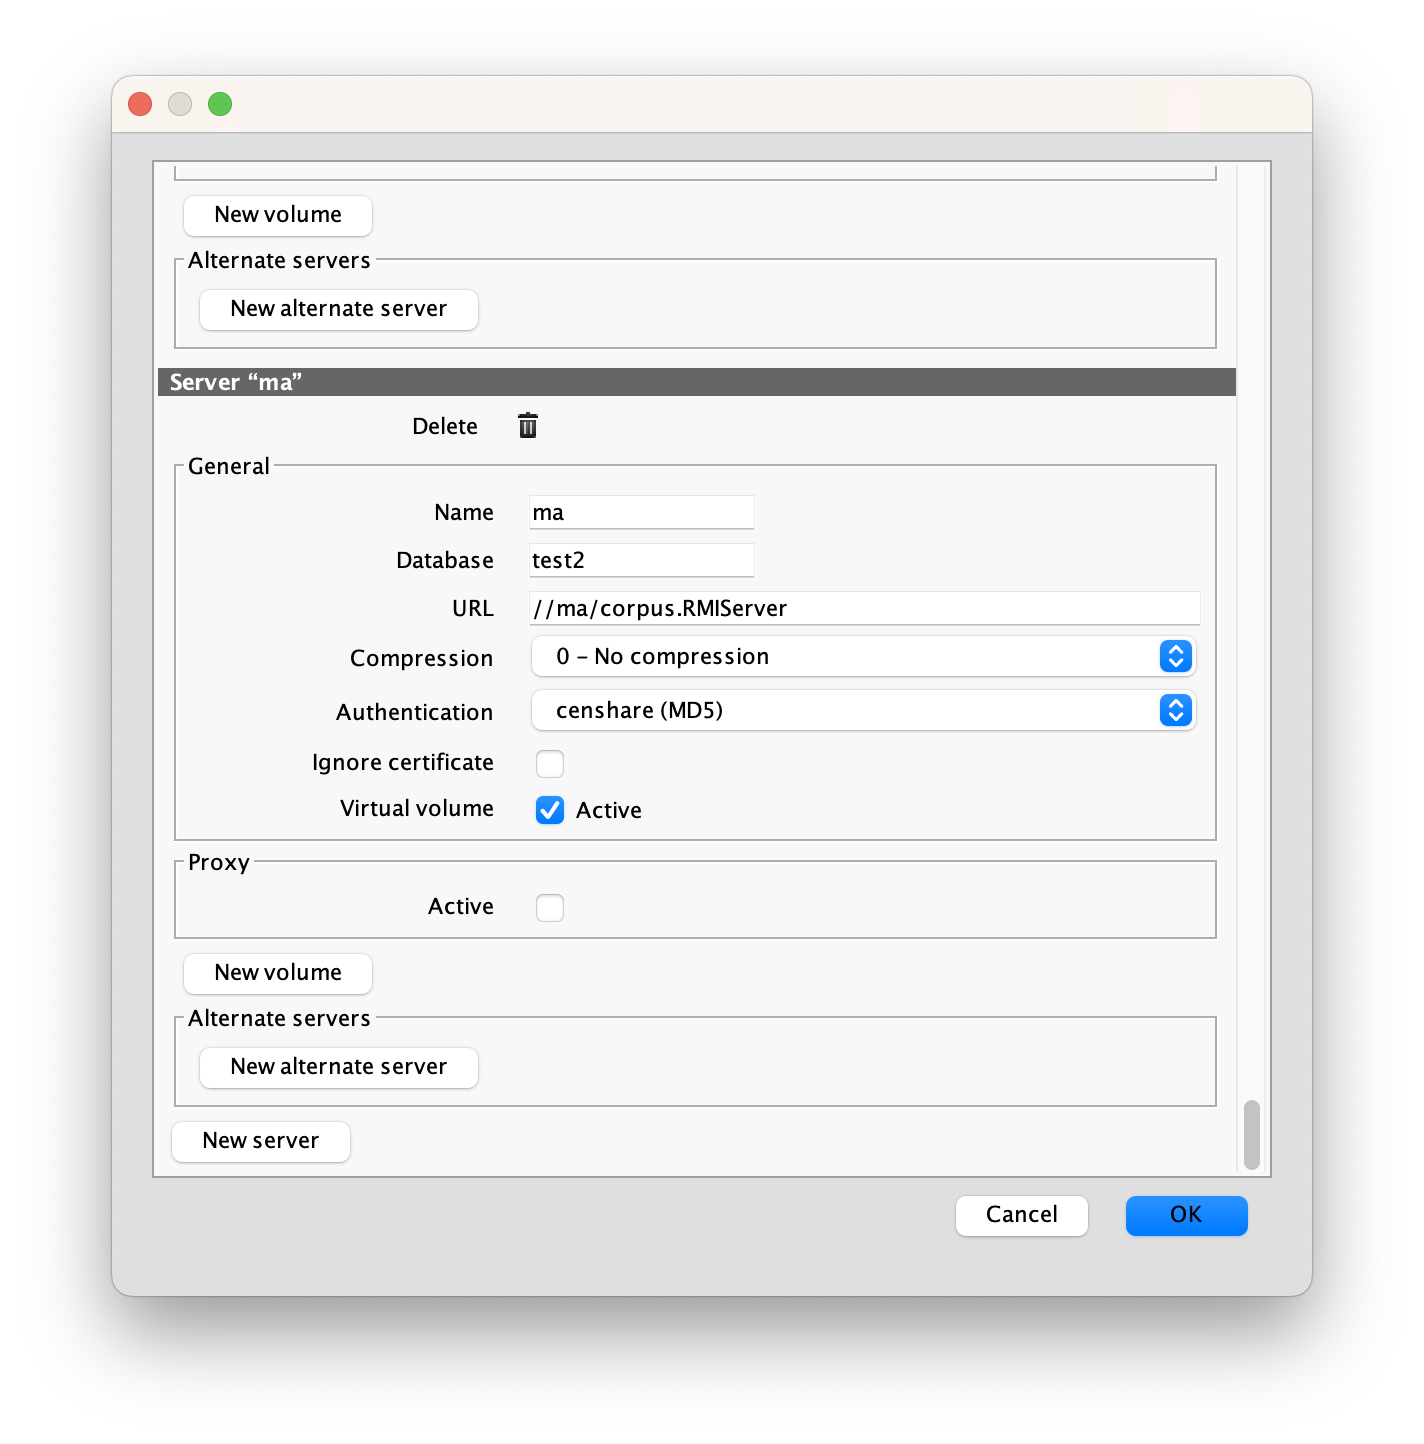
Both tags can be changed using one of the methods below:
- Directly in the
hosts.xmlfile. For a server entry in the associated tag<host>, enter the attributedatabasenamefor the database name and/or the attributenamefor the server name. For example:
<host name="name" url="//name/corpus.RMIServer" compressionlevel="0" authentication-method="" databasename="test2">
  <proxy use="0"/>
  <censhare-vfs use="1"/>
</host>- In the Admin Client, under File → Preferences → Servers

debug-level | Activate and configure logging
VFS 3.0 (macOS) only
For VFS logging on Windows, please consult the official documentation of the CBFS provider (CBFS Connect™ from callback Technologies).
The VFS logging includes logs generated by the censhare native VFS library and logs generated by the censhare Client. Each type of logs needs to be activated separately.
However, the structure of logs is identical on both sides. It may be enough to have only the Client-side logs activated.
VFS native logging
- Set the logging/debug level. This needs to be done only once in the
hosts.xmlfile.debug-level="3"ordebug-level="4"inthe<censhare-vfs/>node.debug-level="3"must be enough for collecting VFS logs. With the"4", you will get all possible log messages.XML<host compressionlevel="3" url="frmis://test-css01/corpus.RMIServerSSL" name="test-css01 - 2023.1.0" disable-trust-manager="true" databasename="test" authentication-method="" > <proxy use="0"/> <censhare-vfs debug-level="3" use="1"/> </host>
- Before each start of the censhare Client:
- Start the
Consoleapplication (a native macOS application for log collection). - Click
Start streamingto start collecting logs. - In the search field on the top right, enter
censhare Clientto filter logs. - Limit the
censhare Clientfilter toProcessinstead ofAny.- Optionally, add
CenshareFSas a search term to limit the displayed logs to VFS-related. - Optionally, click
Saveunderneath to save your search for the next time.
- Optionally, add
- Start the censhare Client.
- Once you finished working in the Client and closed it:
- Select all entries in the Console using
SHIFT+A. - Copy-paste them into any location convenient for you.
- Select all entries in the Console using
- Start the
VFS API/censhare Client-side logging
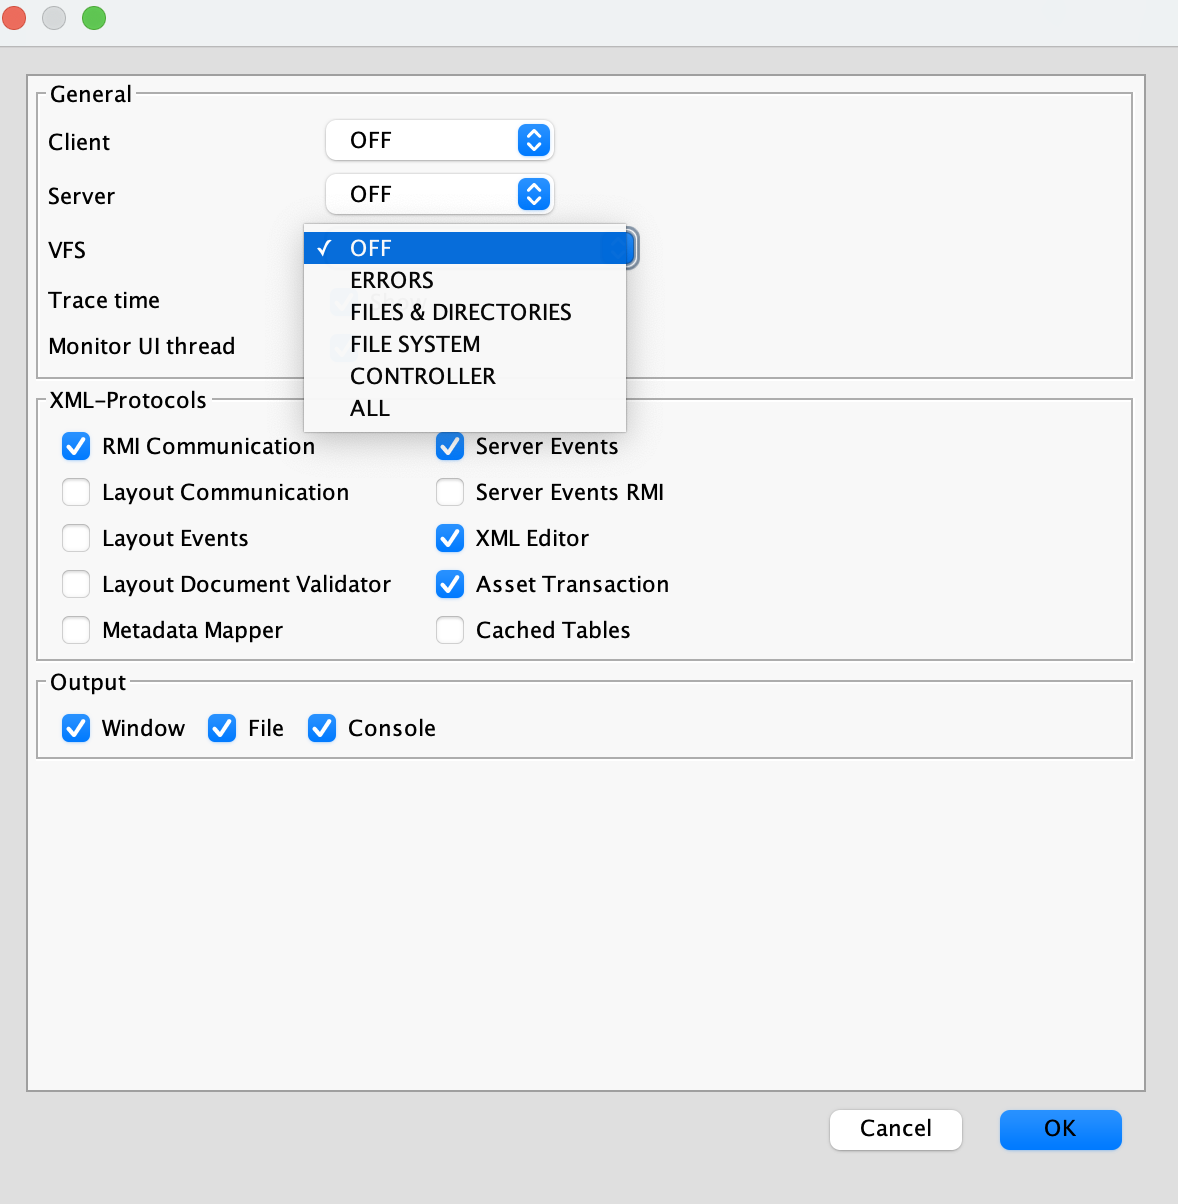
In the censhare Client, under File → Preferences → Logs select:
FILES & DIRECTORIESto get only VFS-related logs- or
ALLto get all logs - specify which XML protocols should be included and in which format they should be outputted

If you select File as an output option, the logs will be written to ~/Library/Preferences/censhare/v4/javaclient-0.x.log
javaclient-0.0.log contains the most recent logs. Other files contain older log entries. The files get rotated.
For information on exact meaning of each log level, see this page.
See also VFS Logging for more information on which logs are generated and why and how to read them.
Facilitate your VFS performance
The following two parameters can be used to facilitate your VFS performance. They can be added in thehosts.xml file.
filecache3 block-prefetch-size | Size of data chunks transferred between the server and the client
A block-prefetch-size parameter influences the size of data chunks transferred between the server and the client. But is not equal to the size of the chunk.
The VFS file cache now uses an internal chunk size of 256KB. By increasing the block-prefetch-size parameter, larger data chunks are exchanged, hence, reducing the amount of RMI network calls. Therefore, depending on the network connection, a larger value can significantly increase the performance. Good values are between 8 and 64 (2MB - 16MB). Higher values are not recommended, because they typically don't bring any further performance benefit and may block file system read calls too long.
filecache3 max-disk-cache-size-mb | Disk space
Additionally to the prefetch size, we also recommend to assign a large value to the disk space that is available for the client's file cache. The default value is now increased from 1GB to 10GB.
Recommended combination of the prefetch size and file cache disk space
<filecache3 max-disk-cache-size-mb="20000" block-prefetch-size="32"/>
This means 20GB of cache size and 32 * 256KB = 16MB chunk size.
hidden | Hide the mount point
By default, the mount point will be shown in the Finder and optionally on your desktop. However, no contents (=assets) will be visible. If you have a lot of other drives, you may want to hide the VFS mount point. This can be done by setting the respective attribute hidden to "0".
<host url="//yourServer/corpus.RMIServer"
      name="serverName">
 <censhare-vfs use="1" hidden="1" />
</host>