Introduction
By default, Censhare Client and Censhare Admin Client connect to the Censhare Server directly. If these Censhare clients should use an HTTP proxy, an RMI proxy, or both, this must be configured explicitly.
This setting can be configured on each local machine for different Censhare Servers individually. You can define for each local machine to use an RMI proxy, an HTTP proxy, or both.
If an HTTP Proxy is set, all HTTP communication of the Censhare client is routed through the proxy, for example Keycloak authentication.
If Keycloak is placed externally in a public network, an HTTP proxy allows the Censhare Client in an internal network to access Keycloak.
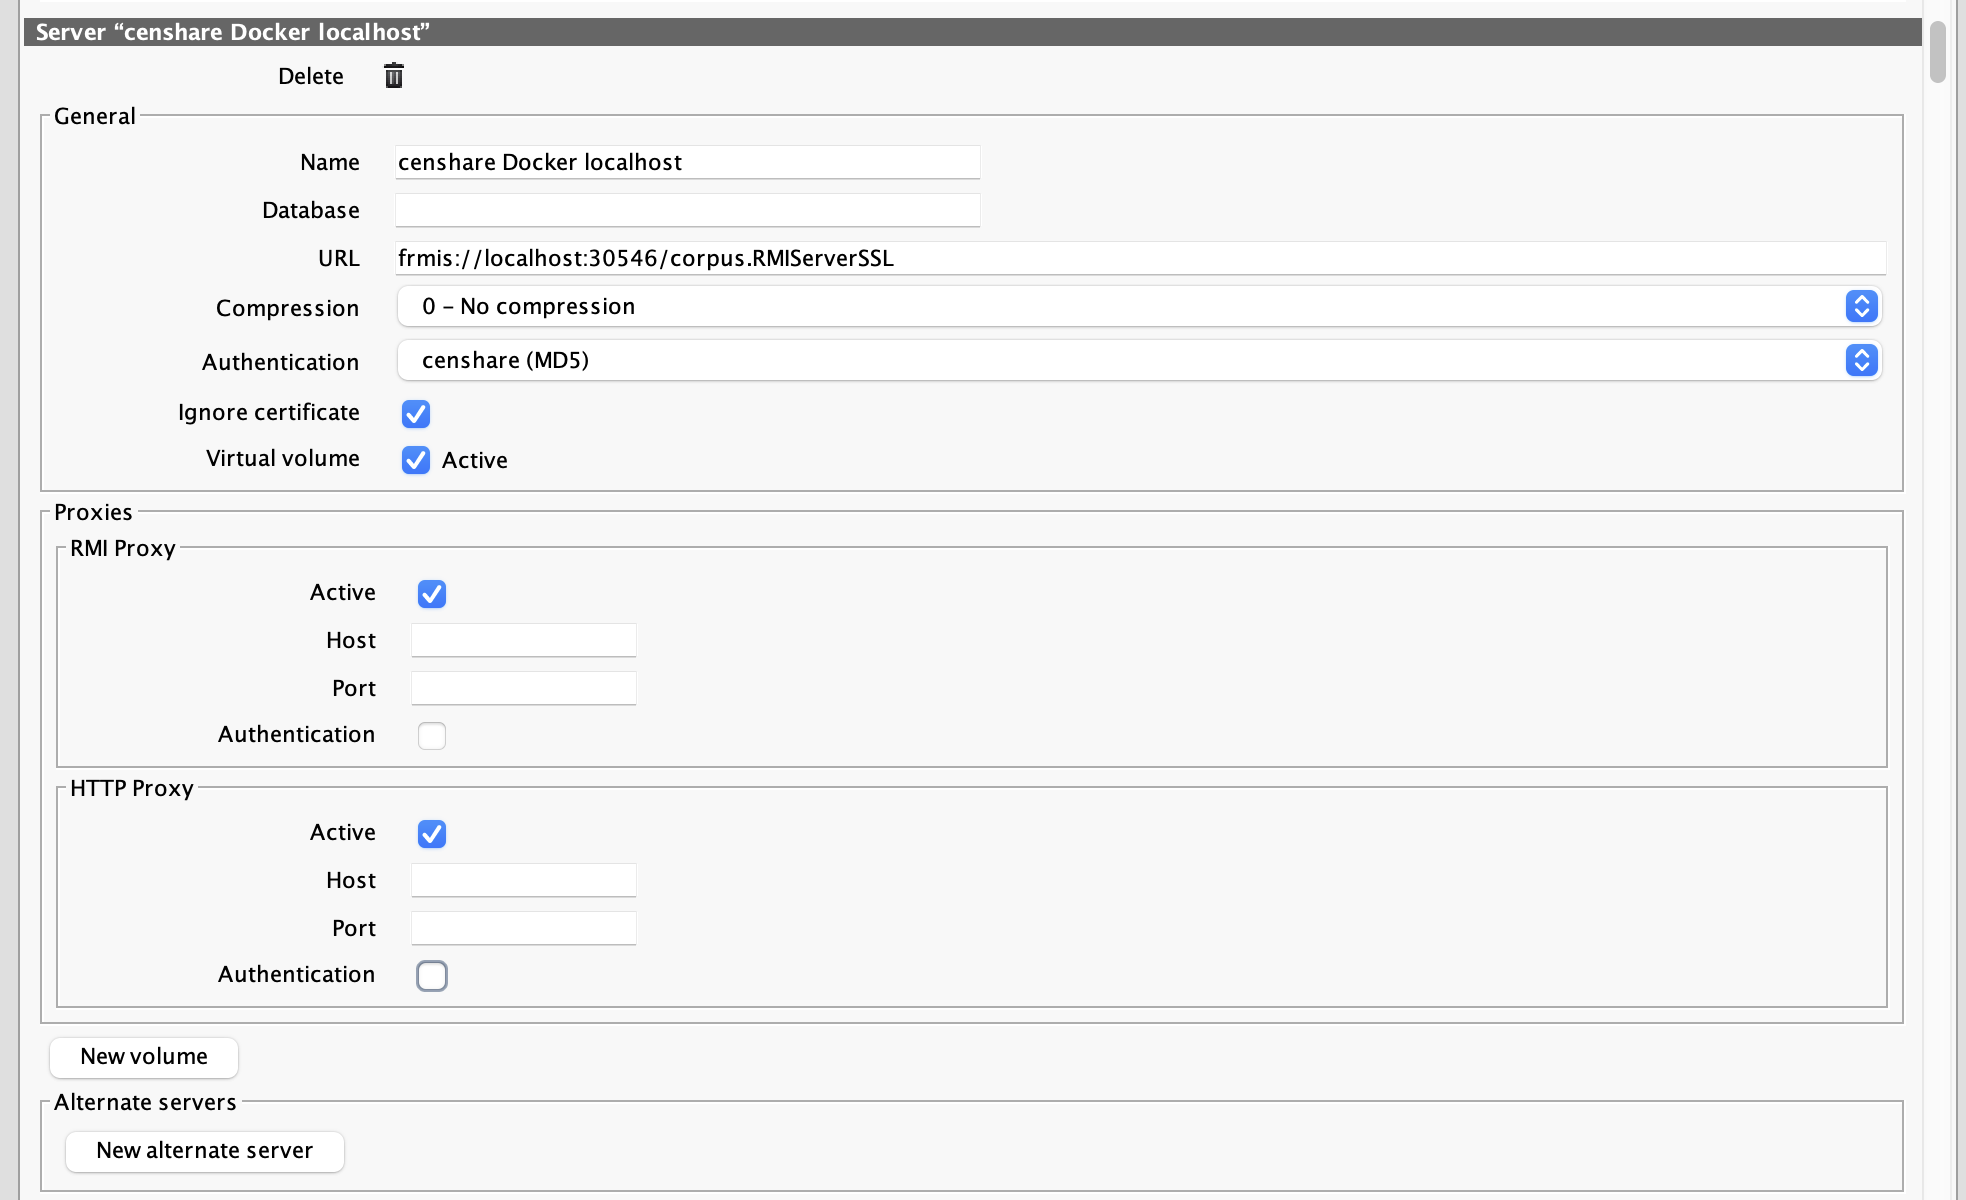
Configuration option for an RMI and an HTTP proxy:
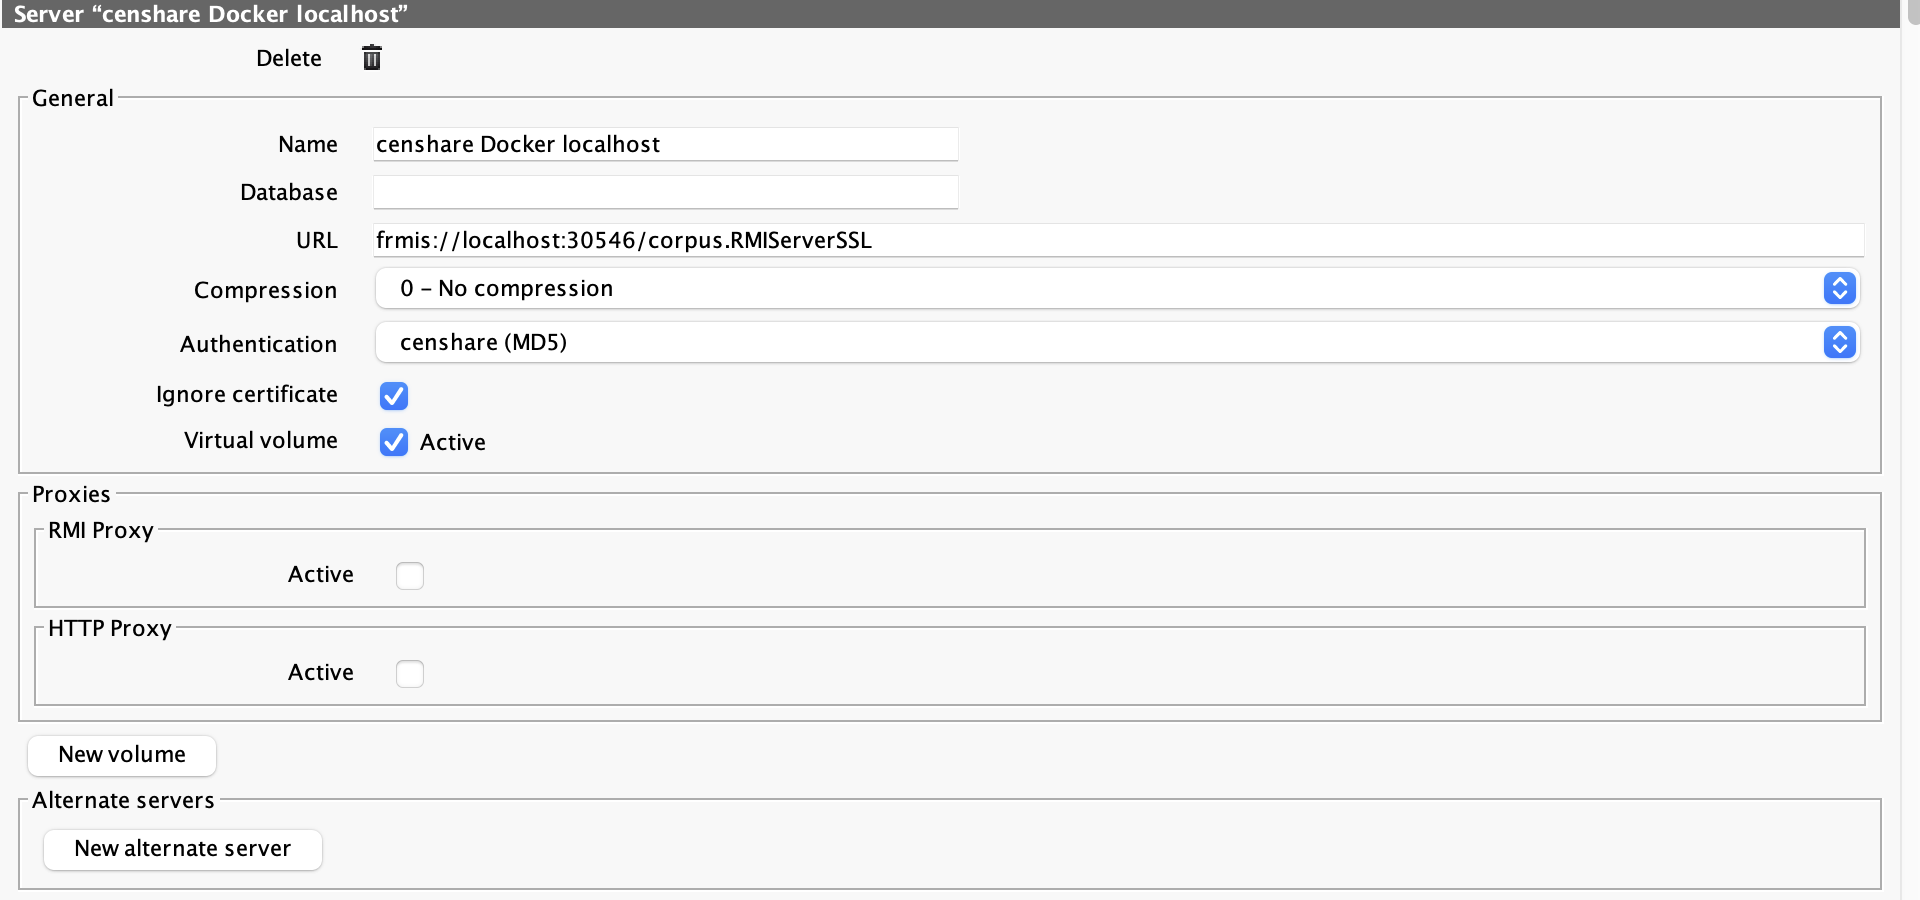
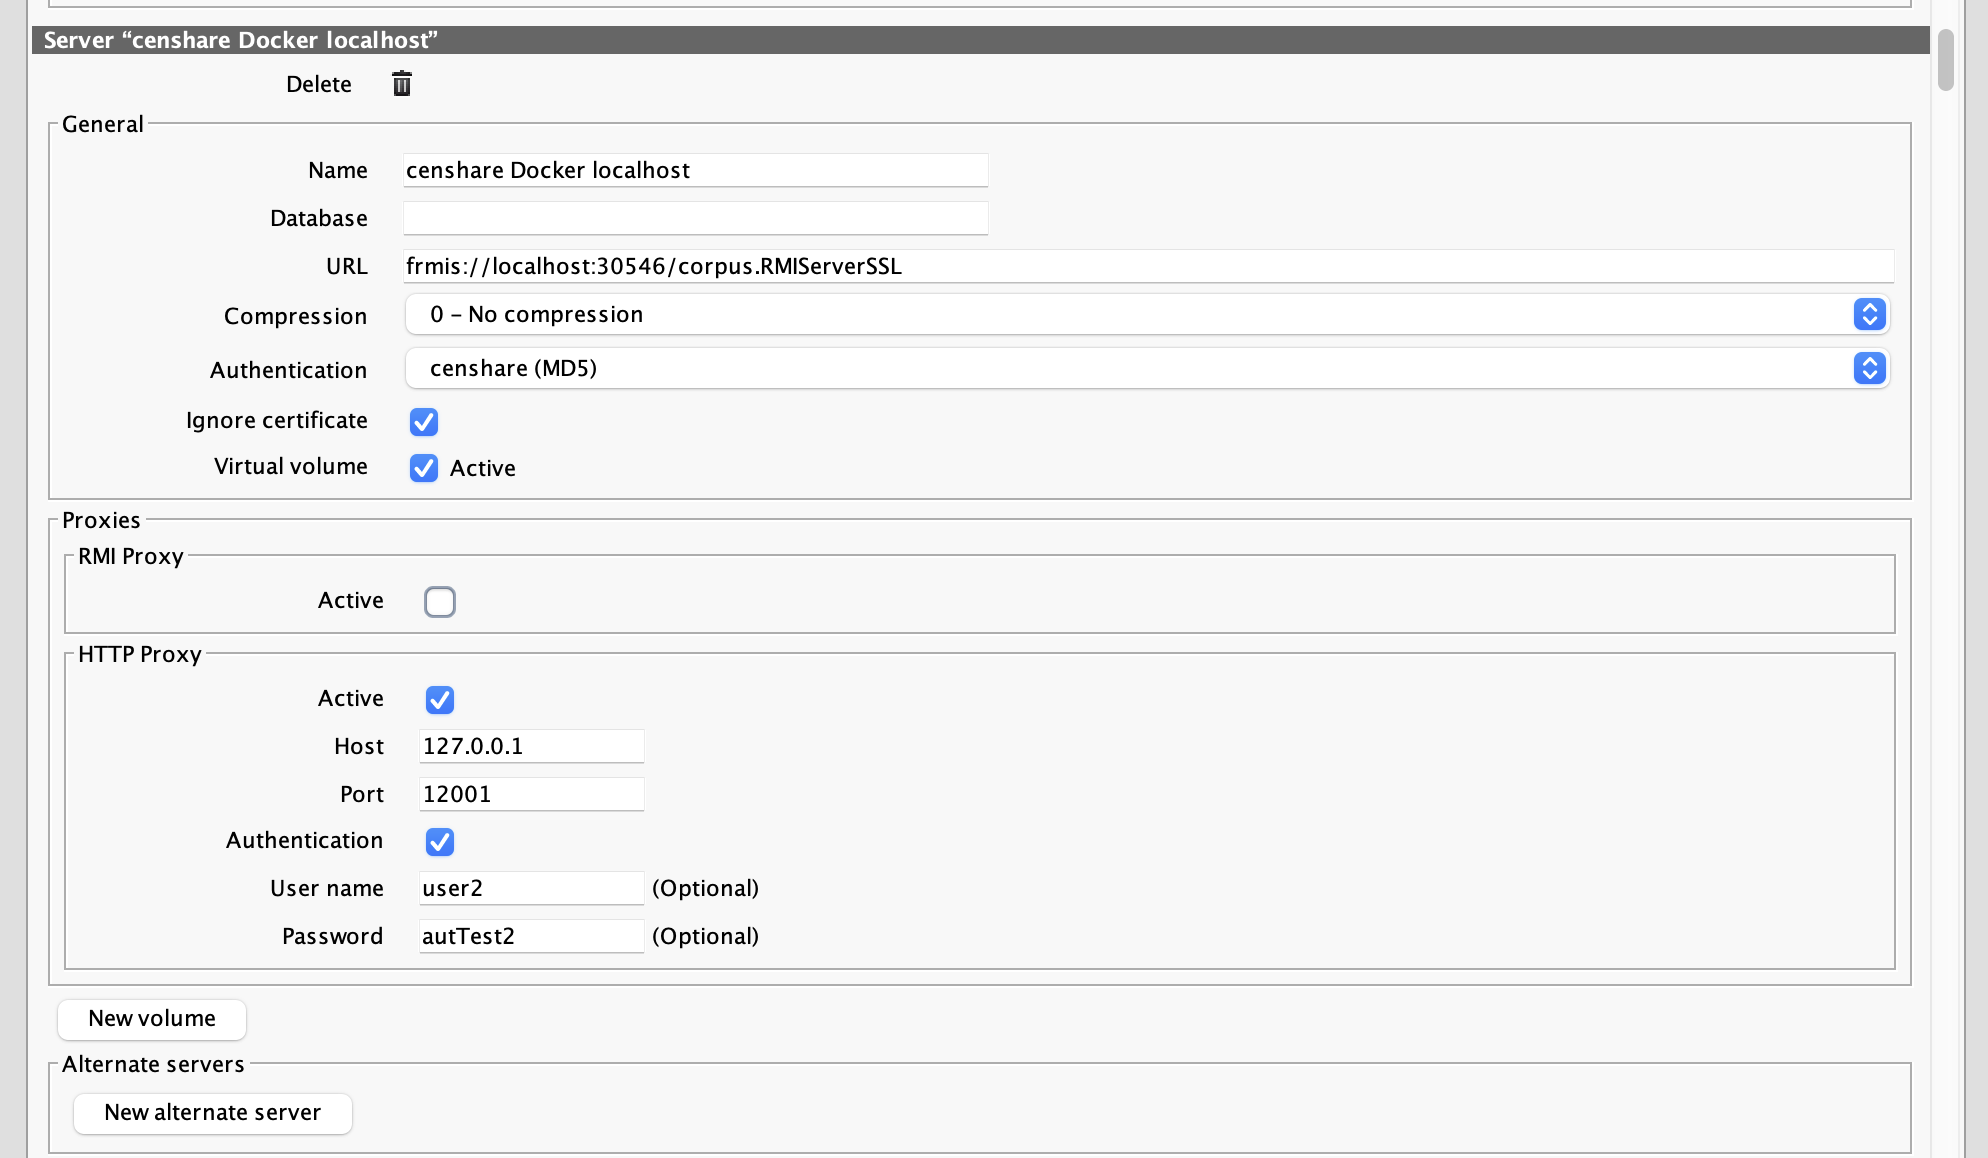
HTTP configuration
Set this proxy definition if the Censhare Client needs to access systems using an HTTP proxy.
Setup of the HTTP proxy:
-
Open a Censhare client, Censhare Client or Censhare Admin Client.
-
In the client menu, open File - Preferences - Servers... .
-
Go to the entry with for Censhare Server configuration in question.
-
In this configuration, go to the HTTP proxy entry in Proxies section.
-
Check the Active box.
-
The parameters for the proxy definition are shown.
-
Enter Host (IP address or DNS name) and Port number of the proxy.
-
If your proxy requires an authentication, check the Authentication box.
-
Now, you can enter User name and Password.
-
Click OK to save your changes.
If you are updating your Hosts.xml file directly, you can use the proxy XML tag of the respective Censhare Server host entry to add your definition directly. All parameters are attributes of proxy, for example:
<host url="frmis://your-host/corpus.RMIServerSSL" name="your-host via proxy" authentication-method="" disable-trust-manager="true">
    <censhare-vfs use="1" hidden="1"/>
    <proxy
        use-http="1"
        authentication-required-http="1"
        host-http="10.26.8.253"
        port-http="3128"
        username-http="myuser"
        password-http="mypass"/>
</host>
Note that RMI and HTTP proxy settings use the same proxy XML tag but different attributes.
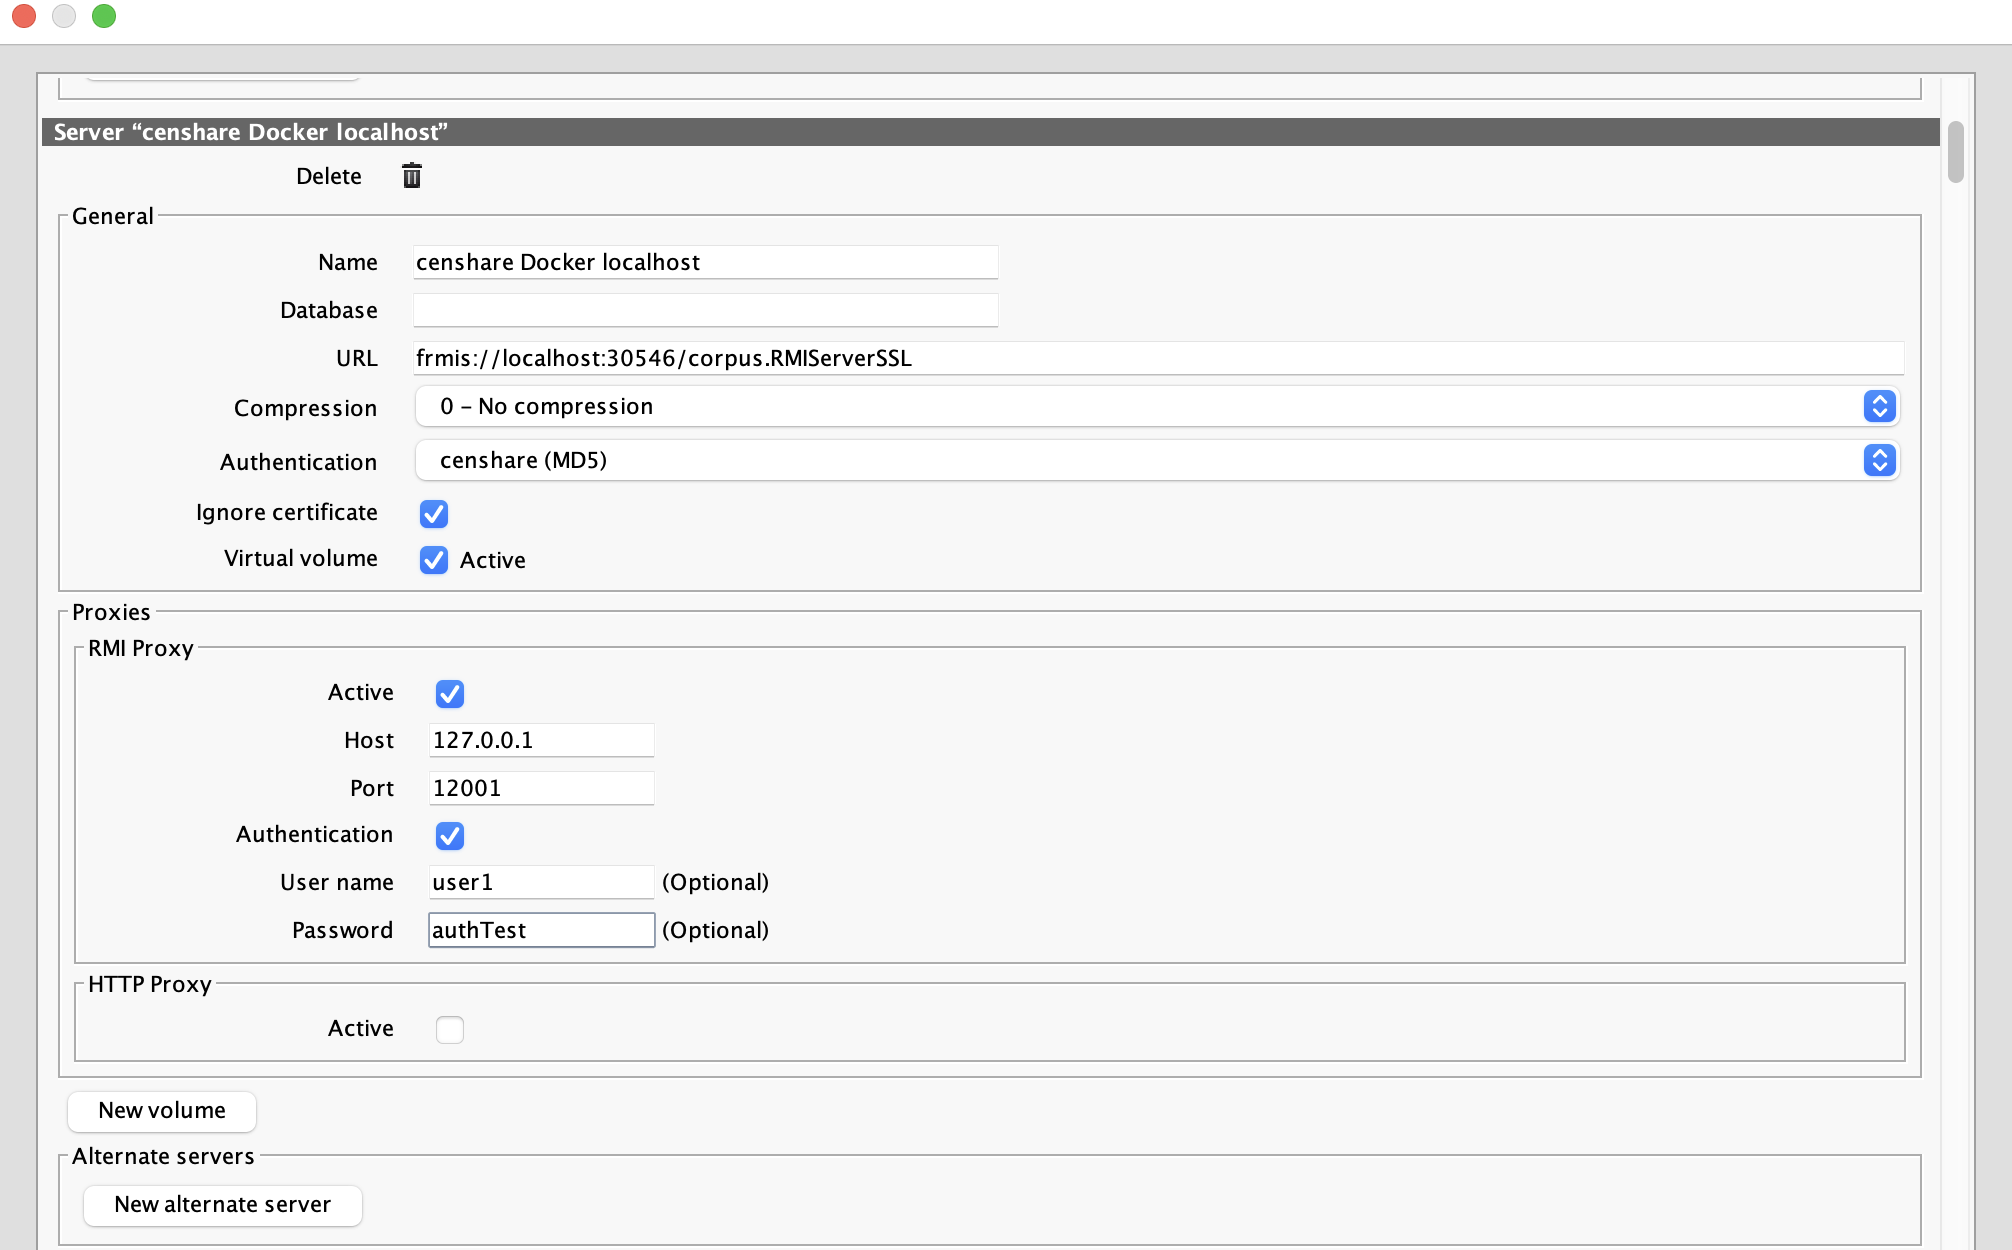
RMI proxy configuration
Set this proxy definition if the Censhare Client needs to access an Censhare Server via a proxy, for example.
Setup of the RMI proxy:
-
Open a Censhare client, Censhare Client or Censhare Admin Client.
-
In the client menu, open File - Preferences - Servers... .
-
Go to the entry with for Censhare Server configuration in question.
-
In this configuration, go to the RMI proxy entry in the Proxies section.
-
Check the Active box.
-
The parameters for the proxy definition are shown.
-
Enter Host (IP address or DNS name) and Port number of the proxy.
-
If your proxy requires an authentication, check the Authentication box.
-
Now, you can enter User name and Password.
-
Click OK to save your changes.
If you are updating your Hosts.xml file directly, you can use the proxy XML tag of the respective Censhare Server host entry to add your definition directly. All parameters are attributes of proxy, for example:
<host url="frmis://your-host/corpus.RMIServerSSL" name="your-host via proxy" authentication-method="" disable-trust-manager="true">
    <censhare-vfs use="1" hidden="1"/>
    <proxy
        use="1"
        authentication-required="1"
        host="10.26.8.252"
        port="3129"
        username="myuser"
        password="mypass"/>
</host>
Special use case: Two separated proxies required
If the Censhare Server resides at an internal network and Keycloak at a public network, you cannot use the same proxy definition for the Censhare Server and Keycloak. Use an RMI proxy setting for the Censhare Server and an HTTP proxy setting for the Keycloak access.
The network setup:
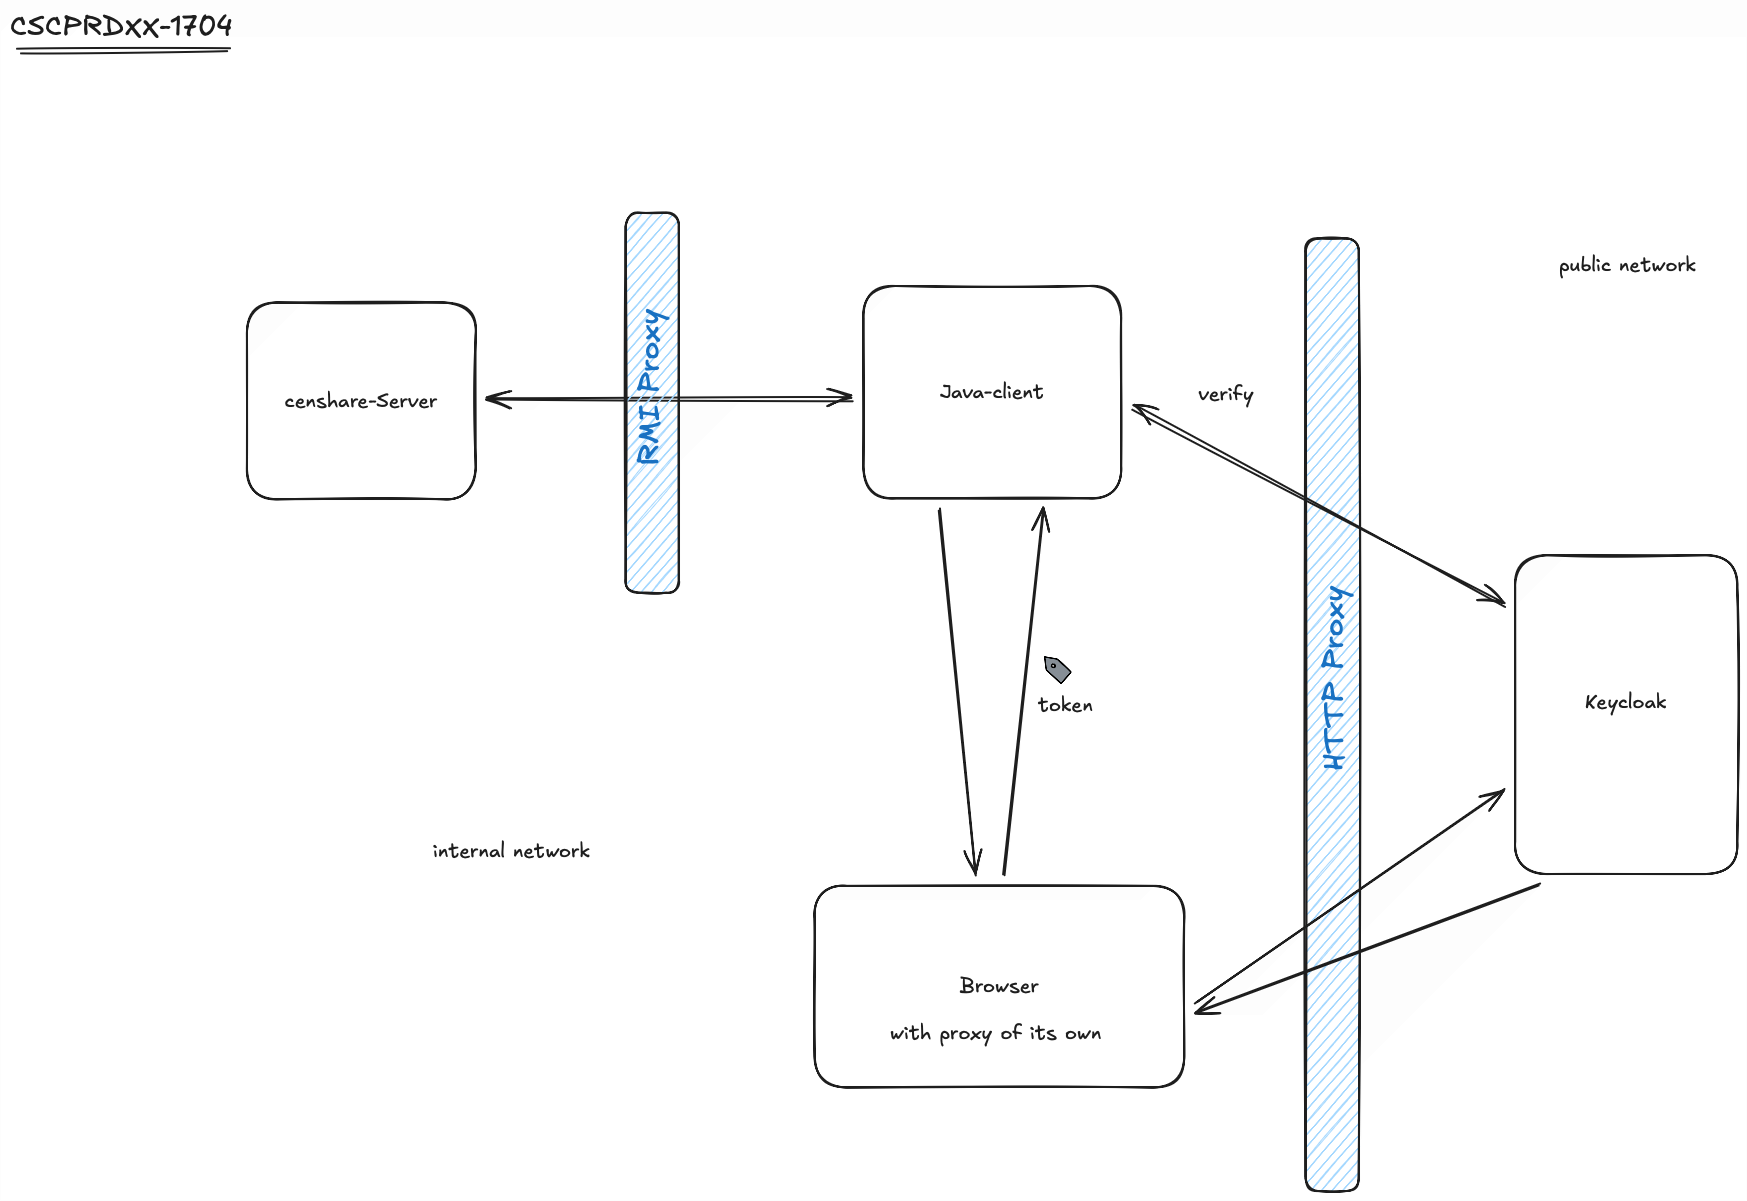
The authentication process shown above:
For the authentication of the user, the Censhare Client uses the proxy settings that are defined in the used web browser. The user sees an login page provided by Keycloak and enters his credentials. Once the login has been successful, Keycloak returns an access token to the Censhare Client. The Censhare Client then sends the token to Keycloak directly to verify it. As of that, there must be an HTTP proxy set for the Censhare Client that it can use.
Check both proxy definitions and then enter the configuration details:
If you are updating your hosts.xml file directly, you can use the proxy XML tag of the respective Censhare Server host entry to add your definitions, for example:
    <host url="frmis://your-host/corpus.RMIServerSSL" name="your-host via proxy" authentication-method="" disable-trust-manager="true">
      <censhare-vfs use="1" hidden="1"/>
      <proxy
            use="1"
            authentication-required="1"
            host="10.26.8.252"
            port="3129"
            username="myuser"
            password="mypass"

            use-http="1"
            authentication-required-http="1"
            host-http="10.26.8.253"
            port-http="3128"
            username-http="myuser"
            password-http="mypass"/>
    </host>