Introduction
If you are using the Flatplan app, you might have to print the flatplan several times to the same printer with a certain format while working on the flatplan. Or, you require a PDF from your flatplan and it is always the same format that you to use. For this, you can define and select a default Page Setup profile in the Censhare Client that is then always used when you are printing or creating a PDF.
You can define several Page Setup profiles in the Censhare Client and then select one of profiles as default which is then automatically selected.
As the Censhare Client does not modify the Print dialog of your system, you do not see here which Page Setup profile is selected.
If you use a default Page Setup profile, the Print Preview for the issue planning app is deactivated. The reason is that the Print Preview does not use Page Setup profiles of the Censhare Client.
Manage Page Setup profiles
You can have several Page Setup profiles. You manage them in the Preferences of the Censhare Client:
-
In the Censhare Client, click the File menu.
-
Open the Preferences entry.
-
Select Page Setup profile.
-
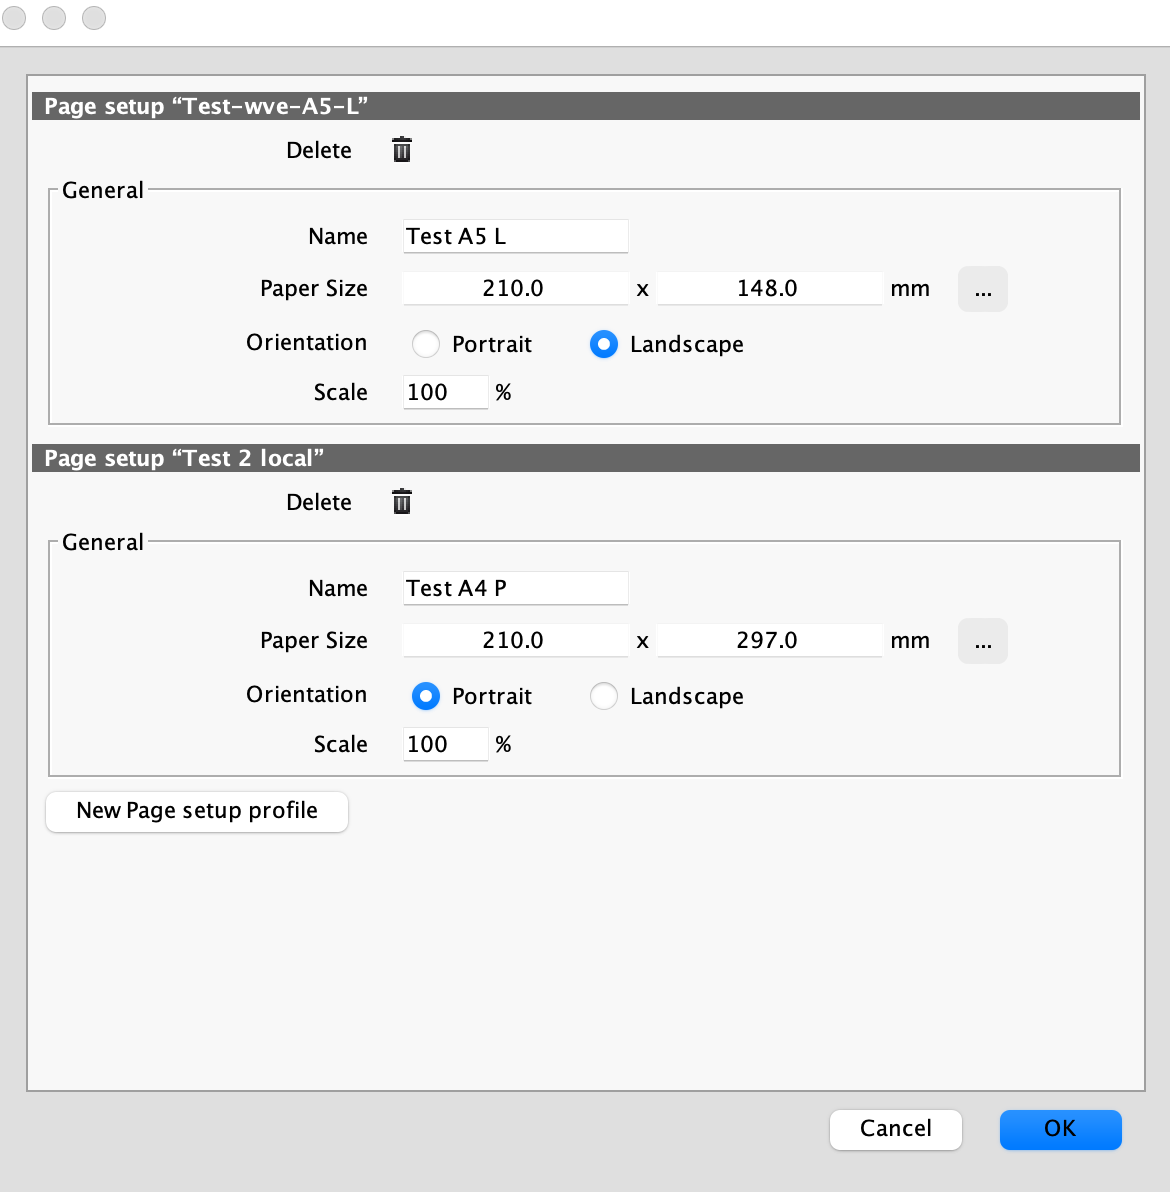
The configuration dialog opens:

Create a new Page Setup profile
-
Go to the last entry of the Page Setup profiles.
-
Click New Page setup profile.
-
A new Page setup entry is created.
-
Enter a Name in the respective field. This name must be unique for all profile names.
-
Click the three dots right to the Page Size label.
-
The system printer dialog opens.
-
Select the desired printer, page format and Scale value.
-
They are automatically added to the new profile.
-
Click OK.
To edit an existing Page Setup profile:
-
Open the system printer dialog via the three dots of that profile entry.
-
Do your changes and click OK.
-
The selected profile is automatically updated.
Delete a Page Setup profile
-
Go to the desired Page Setup profile.
-
Click the paper basket icon of that profile.
-
The profile is removed.
You cannot delete a profile if it is selected to use as default Page Setup profile.
Before you can delete the default Page Setup profile, do one of the following steps:
-
Select another Page Setup profile first in the General preferences.
-
Select Use system Page Setup in the Print section in the General preferences.
Select Page Setup profile for printing
-
Open the General dialog in Preferences in the File menu of the Censhare Client.
-
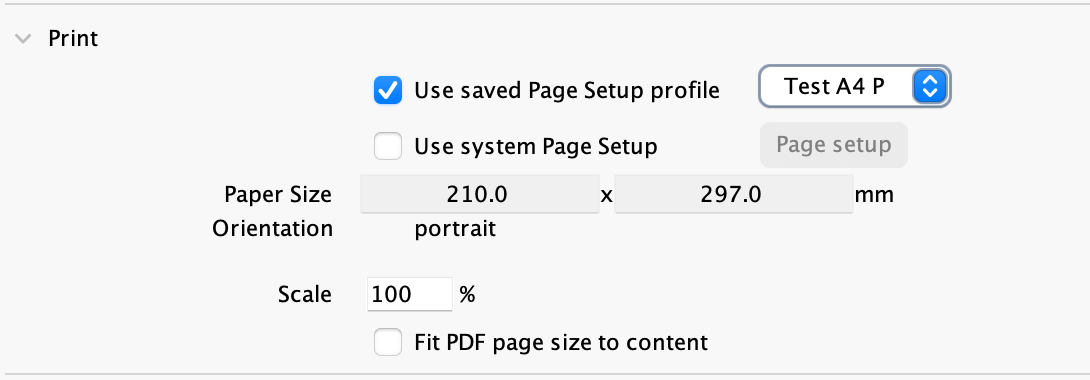
Go to the Print section.
-
Click Use saved Page Setup profile.
-
Select the desired profile in the selection list right from the checkbox:

-
Click OK.
-
This profile is now used each time that you print a flatplan or create a PDF from it.
If you do not want to use a default Page Setup profile, select Use system Page Setup instead.